
Damp-proofing painting tips for homeowners: how to get it right
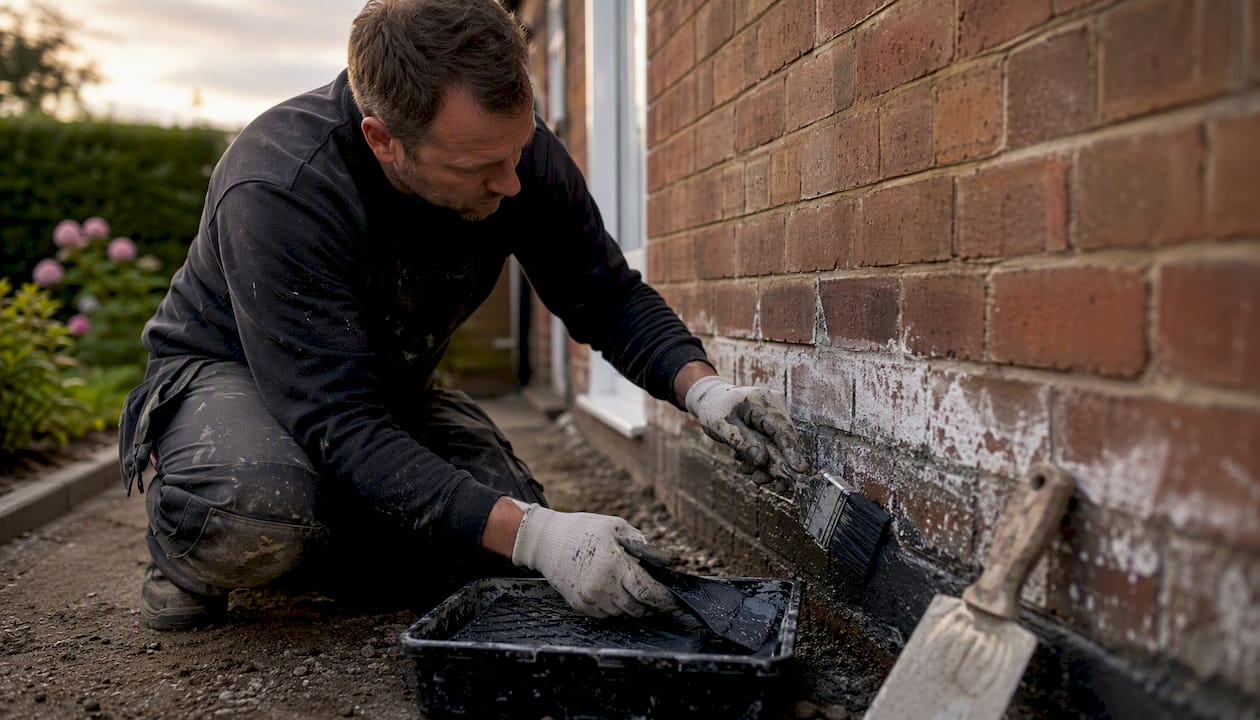
Damp-proof paint is a recovery tool, not a cure. It works after you have fixed whatever is letting water into the wall, not instead of fixing it. Paint over an active leak or a failing damp-proof course and the paint will often fail over time, potentially masking a deeper problem while it does so.
Before you open a tin, work through this:
Stop the source. Repair leaking gutters, cracked render, faulty flashing or a bridged damp-proof course first.
Check for salts and mould. White crusty deposits (efflorescence) or dark staining both need treating before paint goes anywhere near the wall.
Isolate loose or flaking finishes. Anything not firmly bonded to the substrate has to come off.
Ventilate the room. Damp walls dry faster and paint cures better with airflow and, ideally, a dehumidifier running.
Test if you’re unsure. A moisture meter reading, or a professional damp survey for anything beyond surface dampness, tells you whether you’re dealing with condensation or something structural.
Once those boxes are ticked, products like Polycell Damp Seal, Zinsser B-I-N, Zinsser Perma White, Dulux Trade Undercoat, Sandtex masonry paint and SPO Anti-Damp Paint all have a genuine job to do. Each behaves slightly differently, and which one suits your wall depends on what caused the damp in the first place. That’s what the rest of this guide sorts out.
Key Takeaways
Damp-proof paint succeeds only when the root cause is fixed first, the substrate is properly prepared for salts and mould, and the correct number of coats and drying times are followed.
Point | Details |
Fix the source first | Never paint over an active leak or failing damp-proof course; the coating will fail and mask the real problem. |
Prepare before you paint | Strip loose finishes, treat mould with a fungicidal wash, and neutralise visible salt deposits. |
Apply two thin coats | Thin layers cure properly on damp substrates; one thick coat traps moisture and causes bubbling. |
Respect drying and curing times | Touch-dry and fully cured are different; check manufacturer guidance before adding a topcoat. |
Call a specialist for severe cases | Persistent salts, structural movement or hydrostatic pressure need a proper damp survey, not more paint. |
Consider a professional survey | Abrushwithgus offers site surveys and remedial decorating across Cornwall and the South West once the cause is confirmed. |
Table of Contents
When should you actually use damp-proof paint?
Damp shows up in three distinct forms, and which one you’re looking at decides everything else.
Rising damp creeps up from ground level through capillary action, usually because a damp-proof course has failed, been bridged, or was never installed. You’ll see a tidemark, often no higher than a metre, with crumbling plaster and salt staining above it.
Penetrating damp comes from the side, not below. Cracked render, a blocked gutter overflowing down a wall, or missing pointing lets rain in horizontally. It tends to appear as a damp patch that gets worse after heavy rain and dries out somewhat in between.
Condensation is moisture from inside the house, from cooking, showering, drying washing indoors, condensing on cold surfaces. It’s the most common type by far in modern, well-insulated homes with poor ventilation, and it’s also the type damp-proof paint handles best, because there’s no ongoing water ingress to fight.
Run through this before you commit to a tin of paint:
Is the damp active right now? If a wall is visibly wet, cold to the touch, or the patch is growing week by week, painting it is pointless. Damp-proof paint bonds to a damp substrate reasonably well, but not to a wall with ongoing water ingress. It needs to be managing residual moisture during a drying-out period, not fighting a live leak.
Is there salt contamination? Rising damp in particular deposits hygroscopic salts in the plaster. These salts pull moisture from the air even after the original damp source is fixed, so a wall can look and feel damp indefinitely unless the salts are dealt with separately.
Is there structural water ingress or hydrostatic pressure? Basements and cellars below the water table, or walls against retaining earth, face pressure that ordinary damp-proof paint was never designed to resist. That’s a job for tanking systems and, often, professional waterproofing.
Pro Tip: A damp-proof course or structural repair is essential, not optional, when the tide mark keeps rising after redecoration, or when a moisture meter reads consistently high a metre or more up the wall. If a freshly painted patch bubbles again within a few weeks, that’s your sign the root cause was never actually fixed.
How does damp-proof paint actually work?
Most damp-proof paints rely on one or more of three mechanisms: moisture-reactive resins that cure even in the presence of residual dampness, salt-isolating barrier layers, and built-in mould inhibitors. Some specialist formulations also allow moisture vapour to pass through slowly while protecting the surface from salt staining, rather than sealing it in completely.
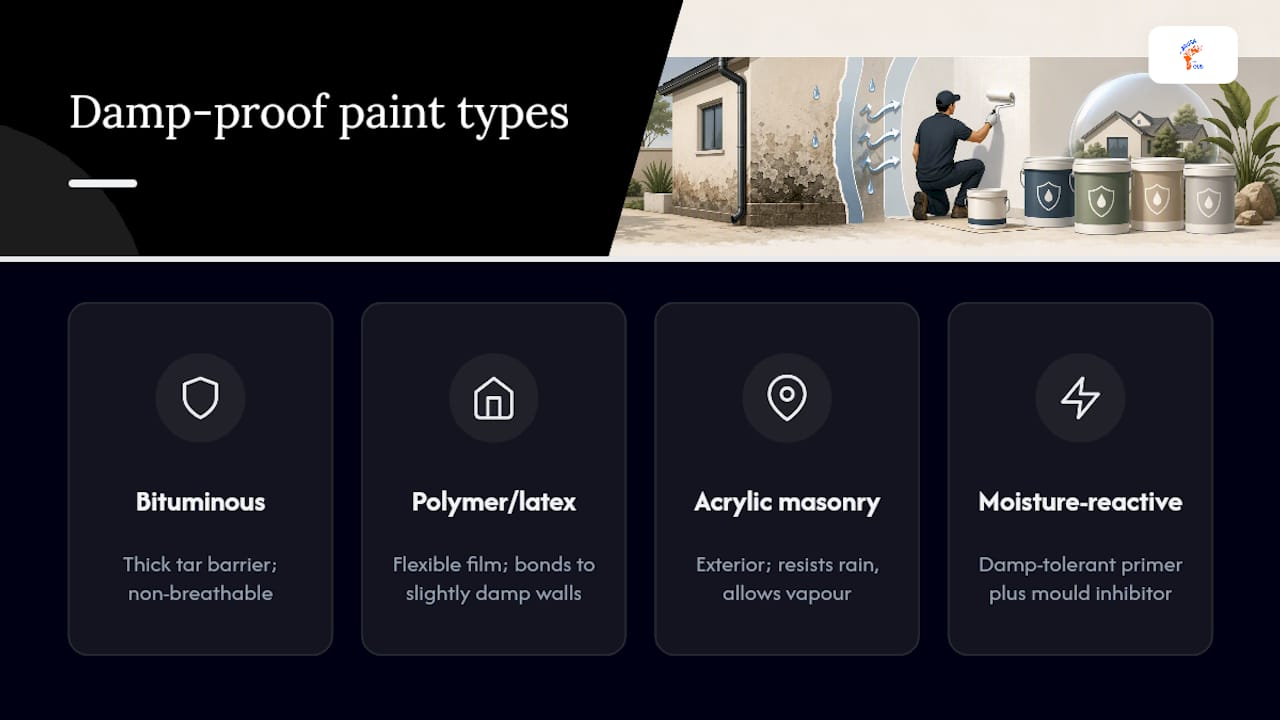
Broadly, you’ll come across four formulation types on the shelf.
Bituminous coatings are the old-school heavy-duty option, still used in cellars and below-ground areas where a thick, tar-like barrier makes sense. They’re effective at blocking moisture but they’re not breathable at all, and they’re messy to apply.
Polymer or latex anti-damp paints, such as Polycell Damp Seal, sit in the middle ground. They form a flexible film that bonds well to slightly damp masonry and plaster, and they’re the most common choice for interior walls affected by rising or penetrating damp once the source is fixed.
Acrylic masonry damp seals, like Sandtex masonry paint, are formulated for exterior use. They resist wind-driven rain while still allowing some vapour transmission, which matters on older solid-wall properties.
Specialist moisture-reactive coatings, including SPO Anti-Damp Paint and Zinsser Perma White, combine a damp-tolerant primer with a mould-inhibiting topcoat in one product. Zinsser B-I-N, a shellac-based stain blocker, earns its place here too, not as a damp-proof paint in the strict sense, but as the product trade painters reach for to block persistent tannin and nicotine staining that bleeds through after damp repairs.
Dulux Trade Undercoat rounds out the list as the standard preparatory layer once a specialist damp-seal coat has cured, giving you a uniform base before the final decorative finish goes on.
For interior walls in occupied rooms, a polymer-based product usually wins on flexibility and finish. For cellars, exterior masonry, or floors with rising moisture from below, bituminous or acrylic masonry formulations tend to perform better. None of them replace fixing the leak. Every one of them will fail eventually if you skip that step.
Surface preparation checklist before painting damp walls
Preparation decides whether your paint job lasts two years or twenty. Removing loose paint and crumbling plaster, brushing away salts, and treating mould before you paint is the single biggest predictor of a job that holds. Skip this stage and even the best product in the taxonomy above will lift within months.
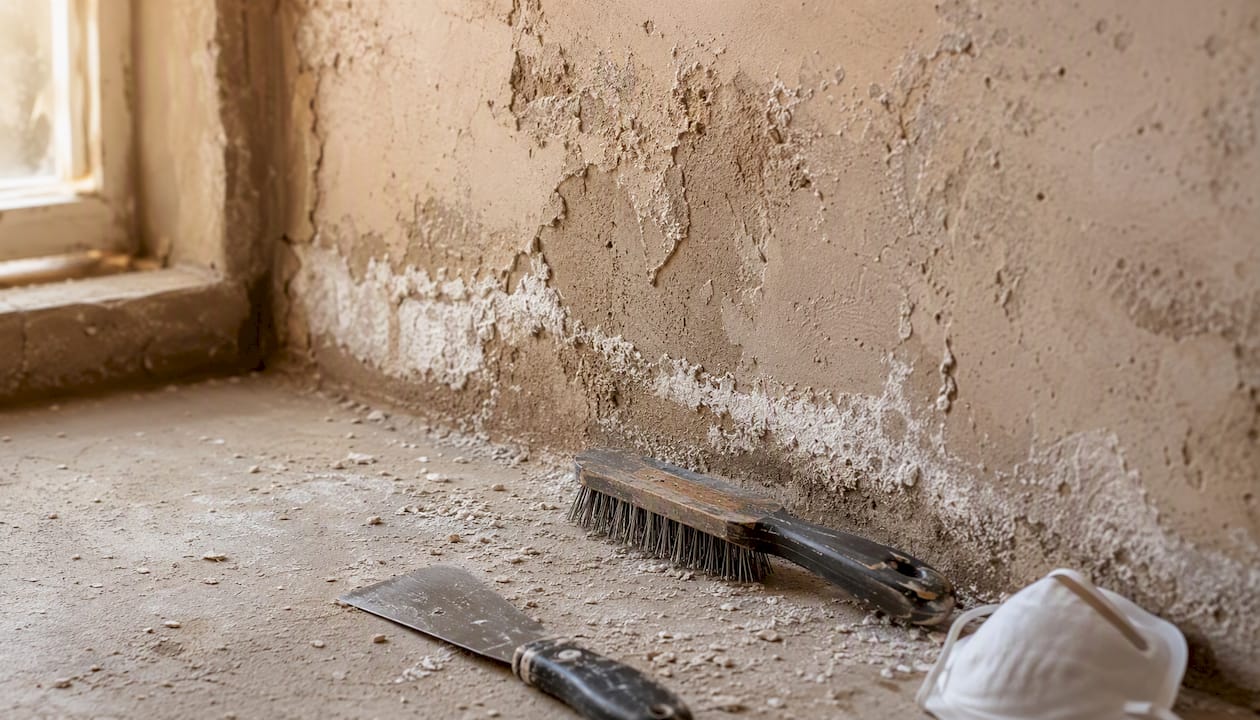
Start by stripping back to a sound substrate. Any paint that’s flaking, blistering or chalky has to come off with a scraper and wire brush, not just around the damp patch but a good margin beyond it, because damp rarely stays exactly where it’s visible.
Next, assess what’s underneath. Run your hand over the bare plaster: does it feel soft, crumbly or hollow when tapped? A moisture meter gives you a rough surface reading, but the more useful comparison is surface versus deep moisture, since a wall can read dry on the face while still holding water further in. Where plaster is heavily salt contaminated or genuinely crumbling, removal and replastering is usually the only reliable route to a lasting finish, rather than trying to paint over it.
Treat mould before anything else touches the wall. A professional-grade fungicidal wash applied before painting stops dormant spores reappearing under the new coating, which is a mistake we see constantly: people paint straight over mould they’ve wiped with bleach, and it’s back within weeks because the spores were never actually killed at the root.
Deal with salts separately from mould. Brush away visible efflorescence dry, never wet, since adding water reactivates the salts and drives them deeper. On badly affected walls, a salt neutraliser is worth using, and on the worst cases, a controlled drying programme alongside the neutraliser prevents recurring failures that would otherwise show up again a few months after redecoration.
Have these ready before you start: a stiff scraper, a wire brush, fungicidal wash, salt neutraliser where efflorescence is present, and a decent mask. Fungicidal washes and salt treatments both throw off fumes and fine particulate you don’t want to breathe, so gloves, eye protection and proper ventilation aren’t optional extras. If you’re reaching for sandpaper on any adjoining sound plaster to feather the repair in, our guide on how to use sandpaper on walls before painting covers the grades that work without damaging the surface.
Step-by-step application of damp-proof paint
Once the wall is prepped, mould-treated, salt-neutralised and dry to the touch, you’re ready to paint. Follow this sequence:
Check for standing moisture. Press a hand flat against the wall. If it feels cold or clammy, give it more drying time with a dehumidifier before you start.
Stir thoroughly. Damp-proof paints, particularly bituminous and moisture-reactive formulas, separate in the tin. Stir until the consistency is uniform, not just on the surface.
Apply the first coat working the product into the substrate, not just across it. Use a firm brushing action on textured or porous plaster so the coating keys into the pores rather than sitting on top.
Check the drying time before recoating. Cold or overly humid conditions slow curing significantly, and manufacturers typically state a minimum application temperature alongside recoat windows, so don’t rely on a generic “few hours” rule of thumb without checking the tin.
Apply a second coat. Most damp-proof paints need two coats minimum for a reliable barrier; one thin coat rarely gives full coverage on an uneven, previously damp surface.
Leave to cure fully before any topcoat or wallpaper. Curing and touch-dry are not the same thing. A coating can feel dry to the touch within hours but need days to cure properly underneath.
Item | Purpose | Typical note |
Synthetic brush | Working paint into textured or porous plaster | Firmer bristles key the product into the surface |
Medium-pile roller | Faster coverage on flat, prepared walls | Not ideal on heavily textured or crumbling areas |
Paint tray with liner | Loading roller evenly, easy clean-up | Bituminous products stain trays permanently |
Dehumidifier or heater | Speeding up drying between coats | Improved ventilation and dehumidifying can noticeably cut drying times |
Gloves, mask, eye protection | PPE for fungicidal wash, salt neutraliser and paint fumes | Ventilate the room throughout, not just during application |
Coverage varies by product and by how porous the substrate is, so always check the manufacturer’s figure on the tin rather than assuming one damp-proof paint spreads the same as another. A heavily absorbent, previously damp wall will drink far more paint per square metre than a sound, sealed surface.
While you’re painting, resist the urge to load the brush heavily to “get it done” in one pass. Build the film in thin, even layers, working across the wall in overlapping strokes rather than up and down in isolated patches, which is what causes visible lap marks once the paint dries.
Pro Tip: Two thin coats consistently outperform one thick one on damp substrates. A thick single coat skins over on the surface while moisture is still trapped underneath, and that trapped moisture is exactly what causes bubbling and peeling a few weeks later. Thin coats let each layer cure properly before the next goes on.
Can you paint over topcoats and finish redecorating safely?
Damp-proof paint is a specialist layer, not a finished wall. Treat it as a primer: allow full curing, then decorate over the top with a compatible finish rather than treating the damp-seal coat itself as the final look.
Curing times vary genuinely by product and by how damp the wall was to begin with. A wall that took weeks to dry out before treatment will generally need longer for the damp-proof layer to cure fully than one that was only mildly affected. Check the manufacturer’s guidance rather than guessing, and if in doubt, give it longer rather than less.
Topcoat choice matters more than most people realise. Breathable emulsions let any residual vapour continue escaping gradually, which suits most standard plastered walls. Non-breathable finishes trap that vapour instead, and on solid-wall or older properties built from lime plaster or cob, this can cause long-term damage even when the damp-proof coating underneath was applied correctly. If your property predates cavity wall construction, get specific advice on breathable systems before you pick a topcoat.
Once redecorated, keep half an eye on the treated area for the first year. A recurring damp patch, fresh staining, or a musty smell coming back all mean it’s worth retesting moisture levels rather than simply repainting over the top again.
Pro Tip: Choosing a breathable topcoat solves half the problem. The other half is reducing the moisture load in the room itself. Run an extractor fan during and after showers, avoid drying washing on radiators, and keep a dehumidifier running in poorly ventilated rooms through winter. Paint manages moisture; it doesn’t generate less of it.
Why does damp-proof paint fail, and when do you need a professional?
Most failed damp-proofing jobs trace back to the same handful of mistakes.
Painting over a leak that was never actually repaired, which guarantees the coating fails from behind.
Skipping the salt check, so hygroscopic salts keep drawing moisture from the air long after the original damp source is gone.
Painting onto a dirty or greasy substrate, so the coating never properly bonds and lifts off in sheets.
Applying thick coats rather than multiple thin ones traps moisture under a skinned-over surface.
Ignoring drying and curing times because the tin’s guidance felt overly cautious.
If you see bubbling or peeling within a few months, the immediate remedial step is to strip the affected area back to bare substrate, reassess for salts and moisture, and start the preparation process again rather than simply repainting over the failure. Painting over a peeling patch without diagnosing why it peeled just repeats the same failure on a slightly longer timescale.
Some situations sit beyond what a repaint can fix. Persistent rising damp that keeps returning after correct treatment, hydrostatic pressure in a basement or cellar, visible structural movement, or an external water source you can’t identify all point to something a damp-proof paint job was never designed to solve. At that point, a proper damp survey from a qualified specialist is the sensible next move, not another tin of paint. If the failure pattern looks more like a general coatings problem than a damp-specific one, our piece on causes of paint peeling outdoors is worth a look too.
What do professional decorators do differently on damp jobs?
A few habits separate a job that lasts from one that needs redoing within a year, and most of them come down to what happens before the paint goes on rather than the painting itself.
Trade teams working on a wall that will later be plastered or rendered often sand-flick the first coat, broadcasting dry, kiln-dried sand into the wet damp-seal layer to create a mechanical key that the plaster can grip once it’s applied on top. Skip this step and smooth damp-seal paint can actually make plaster adhesion worse, not better, because there’s nothing for the new plaster to bite into.
Testing for hygroscopic salts before assuming a wall is simply “still damp” saves a lot of wasted repainting. A wall that feels perpetually clammy weeks after the leak was fixed is very often salt-driven rather than genuinely wet, and no amount of extra damp-proof paint solves that without a salt neutraliser first. Mechanical keying, whether by scoring plaster or wire-brushing render, gets used routinely wherever a smooth surface needs a fresh coat to actually stick rather than sit on top.
When does it make sense to call a professional rather than tackle it yourself?
The affected area covers more than a wall or two, or spans multiple rooms.
Salts keep reappearing after two or three attempts at neutralising and repainting.
You notice cracking, bowing or other signs of structural movement alongside the damp.
The water source is external and hard to pin down, such as a suspected bridged damp-proof course below ground level.
Pro Tip: If you’ve prepped, treated and painted correctly and the wall is still failing, the problem usually isn’t the paint. It’s an unfixed source of water or an unaddressed salt reservoir behind the plaster. A proper survey costs far less than a third round of remedial redecoration.
Abrushwithgus takes on survey and quoting work of exactly this kind across Cornwall and the South West, alongside the interior and exterior decorating that follows once a damp problem has actually been resolved.
What we’ve learned fixing damp-proofing jobs gone wrong
The patterns on site repeat more than you’d expect. Salt deposits get missed constantly, usually because someone assumed a white crust was just old paint rather than efflorescence that needed brushing off dry and treating with a neutraliser. Preparation gets rushed under time pressure, particularly when a homeowner wants a room back in use quickly, and that shortcut nearly always resurfaces within a season.
Topcoat choice trips people up too. A non-breathable finish applied over a correctly treated damp-proof layer in an older solid-wall property can undo weeks of good preparation, because the vapour has nowhere to go.
One job stands out: a hallway wall that had been painted three times in two years, each time with the same bubbling returning within weeks. The damp-proof paint itself was fine. Nobody had ever checked for salts. Once the plaster was stripped back, brushed clean of a genuinely heavy efflorescence layer, treated with a neutraliser and left to dry properly before repainting, it held without issue.
That job changed how we sequence advice: salt checks come before product choice, not after. Get that step right and the rest of the process, the coats, the drying times, the topcoat, tends to fall into place on its own.
Prefer to bring in a professional instead?
If working through salt tests, fungicidal washes and recoat timings on a ladder isn’t how you want to spend a weekend, Abrushwithgus offers exactly that as a service across Cornwall and the South West. Rather than trial-and-error with a tin from the local merchant, a site survey identifies the actual cause of the damp first, then covers the remedial work, whether that’s plaster replacement, a damp-proof course repair, or tanking where hydrostatic pressure is involved, before any decorative finish goes near the wall.

A professional survey adds most value where the diagnosis itself is uncertain: multiple rooms affected, salts that keep returning, or a water source that’s hard to trace from the inside. Where the damp problem is genuinely external, a failing render, blocked gutters, or masonry that needs proper attention, our exterior home services cover the repair and repainting work end to end rather than leaving you to patch the inside while the outside keeps letting water in. For interior redecoration once the underlying issue is sorted, the domestic services page covers the full scope of work.
Get in touch for a site survey and a straightforward quote, and you’ll know exactly what’s causing the damp before a single coat goes on.
Frequently asked questions about damp-proofing painting tips
Can you paint over damp walls without fixing the cause first?
No. Damp-proof paint manages residual moisture during recovery, not an ongoing leak. Painting over an active source of water almost always leads to bubbling, peeling or hidden mould within months.
Which is the best damp-proof paint for interior walls?
It depends on the wall. Polymer-based products such as Polycell Damp Seal suit most interior plaster once the source of damp is fixed, while moisture-reactive options like SPO Anti-Damp Paint or Zinsser Perma White combine damp resistance with mould inhibitors in one coat.
How many coats of damp-proof paint do you need?
Most products need two coats for reliable coverage. Two thin coats also cure more evenly on a previously damp substrate than one thick coat, which can trap moisture underneath.
How long does damp-proof paint take to dry before you can decorate over it?
Drying and curing times vary by product, temperature and humidity, so always check the manufacturer’s guidance on the tin. As a general rule, a fully cured damp-proof layer needs more time than the touch-dry stage suggests, particularly in cold or poorly ventilated rooms.
When should you call a damp specialist instead of doing it yourself?
Bring in a professional when salts keep returning after repeated treatment, when you notice structural cracking or movement, or when the water source is external and hard to identify. A proper damp survey diagnoses the cause before any further paint goes on the wall.
Sources
Recommended
Comments