
3 Coatings That Work on K Rend, UK Contractor Tips
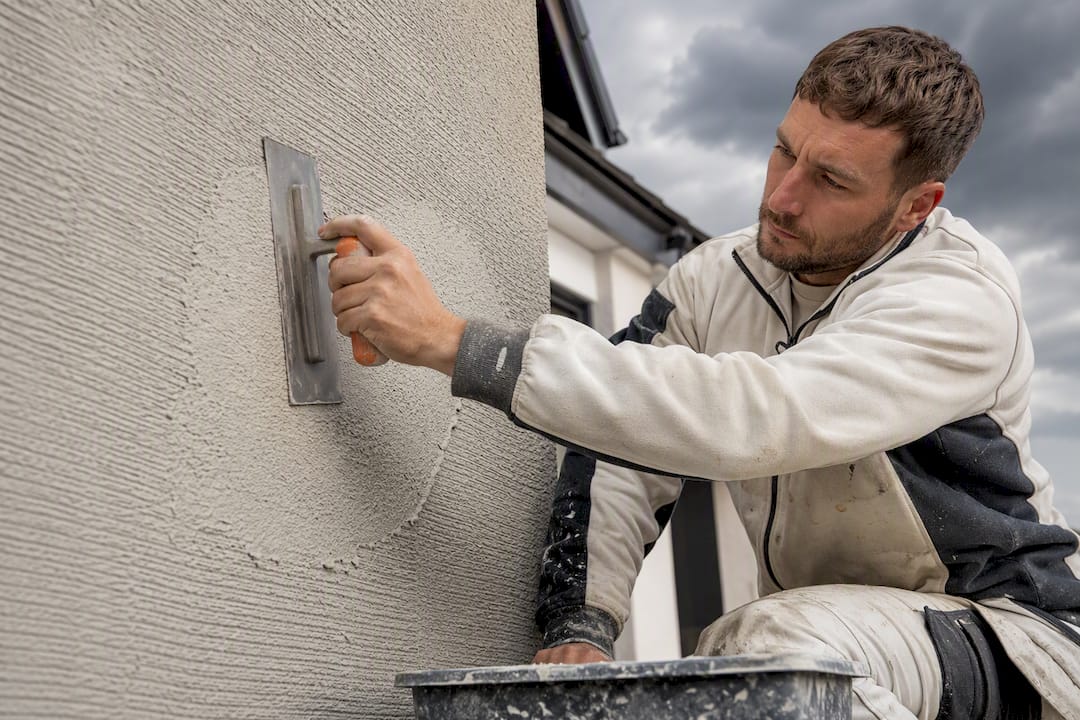
Yes, you can paint K Rend, provided the render is sound, clean and properly dried out first. The correct choice is a breathable, silicone-based coating such as K Rend Colour Enhance or a silicone masonry paint, never a standard acrylic product. Skip the prep and you’ll trap damp behind the coating; get it right and the finish should last for years. Inspect for damage, clean thoroughly, then apply a compatible paint.
TL;DR:
Use a breathable silicone-based coating like K Rend Colour Enhance or silicone masonry paint, and ensure the render is sound, clean, and fully dry before painting.
Repair any structural cracks, delamination, or persistent damp issues before repainting to prevent early coating failures.
Proper surface preparation, including cleaning with power washing and checking for chalking or uneven suction, is crucial for long-lasting results.
Spray application is recommended for textured surfaces to ensure an even finish, and painting during suitable weather conditions is essential to avoid issues from rain or cold.
Always order enough paint from a single batch, apply two coats with appropriate drying time, and avoid acrylic paints that can cause blistering on silicone render.
Table of Contents
When to repaint K Rend and when to repair first
Painting is the right move when the problem is purely cosmetic. Faded colour, general staining, or a render that’s simply gone a bit dull after a decade outdoors are all good reasons to reach for a roller. Structural or moisture problems are a different matter entirely, and painting over them only buys you a year or two before the finish fails again.
Before you commit to a colour, check the wall properly:
Tap test: knock gently across the surface with a knuckle or the handle of a trowel. A dull, hollow sound suggests delamination, where the render has separated from the substrate.
Visual check: look for cracking around openings, staining that returns after cleaning, or green and black patches that suggest persistent damp.
Damp indicators: if staining reappears within weeks of washing, there’s likely a moisture source behind the render, not just surface dirt.
Cosmetic fading gets repainted. Hollow sections, cracking, or recurring damp get repaired first, because painting over unresolved moisture leads to early coating failure.
Compatible paints and coatings for K Rend
Not every masonry paint plays well with silicone render, and picking the wrong one is the single most common mistake homeowners make. Three product types actually work.
K Rend Colour Enhance is the manufacturer’s own coating, designed specifically to refresh existing K Rend finishes without hiding the texture. Apply a diluted first coat, then a second undiluted coat once the first has dried.
Silicone masonry paint is the general workhorse choice for full colour changes. It stays breathable, sheds rainwater rather than absorbing it, and holds up well against UK weather.
Mineral paint (K Lime) suits older or heritage-style properties where maximum vapour permeability matters more than colour flexibility.
Standard acrylic masonry paints are risky on silicone render. Acrylics form a tighter film that reduces breathability, and on a render designed to let moisture escape, that mismatch tends to cause blistering and peeling within a season or two.
Colour Enhance needs roughly 0.3 to 0.6 kg per m² across two coats on textured surfaces, with around a few hours drying time between coats, so you can often finish a modest elevation in a single day if the weather cooperates.
Preparing K Rend for painting: cleaning, repairs and priming
Preparation decides whether the finish lasts five years or fifteen. Rush this stage and no paint, however good, will hide the shortcuts for long.
Clean the surface. A warm power wash with a suitable detergent lifts general grime effectively, though it’s not suitable for dry dash finishes. Keep pressure moderate to avoid gouging the texture, and follow up with a fungicidal wash on facades that stay damp for long periods to knock back algae before it returns.
Repair before you paint. Cut out failed sections, replace with matching render from reliable concrete suppliers, and feather the edges so repairs don’t show through the topcoat, as detailed by Concrete Blocks & Drainage Pipes Dublin | Kerbing Cork Ireland. Fresh repairs need proper curing time before painting.
Check suction and chalking. Run a hand across the dried surface. Heavy chalking or uneven suction signals you’ll need a primer or sealer coat to even out absorption before the topcoat goes on.
Paint a test panel. A small test area confirms colour, coverage and drying behaviour on your specific render before you commit a full elevation’s worth of material.
Pro Tip: Buy paint from a single batch for the whole job. Mixing batches, even of the same colour, is a common cause of subtle shade banding that only shows up in strong sunlight.
How to apply paint to K Rend for a consistent finish
Application technique matters as much as product choice, and this is where DIY jobs most often go wrong. The same staged approach applies to silicone masonry paint generally.
Use a long-pile roller to work paint into the textured surface, keeping a cutting-in brush handy for reveals, edges and detailing around windows and doors.
On larger or heavily textured elevations, spray equipment gives a more even finish and saves considerable time, though it needs a steady hand to avoid overloading the texture.
Keep a wet edge as you work and try to finish a full elevation in one session. Stopping halfway, or letting sun hit one section while shade covers another, is the most common cause of visible shade differences, since inconsistent drying conditions across a wall are the leading cause of colour variation.
Stick to the working temperature window. K Rend products need temperatures suitable for typical outdoor conditions, and freshly painted surfaces need protecting from rain or frost for a couple of days after application. Check how weather affects exterior painting across the South West before booking the job in.
How much paint do you need to cover K Rend?
Coverage depends heavily on texture. A smooth K Rend finish drinks far less paint than a heavily textured one, so measure your actual surface area rather than relying on a rough guess from the front elevation alone.
Product | Coverage | Notes |
K Rend Colour Enhance | approx. 0.3–0.6 kg/m² (two coats) | For textured renders; drying time 3–4 hours between coats |
Silicone masonry paint | covers a moderate area per tub on smooth surfaces with two coats | |
Silicone masonry paint | covers a smaller area per tub on textured surfaces | Heavier texture reduces yield considerably |
Order roughly 10% extra material for touch-ups, snagging, and inevitable spillage. Running short mid-elevation and waiting on a delivery is how shade mismatches creep in.
Common K Rend painting failures and how to avoid them
Most repaint problems trace back to one of a handful of causes, and nearly all of them are avoidable with the right prep.
Patchy finish: usually uneven suction across the render. A primer or sealer coat, applied after checking chalking levels, evens this out before the topcoat goes on.
Blistering or peeling: almost always trapped moisture. Trace and fix the damp source before repainting, rather than assuming the paint itself is faulty.
Colour variation: caused by mixed batches, interrupted work, or inconsistent drying across a wall. Test panels, single-batch ordering, and finishing full elevations in one go all but eliminate this.
Hairline cracking reappearing through the topcoat: a sign the underlying render movement was never properly addressed, not a paint fault.
If a hollow section, active leak, or widespread cracking turns up during inspection, that’s a job for a contractor rather than a weekend DIY project.
Practitioner tips from Abrushwithgus for a better finish
Getting a K Rend repaint right on a UK job site comes down to discipline around weather and prep, not just product choice. Crews working across Cornwall and the South West build weather windows into every schedule, checking wall temperature and substrate moisture before committing to a start date, since rain shortly after painting can undo a day’s work.
Run a tap test and moisture check on the wall before quoting, not just before starting work.
Power-wash at a controlled pressure, then wait for genuine surface drying, not just a dry-looking exterior, before painting.
Choose spraying over rolling on large or heavily textured elevations to keep the finish consistent, reserving brushes and rollers for detailing and smaller jobs.
Pro Tip: If a wall has been recently rendered, check how long the guidance recommends waiting before the first topcoat. Painting too soon after new render is a frequent cause of early adhesion failure.
Why manufacturer data alone doesn’t get you a good finish
K Rend’s own literature gets you most of the way there: the right paint family, sensible coverage figures, and clear temperature limits. What it can’t tell you is what a British autumn will actually do to your schedule, and that’s where most DIY repaints come unstuck.
The conventional advice treats painting K Rend as a product decision. Pick Colour Enhance or a silicone masonry paint, follow the tin, done. In practice, the finish lives or dies on timing: whether you can complete a full elevation before the light changes, whether the wall’s had 48 hours clear of rain, whether the crew actually stopped to run a tap test instead of assuming the render’s fine because it looks fine.
If there’s one thing worth prioritising above product choice, it’s discipline around drying conditions. A slightly cheaper paint applied with a proper weather window and a single-batch approach will outlast a premium coating rushed on between showers. Homeowners researching this themselves should spend as much time reading their wall as reading the tin.
— Angus
Get your K Rend repainted properly by A Brush With Gus
Reading up on Colour Enhance dilution ratios and drying windows is useful, but matching that to your actual wall, in Cornish weather, on a specific weekend, is a different job. Abrushwithgus handles the whole sequence for homeowners across Cornwall and the South West: inspection, cleaning, repair, priming and the final coat, without you having to gamble on a DIY weekend and a forecast that changes on Thursday.

A survey ahead of any quote checks for hollow sections, damp sources, and suction issues before a single tin of paint is ordered, so you’re not paying to have a cosmetic problem repainted over a structural one. For heavily textured or larger elevations, the team uses professional spraying to keep colour consistent across a full wall, and pairs it with exterior cleaning services beforehand to deal with algae and staining properly rather than just rinsing the surface. If your render needs more than a simple refresh, the domestic exterior painting service covers repair and recoating as one job. Get in touch to arrange a survey and a proper quote for your property.
Sources
Recommended
Comments