
Maintenance tips for sprayed kitchens: keep that finish fresh
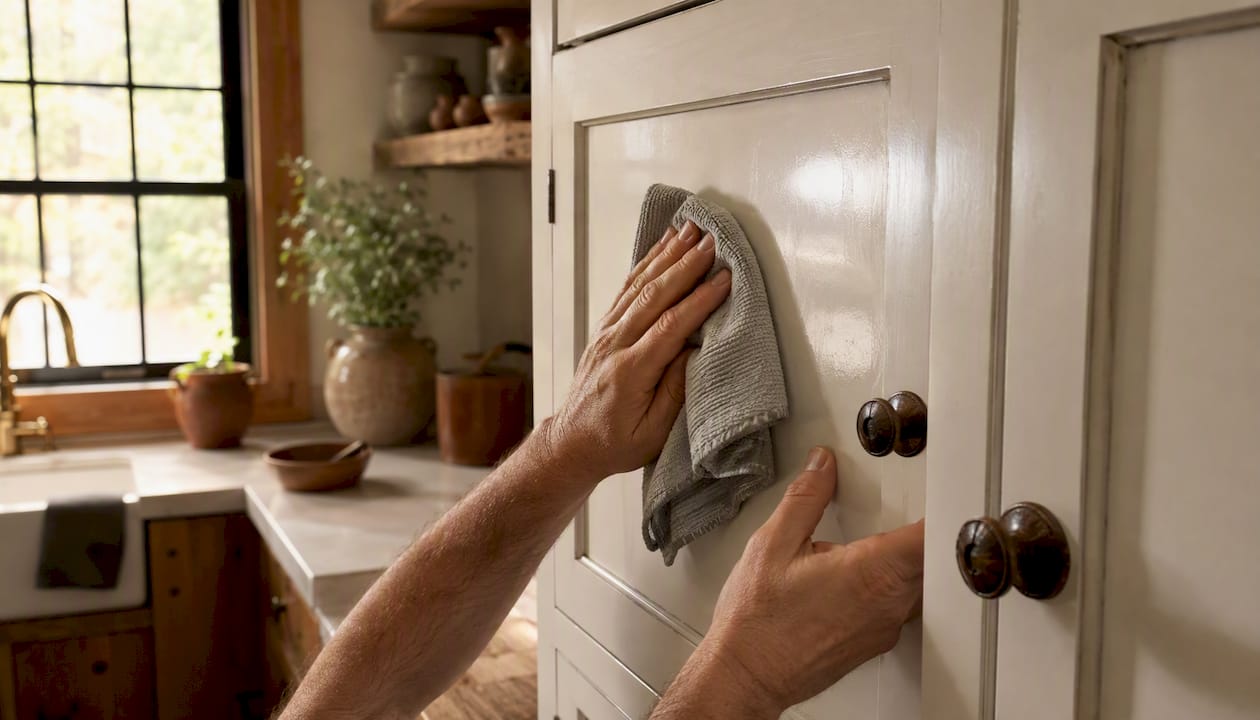
A sprayed kitchen keeps its factory-like finish if you stick to three habits: clean gently, control moisture, and handle it with a bit of patience while it cures. Get those right and a sprayed finish will outlast most of the appliances around it. Get them wrong, and you’ll be looking at scuffed edges and swollen chipboard within a year.
Here’s what to do from day one:
Wipe with a microfibre cloth, never anything textured or abrasive
Deal with spills the moment they happen, especially near the hob and sink
Run your extractor fan every time you cook, and wipe condensation off doors promptly
Skip anything abrasive, including bleach, scourers, and melamine sponges
Give the finish its full curing window before loading it with heavy daily use
The finish on a freshly sprayed kitchen behaves a lot like a car’s paintwork straight from the factory: tough once it’s settled, but genuinely vulnerable to rings, knocks, and standing water in the first couple of weeks. Treat it that way and it will reward you for years.
Key Takeaways
A sprayed kitchen finish lasts longest when gentle cleaning, strict moisture control, and cautious handling during the curing window are treated as one connected routine rather than separate chores.
Point | Details |
Daily habit | Wipe with a damp microfibre cloth and diluted washing-up liquid, then dry immediately with a clean cloth. |
Weekly task | Give handles, hob-side panels, and the door beside the bin a slightly deeper clean than the daily wipe. |
Monthly check | Inspect hinge screws, door alignment, and plinths for wear that accelerates paint damage if left. |
Curing window | Handle lightly for the first 24 hours and avoid heavy daily use for up to 7 to 14 days while the finish reaches full hardness. |
When to call a pro | Book an Abrushwithgus inspection for bubbling, persistent tackiness, peeling, or any mark you’re unsure about. |
Table of Contents
Curing time for sprayed kitchens: what to do in the first two weeks
How do you remove marks and stains from a sprayed kitchen finish?
What products and tools are safe for painted kitchen cabinets?
What aftercare should you expect from a professional kitchen spray?
What do professional sprayers do differently to protect a finish?
Curing time for sprayed kitchens: what to do in the first two weeks
Handle your cabinets lightly for the first fortnight and save the heavy use, the hook installations, and the deep cleans for later. That’s the single most important habit in this entire guide, and it’s the one homeowners get wrong most often because a sprayed door can look completely finished within hours.
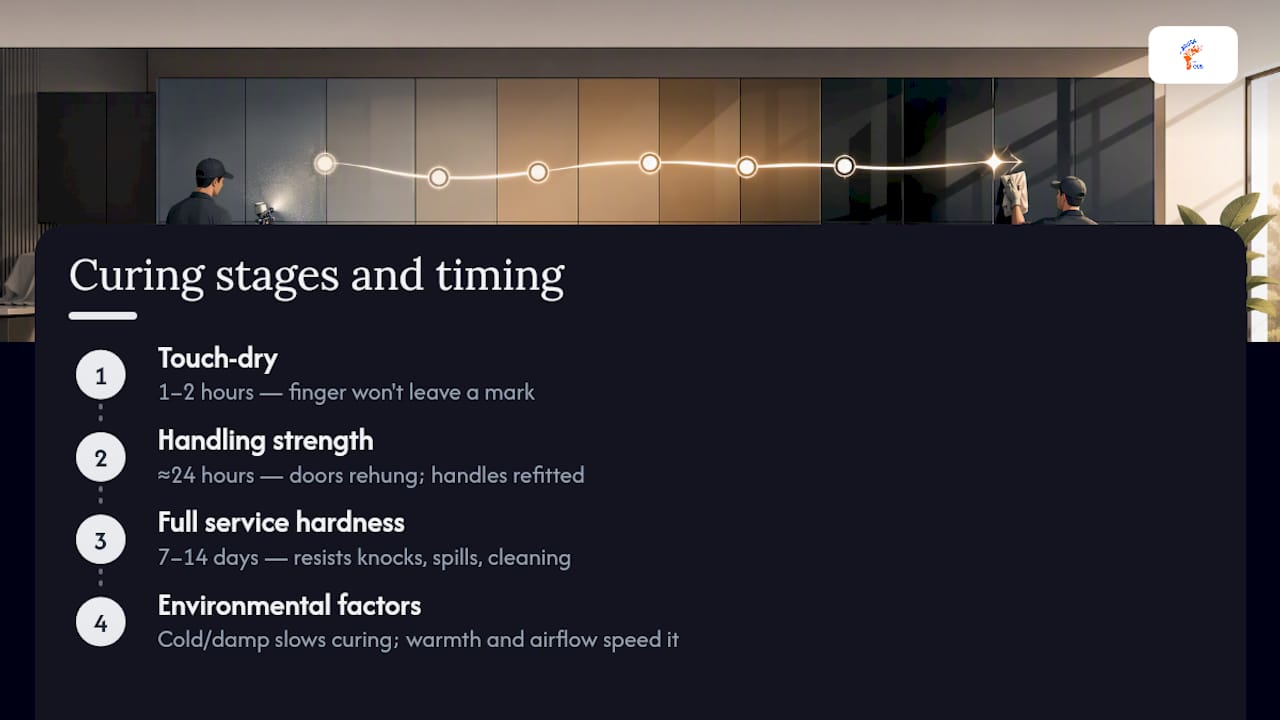
Looks are deceiving here. There’s a real difference between touch-dry, handling strength, and full service hardness, and confusing the three is how good jobs get damaged early. Touch-dry means you can brush a finger across the surface without leaving a mark, and that typically happens within an hour or two of the final coat. Handling strength is the point where doors can be rehung and handles refitted without denting the film, and professional-grade sprayed systems commonly reach that stage within roughly 24 hours under controlled conditions. Full service hardness, the point where the finish can shrug off daily knocks, spills, and cleaning without any risk of marking, generally takes 7 to 14 days indoors at a reasonable room temperature.
That range moves depending on your home. A cold, damp kitchen in January will cure more slowly than a warm one in June, and a room with no airflow will always lag behind one with a window cracked open or an extractor running.
Pro Tip: Don’t stick anything to the doors during the curing window, not even removable adhesive hooks. The bond between an adhesive pad and a still-curing topcoat can lift paint clean off when you peel it away weeks later.
Avoid stacking heavy pans against door fronts, leaning against cabinets while cooking, and running a steam-heavy dishwasher cycle right beside a curing run of units. None of that will ruin the finish outright, but all of it adds risk during the window when the paint film is least able to defend itself.
How do you clean sprayed kitchen cabinets safely?
The safest method is a lightly damp microfibre cloth with a small amount of diluted washing-up liquid, followed by a plain-water rinse pass and an immediate dry. That’s the whole routine, and it works because diluted dish soap lifts grease through surfactant action without leaving behind anything abrasive or chemically aggressive enough to strip a topcoat.
Here’s the recipe that keeps a sprayed finish looking new:
Fill a bowl with warm water and add a few drops of mild washing-up liquid, not a heavy squirt
Dip your microfibre cloth and wring it out until it’s just damp, not wet
Apply the cloth to the surface with light pressure, working with the grain of the door panel
Go over the same area with a second cloth dampened in plain water to rinse away any soap residue
Dry immediately with a clean, dry microfibre cloth so no moisture sits in joints or routed edges
That plain-water rinse pass matters more than people assume. Soap residue left to dry on a painted surface can dull the sheen over time, and it’s an easy step to skip when you’re in a hurry.
For your weekly routine, go slightly deeper around the areas that take the most contact:
Wipe handles and the door edges around them, where hand oils build up fastest
Clean the panel closest to the hob, which collects grease from cooking even with an extractor running
Check the door beside the bin for smudges and splashes that get missed in the daily wipe
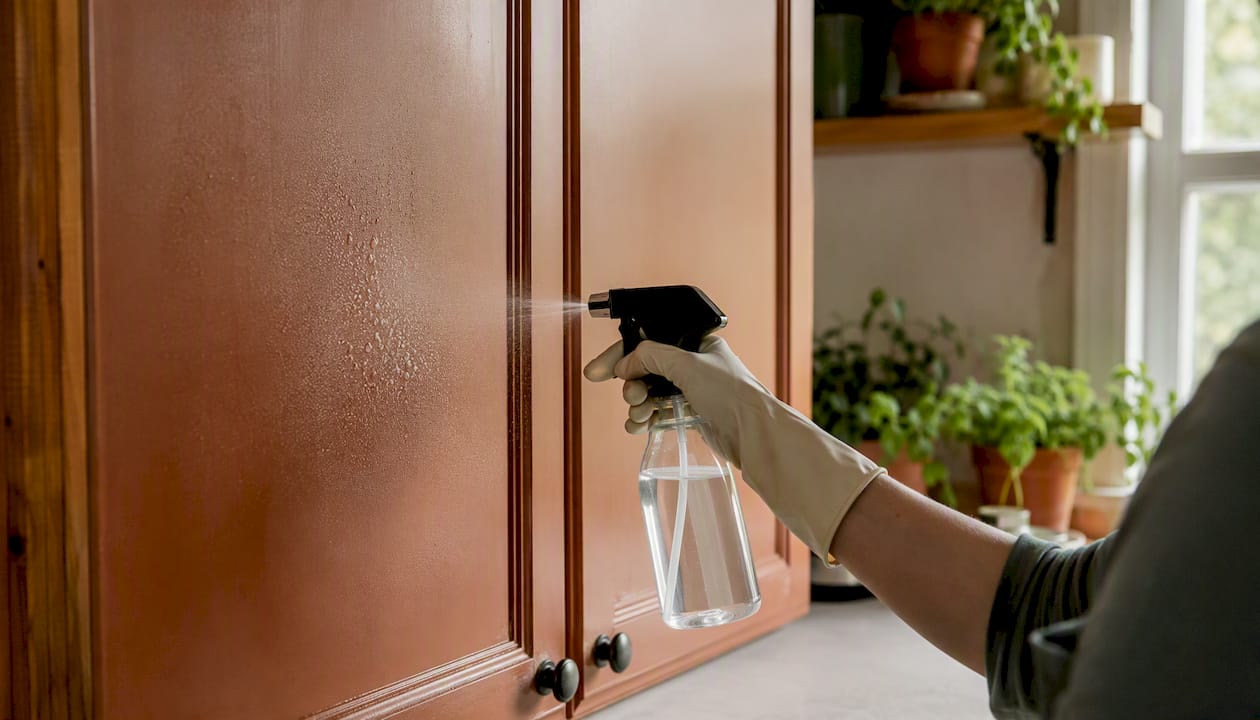
Avoid abrasive pads, bleach-based sprays, and anything that claims to be a heavy-duty degreaser unless it’s explicitly labelled safe for painted joinery. Spraying cleaner directly onto the door is another habit worth breaking, since it’s easy to oversaturate a panel and push moisture into a seam or hinge recess. Applying the cleaning solution to the cloth rather than the surface gives you the same clean with far less risk.
What should a monthly kitchen cabinet check include?
A short monthly check catches the small mechanical problems that cause most avoidable finish damage, and it takes about fifteen minutes for an average kitchen. Doors that hang slightly off alignment rub against their neighbours every time they close, and that friction wears through paint far faster than ordinary daily use ever would.
Run through this once a month:
Check top edges and cornices for dust build-up that can trap moisture over time
Test hinge screws by gently pushing each door closed and watching for wobble or drop
Look at door alignment side-on to spot any gaps that have widened since installation
Inspect plinths at floor level for scuffs from mop heads, vacuum cleaners, or shoes
Check under the sink for any seal or pipe weeping that could be reaching the cabinet base
Pay particular attention to hardware while you’re at it:
Hinge screws should be snug, not loose enough to let a door shift under its own weight
Handle fixings need the same check, especially on doors used dozens of times a day
Soft-close mechanisms should engage smoothly without a hard clunk at the end of travel
Bumper pads at the top corners of doors should still be present and not worn flat
A door that’s even a few millimetres out of alignment will keep catching against its neighbour on every single close, and that repeated contact is exactly the kind of localised wear that turns into a visible scuff line within a few months. Tightening a hinge screw takes thirty seconds. Fixing the paint damage that loose hinge caused does not.
Everyday habits that stop sprayed cabinets wearing early
Use the handles, not the flat of your palm, and you’ll eliminate the single biggest source of visible wear on a sprayed kitchen. Palm pressure on a door face transfers skin oils directly onto the paint, and repeated over months, that’s what causes the dull, slightly grubby patch that appears around handle-free push points on doors that get closed with a shove rather than a pull.
A few habits separate a kitchen that still looks sprayed-fresh after three years from one that doesn’t:
Do use the handle every time, even when your hands are full
Do close doors with a controlled push rather than a slam
Don’t wear rings or watches while doing anything involving contact with door fronts, particularly moving pans or crockery
Don’t drape a damp tea towel over a door edge to dry, since trapped moisture against paint is a slow route to swelling
Do wipe fingerprints off as you notice them rather than letting several weeks of contact build up
Handleless and push-to-open cabinets need a bit more thought, because the mechanism relies on direct hand pressure against the door itself. If that’s your kitchen, focus your cleaning attention on the push points specifically, since they’ll show fingerprints and light scuffing faster than a handled door ever would.
Pro Tip: If a handleless kitchen is giving you grief, ask your sprayer about fitting discreet bumper pads or converting high-use doors to soft-close hinges. It’s a small mechanical change that takes the shock out of every closure and noticeably slows down wear at the point of contact.
How do you remove marks and stains from a sprayed kitchen finish?
Clean gently and repeat the pass rather than pressing harder or reaching for a stronger product. That’s the rule that saves more finishes than any single cleaning tip, because most marks that look stubborn on first inspection lift with a second or third light pass that would have taken thirty seconds longer.
Work through marks in this order:
Fingerprints and light grease film: a standard diluted washing-up liquid wipe, repeated once if needed
Grease splashes near the hob: the same solution left to sit for thirty seconds before wiping, giving the surfactants time to break the grease down
Pen or crayon marks: a barely damp cloth with a tiny amount of washing-up liquid, applied in gentle circular motions, never scrubbed in one direction repeatedly
Dried-on stains: a warm damp cloth held against the mark for a minute to soften it before wiping, rather than scraping at it dry
Light scuffs: often buff out with nothing more than a dry microfibre cloth and firm, even pressure
If a mark genuinely won’t shift, resist the urge to escalate to anything abrasive. A very light DIY touch-up, using a matching touch-up pot kept from the original spray job, can cover small chips, but this only works cleanly on isolated spots. Anything covering more than a coin-sized area usually needs a professional colour-matched respray to blend properly.
Pro Tip: Photograph any mark, chip, or unusual patch as soon as you spot it, with a coin or ruler in shot for scale. If it turns out to be warranty-relevant, that dated photo makes the claim far easier to process than a description over the phone.
Call a professional rather than attempting a fix yourself if you see bubbling under the surface, tackiness that hasn’t resolved weeks after spraying, visible peeling at any edge, or swelling that suggests moisture has got into the substrate. Those are structural signs, not cosmetic ones, and DIY attempts at a fix usually make the eventual professional repair more expensive.
Managing moisture and steam around sprayed cabinets
Run your extractor fan every time you cook and wipe visible condensation off doors as soon as you notice it. Moisture is the single biggest long-term threat to a sprayed finish, more damaging over time than scuffs, fingerprints, or sunlight combined, because it attacks joints and edges from underneath rather than wearing down the visible surface.
Build these habits into your routine:
Switch the extractor on before you start cooking, not partway through
Crack a window for a few minutes after boiling pans or running the oven, especially in smaller kitchens
Never leave a wet tea towel hanging over a door edge to dry
Keep the area around the kettle and toaster wiped dry rather than letting steam settle on the panel behind them
Check inside cabinets near the sink occasionally for any drips reaching the base or back panel
A quick monthly moisture check is worth adding to your existing routine: look under the sink for pipe sweating, check the cabinet beside the dishwasher for any warmth or dampness escaping the seal, and glance behind the kettle for a build-up of condensation that’s been quietly settling for weeks. If your kitchen runs consistently humid, whether from poor ventilation or the layout of the room, a small dehumidifier can take real pressure off the finish. After a dishwasher cycle finishes, leave the door ajar for a few minutes before opening the cabinet beside it, so the steam has somewhere to go other than straight onto your paintwork.
Does sunlight or heat damage a sprayed kitchen finish?
Yes. Direct, repeated heat and prolonged sun exposure gradually change the sheen of a sprayed finish and speed up general wear, particularly on doors that sit close to a heat source day after day. It’s a slower process than a spilled glass of red wine, but it’s just as permanent once it’s happened.
The risk concentrates in a handful of predictable spots:
Doors and panels directly beside the oven, where radiant heat is a daily, sustained event
The area around the kettle, especially if it’s used dozens of times a day in a small footprint
Cabinet faces near the microwave’s exhaust vent, which pushes out warm, sometimes damp air
Any run of units that catches strong, direct sun through a window for several hours a day
A blind or a sheer curtain on a south-facing kitchen window does more for your paintwork’s long-term sheen than almost any cleaning product. If you can, keep hot appliances like kettles and toasters a few centimetres clear of door faces rather than hard against them, and rotate items on open shelving occasionally so the same patch of a nearby panel isn’t taking the same low-level heat exposure every single day.
What products and tools are safe for painted kitchen cabinets?
Stick to mild washing-up liquid, microfibre cloths, a soft-bristled brush for detail work, and pH-neutral cleaners specifically labelled safe for painted wood or joinery. Nothing exotic is required, and in fact the simplest option is usually the safest one.
A short shopping list covers nearly every situation:
Mild washing-up liquid: any standard supermarket own-brand works fine when properly diluted
Microfibre cloths: buy a few and dedicate one exclusively to cabinet fronts so it doesn’t pick up grit from other jobs
Soft detail brush: useful for handle recesses and routed grooves where a cloth can’t reach
pH-neutral surface cleaner: worth having on hand for anything a soap-and-water wipe doesn’t fully shift, provided the label states it’s safe for painted or lacquered wood
Whatever you pick, test it first. Apply a small amount to an inconspicuous spot, such as the top inside edge of a door, and leave it for a few minutes before wiping. If there’s no colour change, softening, or dulling, it’s safe to use more widely. Avoid all-purpose kitchen degreasers entirely unless the label explicitly states it’s safe for sprayed or lacquered joinery, since many are formulated for tile and worktop surfaces that can tolerate far harsher chemistry than a painted door front can.
Pro Tip: Keep melamine sponges, scouring pads, and anything marketed as a “magic eraser” well away from sprayed doors. They work by micro-abrading the surface they’re cleaning, which is exactly the mechanism that dulls a painted finish over repeated use.
For anyone still finishing the prep stages, our guide on cleaning kitchen doors before painting covers the products and techniques that carry over neatly into ongoing maintenance once the job’s done.
What aftercare should you expect from a professional kitchen spray?
Contact the sprayer who did the work if anything looks off in the first few weeks, and use their warranty for any genuine finish defect rather than attempting a fix yourself. A good contractor won’t just spray your kitchen and disappear. They’ll usually leave you with guidance on reassembly timing, when it’s safe to refit handles, and how to bring the kitchen back into full daily use in stages rather than all at once.
Typical aftercare guidance from a professional includes a staged return to normal use, starting with light contact only in the first day or two and building up to full daily wear over the following one to two weeks. Handles are often left off, or fitted loosely, until the finish has reached handling strength, which keeps screw pressure from marking a still-soft topcoat.
If you do need to raise a warranty claim, documentation speeds everything up. Photograph the issue clearly, note the date it appeared, and jot down anything relevant, such as whether it followed a spill, a knock, or simply appeared on its own. A contractor visit is genuinely worthwhile if you spot bubbling anywhere on the surface, tackiness that persists well past the expected curing window, visible peeling at an edge or corner, or any softness that suggests moisture has worked its way into the wood beneath the paint.
Readers weighing up whether a respray was the right call in the first place might find our piece on the benefits of respraying over replacement useful context for what a well-maintained sprayed kitchen is actually worth over time.
What do professional sprayers do differently to protect a finish?
Apply the cleaning solution to the cloth, never the surface. That one habit prevents more damage than almost any other single piece of advice in this guide, because oversaturating a door with spray cleaner is how water finds its way into a hinge recess or a routed edge, and that’s where swelling starts.
Fragile edges get particular attention from anyone who sprays kitchens for a living. Routed grooves, chamfered panel edges, and the inside corners around handle cut-outs are where the paint film is thinnest and most exposed, so they’re the first place a careful eye checks for early wear. Ventilation gets the same weight in professional advice as cleaning technique does, and for good reason.
Good airflow during and after spraying isn’t a nice-to-have, it’s what lets the film cure properly in the first place. Skip it and you’re gambling with the very thing that makes the finish durable.
A quick homeowner habit worth borrowing from the trade: take a photo of your kitchen doors once a month, ideally in the same lighting, from the same angle. It sounds excessive, but a simple photo log makes it far easier to spot slow changes, a fading patch, a slowly widening gap, a sheen change near the hob, that are easy to miss day to day but obvious side by side a few months apart.
Small preventive habits, done consistently, do more for a finish’s lifespan than any single deep clean ever will: wiping spills the moment they happen, keeping rings and watches off during kitchen tasks, and never letting a wet cloth sit against a door edge overnight.
A note from the team at Abrushwithgus
When we finish a spray job, the work isn’t really done until we’ve talked the homeowner through those first two weeks. Most of the calls we get after a job are about things that would never have come up if someone had mentioned the curing window at handover, a hook stuck on too early, a damp tea towel left over a door corner overnight. We’d rather spend ten minutes explaining that upfront than have someone dealing with a mark that didn’t need to happen. If you’ve got a kitchen we’ve sprayed and something’s bothering you, or you’re just not sure whether what you’re looking at is normal, get in touch through our domestic services page and we’ll take a look.
Book a professional check for your sprayed kitchen
If you’d rather have a second pair of eyes on your kitchen than guess whether a mark is cosmetic or something more, Abrushwithgus offers inspection and touch-up visits across Cornwall and the South West that cost far less time and worry than living with uncertainty about a finish you’ve paid good money for.

A typical inspection covers a curing check to confirm the finish has hardened as expected, a hinge and alignment adjustment where doors have started to drift, and small colour-matched touch-ups on any chips or scuffs picked up since installation. If you’re not sure whether a visit is worth booking, send us a few photos of the area you’re concerned about first. It’s the fastest way for us to gauge whether it’s a quick fix, a warranty matter, or nothing to worry about at all.
If your kitchen was sprayed by Abrushwithgus, keep any paperwork or job reference handy when you get in touch, since it speeds up the warranty check considerably. For a wider view of what our spraying service actually involves, our spraying services page sets out the process, and our cleaning services page covers what we offer if you’d rather hand the whole maintenance routine to someone else. Either way, the first step is simple: get in touch with a few photos and a short description of what’s on your mind.
Sources
Recommended
Comments