
Homeowners: One Shellac Coat Stops Bleed Through Smoke Damaged Walls
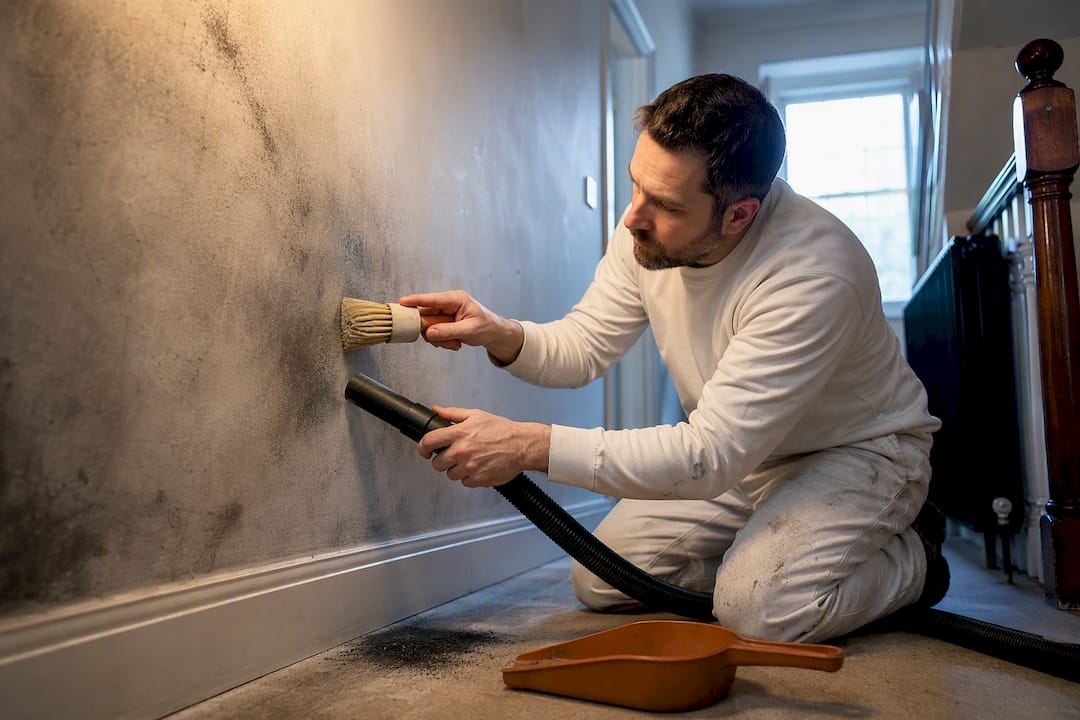
Yes, you can usually paint smoke damaged walls, but only after staged cleaning and sealing with a shellac-based stain and odour-blocking primer. Skip the cleaning stages or use an ordinary primer, and the stains bleed through within weeks. Exceptions apply: soaked drywall, HVAC contamination, or structural fire damage need a professional, not a paintbrush.
TL;DR:
Smoke damage that has soaked into drywall or spread through HVAC systems requires professional remediation, not just DIY cleaning and sealing.
Dry soot removal should always start with vacuuming and chemical sponging, followed by wet cleaning with appropriate solutions based on residue type.
Smoke odors penetrate walls and porous materials, often lingering after cleaning unless specialized treatments like fogging are applied.
Shellac-based primers are essential for sealing heavy smoke stains and must be applied correctly within their short recoat window for effective results.
Multiple topcoat layers may be necessary, and persistent staining or odor indicates underlying contamination that should be addressed by specialists.
Table of Contents
Assess the damage before you pick up a brush
Not every smoky room is a DIY job. Before buying primer, work out whether you’re dealing with a light surface film or something that has soaked into the fabric of the house.
A room suits the DIY route when the damage is contained, dry, and hasn’t travelled through the ventilation system. Anything beyond that starts tipping toward a job for remediation specialists.
Damage limited to one room, with no odour spreading through the house via the HVAC system.
Soot is dry and powdery rather than wet, waxy, or greasy to the touch.
No structural damage, scorched timber, or melted wiring nearby.
Walls and plasterboard feel dry, not soft or swollen.
Photograph everything before you start, both for insurance purposes and to track your progress. Wear an N95 or P3 respirator, gloves, and goggles, and isolate the room by sealing doorways and covering furniture. If you spot melted wiring, heavy soot spread across multiple rooms, or a smell that seems to be coming from inside the walls, stop and call a specialist.
How do you remove loose soot before wet cleaning?
Soot removal always starts dry. Wet a heavily sooted wall too soon and you’ll drive carbon particles deeper into the paint film, turning a cleanable stain into a permanent one. Dry chemical sponges and HEPA vacuuming lift loose particulate without smearing it, which is why every restoration guide puts them first.
Work through the room in this order:
Vacuum the entire wall and ceiling area with a HEPA-filtered vacuum, using a soft brush attachment.
Wipe down with a dry chemical sponge, working from ceiling to floor in overlapping strips.
Turn the sponge to a clean face as soon as it saturates with soot. Never rinse and reuse the same face.
Repeat over stubborn patches rather than pressing harder, which just grinds soot into the surface.
Inspect under strong light for residual staining before moving on to wet cleaning.
For a typical bedroom or lounge, budget a full chemical sponge per wall and expect the process to take longer than the wet clean that follows. Keep windows cracked for airflow, and swap your respirator filter if it starts to feel harder to breathe through.
What’s the safest way to wet clean smoke stained walls?
Once loose soot is gone, wet cleaning tackles what’s left behind. The right cleaner depends on what actually burned. Protein residue from cooking fires behaves differently to synthetic soot from burning plastics, and using the wrong chemistry can fix residue into the surface instead of lifting it off.
For heavy, greasy soot, a trisodium phosphate (TSP) solution at around 4 to 6 tablespoons per gallon of warm water cuts through grime effectively.
For lighter staining, a gentler mix of white vinegar and water is often enough and less likely to strip existing paint.
Always test on a hidden patch first, and rinse with clean water afterwards to stop residue drying back onto the wall.
Keep the sponge damp rather than soaking wet. Paper-faced plasterboard swells and delaminates quickly if it gets too wet.
Pro Tip: Work in small sections and dry each one with a towel straight after rinsing. Letting water sit on smoke damaged drywall for even ten minutes can be enough to cause bubbling under the paper face.
Why does smoke odour keep coming back after cleaning?
Smoke odour is stubborn because it doesn’t stay on the surface. It penetrates wall cavities, loft insulation, carpet underlay, and ductwork, then off-gasses slowly for weeks after the visible mess is gone. Painting over a wall that still smells strongly is a temporary fix at best.
Ventilate the property thoroughly and replace or clean HVAC filters before assuming odour treatment is done.
Wipe down vents and grilles, since soot settles on them even in rooms untouched by fire.
For lingering smells, thermal fogging and ozone treatment penetrate porous materials that wiping can’t reach, though both require trained operators and an empty property.
If the smell is still noticeable after a proper clean and a shellac-based primer coat, that’s a sign the contamination has gone further than surface level, and it’s worth calling a restoration specialist rather than adding more primer.
Why shellac-based primers matter for smoke damaged walls
Once the wall is clean, dry, and odour has been dealt with, sealing is what actually stops the stain reappearing. Shellac-based primers have very low vapour permeability, which is why they outperform standard latex primers on heavy smoke and fire damage. Zinsser B‑I‑N is the product most commonly recommended for this job, and it’s worth knowing why before you reach for something cheaper.
One coat of shellac primer typically covers around 400 square feet per gallon, though solids settle fast in the tin, so stir it frequently as you work.
Stir before and during application. Settled solids give patchy sealing if you don’t.
Shellac primers have short recoat windows, sometimes as little as 20 to 45 minutes depending on temperature and humidity, so plan your session and don’t leave a half-primed wall overnight.
Manufacturer guidance recommends checking substrate moisture and letting the wall dry fully before priming, not just before painting.
A water-based stain-blocking primer can work for light nicotine staining, but “paint-and-primer-in-one” products almost never seal heavy smoke damage on their own.
Many decorators apply one thin shellac coat, test with the topcoat, and only add a second primer coat if staining still bleeds through. This keeps costs sensible without risking adhesion problems.
Our guide to shellac primer and nicotine staining covers the same product logic in more detail if you’re dealing with a lighter tobacco smell rather than fire damage. And if you’re unsure what priming actually does structurally to a wall, this primer basics guide is worth a read before you buy anything.
How many coats of paint do smoke damaged walls need?
Once the primer’s cured properly, the topcoat itself doesn’t need to be anything special. A normal quality emulsion goes on fine, because the shellac layer underneath is doing the actual sealing work.
Two coats is standard for even coverage and colour consistency, even over a well-sealed wall.
Use a roller for open wall areas and a brush for edges and corners, keeping a wet edge to avoid visible lap marks.
Let the first coat dry fully and check for any bleed-through before applying the second. If staining reappears, that’s your cue for another primer coat, not another topcoat.
Ventilate the room while painting and drying. Trapped moisture slows curing and can dull the finish.
If you’re patching rather than repainting a whole wall, feather the edges with a slightly wider roller pass to avoid a visible tide line where old and new paint meet.
For technique on getting a clean, professional-looking finish once you’re at this stage, our guide to painting walls at home walks through roller and brush habits that make the biggest visible difference.
When should you stop and call a restoration professional?
Some situations aren’t solved by better technique, only by different equipment and training.
Odour persists after correct dry cleaning, wet cleaning, and a shellac primer coat. That points to hidden contamination, not a painting problem.
Soot has visibly travelled through ductwork or vents, which needs professional HVAC decontamination.
Soot is wet, waxy, or tar-like rather than dry and powdery, a sign of a hotter, more damaging fire.
Structural elements, wiring, or insulation show fire damage, which is a safety issue before it’s a decorating one.
A restoration contractor typically handles insulation and drywall removal, HVAC cleaning, and thermal fogging. When getting quotes, ask exactly what’s included in scope, whether moisture readings are taken before sealing, and how they handle drywall that’s swollen from earlier water exposure. If drywall has already started delaminating, replacing the affected section is often cheaper than trying to save it.
What do decorators actually see on smoke damage jobs?
Most DIY attempts fail for one reason: people paint before the wall is actually clean and dry, then wonder why yellow patches bleed through a fresh coat weeks later. The fix isn’t a better paint, it’s patience with the cleaning stages first. A professional visit for smoke damage typically costs more upfront than a DIY weekend, but it avoids repainting the same wall twice.
— Angus
How Abrushwithgus can take this off your hands
If reading through cleaning stages, recoat windows, and drywall moisture checks has you thinking this sounds like a lot of careful sequencing to get right once, that’s a fair reaction. Professional painting services are available that handle the full process, from assessment through to final coats, so you don’t have to time a shellac primer’s 20-minute recoat window around a weekend.

A typical service visit starts with an honest look at the damage; light surface soot gets treated differently to a room that’s had heavier fire exposure, and specialists will advise if a wall needs specialist attention rather than a repaint. Our interior cleaning service covers the dry and wet cleaning stages, and our domestic painting service handles priming and finish coats once the wall’s ready. For UPVC frames or exterior surfaces caught in the same fire, our spraying service gets those back to a factory finish too. Get in touch for an assessment and quote to understand what your walls need before any painting work begins.
Sources
Recommended
Comments