
Wall preparation essentials: get a lasting, professional finish
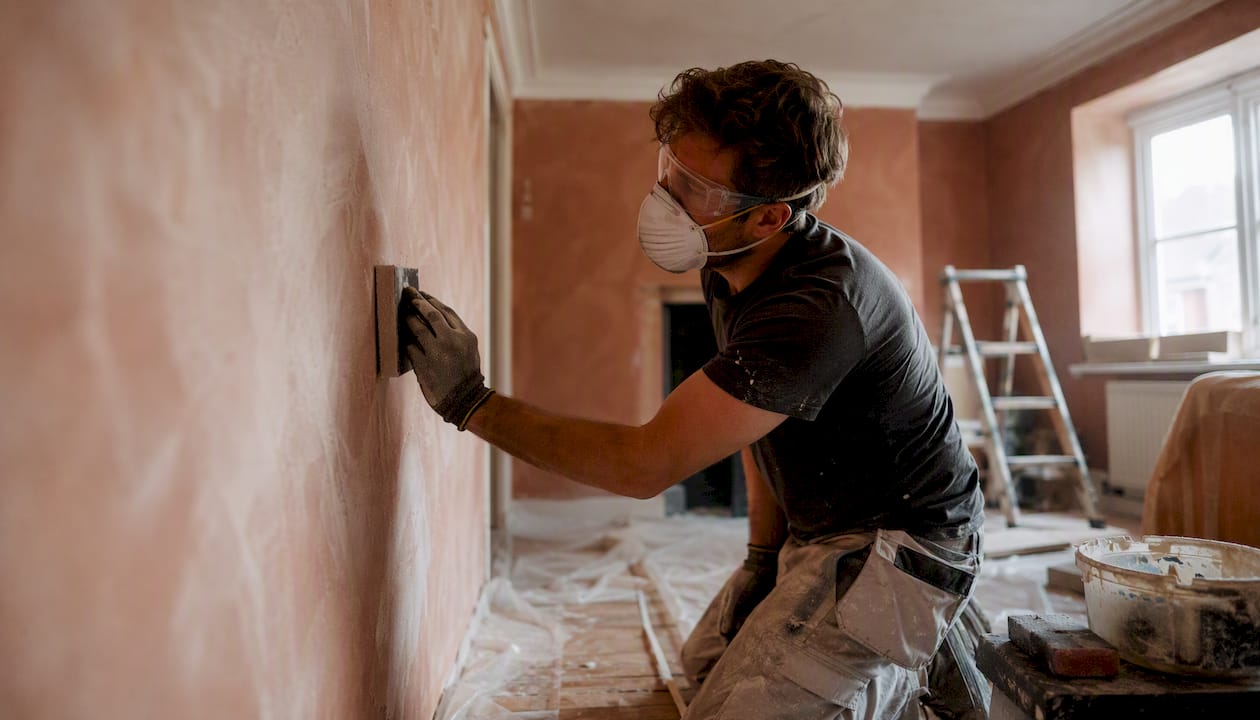
Thorough wall preparation — cleaning, repairing, sanding and priming — is what separates paint that lasts a decade from paint that peels within a year. Before you open a single tin, you need four things sorted: clean walls, filled holes, sanded surfaces and the right primer. Products like sugar soap, Polycell Polyfilla, Dulux Primer & Undercoat, and the guidance from Abrushwithgus will take you through each stage.
The four core steps at a glance:
Clean — wash with sugar soap, rinse and let the wall dry fully
Repair — fill cracks and holes with the correct filler for the depth
Sand — smooth filled areas and any rough patches, then remove all dust
Prime — apply the right primer for your substrate before any topcoat
Key takeaways
Thorough wall preparation — cleaning, repairing, sanding and priming in sequence — is the single most reliable way to achieve a finish that holds.
Point | Details |
Clean before anything else | Wash with sugar soap, rinse and dry fully; residue prevents primer bonding. |
Match filler to the repair | Use lightweight filler for small holes, deep repair filler in layers for holes over 5mm. |
Sand with the right grit | 120-grit for general smoothing, 80-grit for rough plaster; remove all dust before priming. |
Prime every patched area | Filler absorbs paint differently; spot-prime to avoid dull patches in the topcoat. |
Abrushwithgus | Handles prep, repairs and painting for homeowners in Cornwall and the South West. |
Table of Contents
What are the wall preparation essentials you actually need?
Having the right kit before you start saves two trips to the DIY shop and prevents the most common mid-job delays. The Prestige Painting Solutions prep guide recommends keeping both 120-grit and 80-grit sandpaper to hand, alongside a full set of filling and cleaning materials.
Tools:
Filling knives (25mm and 100mm)
Sanding block or orbital sander
Scraper / stripping knife
Paintbrushes and rollers
Masking tape (low-tack for delicate surfaces)
Dust sheets (cotton preferred)
Bucket and sponge
Materials:
Sugar soap (liquid or powder)
Lightweight ready-mixed filler (e.g. Polycell Polyfilla)
Deep repair filler for holes over 5mm
Flexible decorator’s caulk for skirting and architrave gaps
Dulux Primer & Undercoat or a specialist stain-blocking primer
PVA or plasterboard primer for new board
Item | Use | UK example |
Sugar soap | Degrease and clean painted walls | Polycell or Bartoline sugar soap |
Lightweight filler | Small holes, hairline cracks | Polycell Polyfilla Ready Mixed |
Deep repair filler | Holes deeper than 5mm | Deep repair filler |
Primer/undercoat | Seal and even absorption | Dulux Primer & Undercoat |
Stain-blocking primer | Water, nicotine or mould stains | Zinsser BIN or Bulls Eye 1-2-3 |
Plasterboard primer | New board or bare plaster | Dulux Plasterboard Sealer |
Pro Tip: Wear a P2 dust mask and safety goggles whenever you sand. For any task involving old coatings on pre-1970s walls, add disposable gloves and consider a half-face respirator until you have confirmed there is no lead paint present.
How to clear and protect the room before you start
Skipping this step costs more time than it saves. Move furniture to the centre of the room or out entirely, then cover it with dust sheets. Cotton dust sheets are worth the small extra cost over thin plastic: they grip the floor rather than sliding, and they absorb sanding dust instead of letting it drift back onto your freshly cleaned walls.
Remove pictures, curtain rails, switch plates and socket covers where safe to do so
Lay dust sheets over floors and any furniture you cannot move; tape the edges down
Apply low-tack masking tape along skirting boards, window frames and door architraves
Protect light fittings with a plastic bag secured with tape
For kitchens, protect fixtures and fittings before any sanding begins
Pro Tip: Always work top to bottom — ceiling dust falls onto walls, wall dust falls onto skirting. Doing it in reverse means cleaning the same surface twice.
How to clean walls and remove flaky paint before filling
Dulux advises a short, repeatable sequence: wash, rinse, scrape and dry. Skipping the rinse is the step most people miss — sugar soap residue left on the wall prevents primer from bonding properly.
Mix sugar soap solution according to the packet (typically one part concentrate to four parts warm water for liquid versions)
Wash the wall from top to bottom using a sponge or cloth, working in sections
Rinse with clean water and a fresh cloth; change the rinse water frequently
Allow the wall to dry for at least two hours before touching it again
Scrape away any loose or flaking paint using a stripping knife held at a low angle; do not gouge the plaster
Check for damp patches, mould or discolouration — treat mould with a dilute bleach solution (3–4 parts water to 1 part bleach), rinse and dry thoroughly before priming
If you suspect active damp rather than an old stain, investigate and fix the source before painting
New plasterboard does not need washing, but any previously painted wall does, regardless of how clean it looks.
Which filler should you use and how do you apply it?
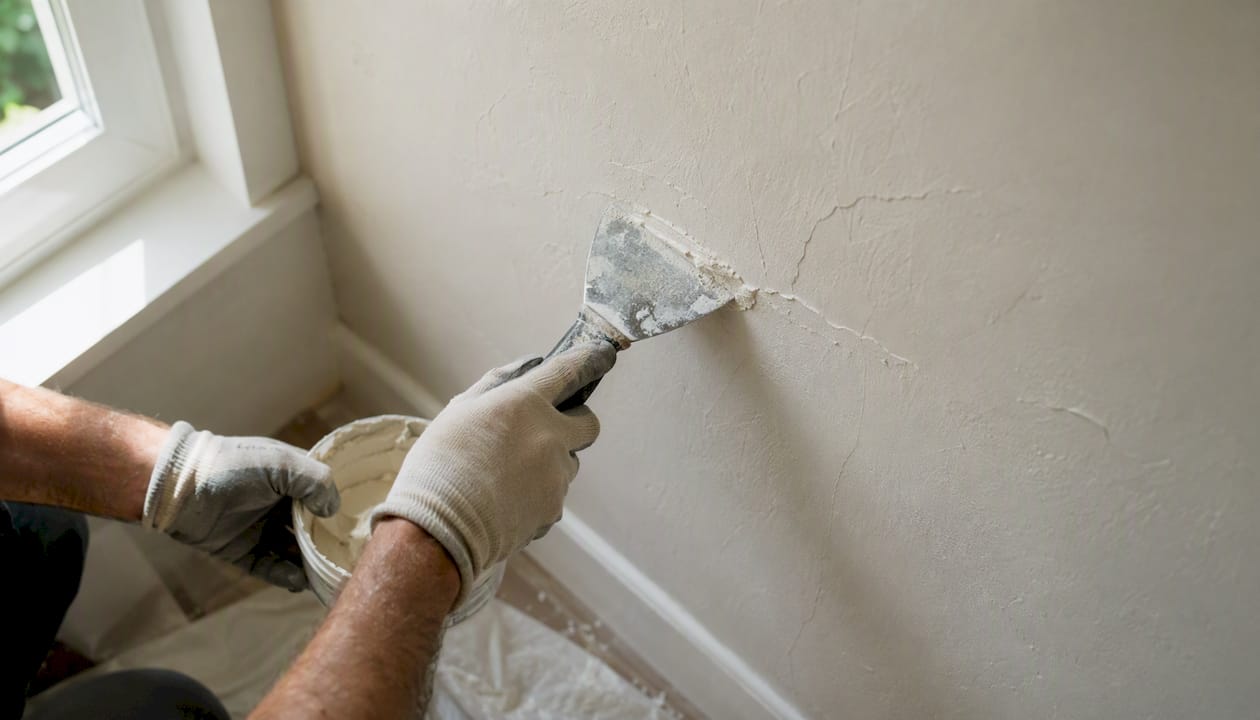
Choosing the wrong filler is one of the most common reasons patches show through the finished coat. Lightweight ready-mixed fillers like Polycell Polyfilla suit hairline cracks and nail holes up to about 5mm. For anything deeper, use a deep repair filler applied in layers, letting each layer dry before adding the next.
Filler type | Best use | Typical dry time |
Lightweight ready-mixed | Hairline cracks, small holes up to 5mm | 1–2 hours |
Quick-dry powder filler | Larger holes needing a fast turnaround | Allow several hours for drying |
Deep repair / 2-part filler | Holes deeper than 5mm, structural repairs | 4–6 hours or overnight |
Flexible decorator’s caulk | Gaps at skirting, architraves, coving | Skin forms quickly after application |
How to fill correctly:
Open hairline cracks slightly with a scraper or filling knife so the filler has something to grip
Press filler firmly into the hole with a filling knife, slightly overfilling
For deep holes, apply in layers no thicker than 5mm; let each layer dry before adding the next
Once dry, sand flush with 120-grit paper
Spot-prime every patched area before painting — filler absorbs paint at a different rate to the surrounding wall and will show as a dull patch if left unprimed
How to sand walls safely and remove dust before priming
Use 120-grit sandpaper for general smoothing and 80-grit for rough plaster. A sanding block gives you more control on flat patches; an orbital sander saves time on larger areas but creates significantly more dust.
Run your hand across filled areas — if you can feel a ridge, it needs more sanding
Sand in circular motions, then finish with light strokes in one direction
Vacuum the wall surface with a brush attachment before wiping with a barely damp cloth
Let the wall dry again before priming; even a slightly damp surface will cause adhesion problems
Wear your P2 dust mask throughout and keep windows open for ventilation
For a detailed breakdown of sanding technique and grit selection, the Abrushwithgus guide covers hand versus machine sanding in full.
When should you prime, and what painting order gives the best result?
Primers even out absorption and improve adhesion, which reduces the number of topcoats you need. The type of primer matters as much as whether you use one.
Choosing the right primer:
New plaster: apply a mist coat (emulsion thinned 10% with water) first; follow with a proper primer once absorbed
Plasterboard: use a dedicated plasterboard primer or diluted PVA before any paint
Patched areas: spot-prime with the same primer you are using for the walls; filler absorbs paint differently and will show through without this step
Water or nicotine stains: use a shellac or oil-based stain-blocking primer (Zinsser BIN is widely available in the UK); standard emulsion will not seal these
Dulux Primer & Undercoat suits most previously painted walls. Allow it to dry for the time stated on the tin — typically two hours for a water-based version — before applying your topcoat.
Painting order:
Ceilings first
Walls, working away from the main light source to spot wet edges and avoid lap marks
Windows, frames and door architraves
Skirting boards last
For a full walkthrough of painting technique and order, the Abrushwithgus guide on professional results at home covers each stage.
What causes paint to peel, blister or look patchy?
Skipped or inadequate preparation is the primary cause of paint failure — peeling, colour bleed and uneven wear almost always trace back to something missed in prep.
Peeling paint: usually caused by painting over damp, dirty or poorly keyed surfaces; strip back to a sound substrate and start the prep sequence again
Blistering: trapped moisture beneath the film; investigate the damp source before repainting
Patchiness: missed spot-priming on filled areas, or painting over unprimed new plaster
Wallpaper residue: old adhesive left on the wall prevents paint from bonding; wash with warm water, scrape off any remaining paste and allow to dry fully
Nicotine or mould stains bleeding through: these require a stain-blocking primer, not extra topcoats
Incompatible paint systems: oil-based paint over water-based (or vice versa) without the correct preparation can cause delamination
When damp is active rather than historic, or when plaster repairs cover a large area, calling a professional is the faster and cheaper long-term choice.
PPE, dust control and safe disposal in the UK
The Abrushwithgus safety guide covers PPE in detail, but the essentials are straightforward.
Wear a P2 dust mask when sanding; upgrade to a half-face respirator for large areas
Safety goggles protect against filler dust and splashes during cleaning
Nitrile gloves when handling sugar soap concentrate or bleach solutions
Open windows and use a vacuum with a dust-extraction bag rather than sweeping
Disposal in the UK:
Leftover paint: take to your local household waste recycling centre (civic amenity site); never pour down the drain
Dried filler and sanding dust: can go in general waste once fully dry
Contaminated cloths (bleach, solvent): seal in a bag and check your local council guidance before disposal
Lead paint warning: walls painted before 1970 may contain lead. If you suspect this, stop sanding immediately, seal the area and seek professional advice before continuing. Do not sand or scrape lead-painted surfaces without specialist equipment.
Practical shortcuts from Abrushwithgus that still deliver quality
The most common mistake Angus sees on domestic jobs is homeowners painting the same day they fill. Filler that looks dry on the surface can still be damp inside, and paint applied too soon will crack as the filler continues to cure.
Fill the night before you plan to sand; deep repairs genuinely need overnight
Use a bright torch held at a raking angle across the wall to spot low spots and ridges you would miss under normal room lighting
A second thin coat of filler is almost always faster than trying to sand a single thick coat flat
For new homeowners tackling a first paint project, a printed checklist pinned to the wall keeps the sequence on track
Pro Tip: After priming, run your hand across the surface in good raking light. Any grit or dust that settled during drying will feel rough. A very light pass with 180-grit paper and a wipe-down takes two minutes and prevents a textured finish in your topcoat.
When a job involves persistent damp, large-scale plaster repairs or extensive stain-blocking across multiple rooms, the time and material costs of DIY can quickly exceed a professional quote.
Does temperature or humidity affect how paint dries?
Both matter more than most homeowners expect. Paint applied in cold or humid conditions dries slowly and unevenly, and the bond to the substrate is weaker.

Most UK paint manufacturers recommend applying emulsion between 10°C and 25°C. Below 10°C, water-based paints struggle to coalesce properly and the film can remain tacky or crack as it cures. Above 25°C, paint dries too fast, leaving lap marks and brush drag.
Humidity is the less obvious factor. In Cornwall and the South West, where coastal air keeps humidity higher than inland areas, this is a genuine consideration rather than a theoretical one. Ventilate the room during painting and for several hours afterwards, but avoid creating a cold draught in winter — a gentle airflow is the goal, not a wind tunnel.
Check the weather before starting exterior prep or painting. A dry spell of at least two to three days gives surfaces time to dry out after cleaning and allows each coat to cure before the next.
Why Abrushwithgus puts preparation first
Preparation is not the glamorous part of decorating, but it is the part that determines whether the finished job looks good in five years or five months. Every project Abrushwithgus takes on in Cornwall and the South West starts with a thorough assessment of the surface condition — checking for damp, testing adhesion and identifying any staining that needs specialist treatment before a brush goes near the wall. That approach is what produces the clean, lasting finishes the firm’s clients come back for.
Professional prep and painting in Cornwall and the South West
Solid prep work takes time, and on larger rooms or properties with damp, staining or damaged plaster, the material and labour costs of doing it yourself can mount quickly. Abrushwithgus offers domestic painting and decorating services across Cornwall and the South West, handling everything from surface assessment and repairs through to the finished coat — so you get a professional result without the guesswork of sourcing the right primers and fillers for your specific walls.

The team also provides a property preparation and cleaning service for homeowners who want surfaces properly assessed and cleaned before any decorating begins. Get in touch with Abrushwithgus for a no-obligation quote on your next project.
Sources
Recommended
Comments