
Yes, you can paint pebbledash. Here's how to do it properly
- WM Creative Designs Limited
- 2 hours ago
- 10 min read
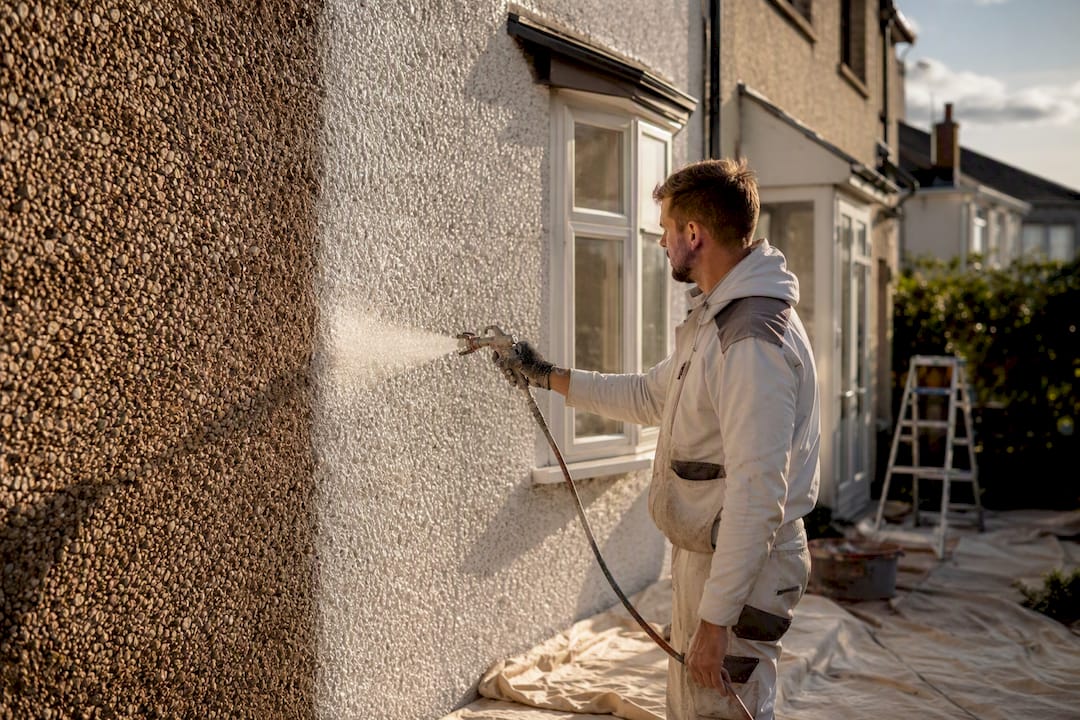
Painting pebbledash is one of the most cost-effective ways to modernise a tired UK exterior, and yes, it’s a job most homeowners can tackle themselves if the wall is sound. For a full-height façade, spray application gives the most even coverage and saves hours of back-breaking work. A brush or long-pile roller works fine for smaller jobs, porches, or careful cutting-in around windows. The one rule that overrides everything else: inspect and repair the surface first, then use a breathable masonry paint suited to British weather.
Sound, dry pebbledash with no loose stones = good candidate for DIY painting.
Large areas or tight timescales = spray application, hired or professional.
Small walls, porches, or detail work = brush and long-pile roller.
Cracks, damp patches, or crumbling stones = repair before you touch a paintbrush.
Key Takeaways
Painting pebbledash succeeds when the surface is properly assessed and repaired first, breathable masonry paint is used, and the application method matches the size of the job.
Point | Details |
Inspect before you paint | Tap-test for hollow sounds and check for damp, cracks, or loose stones before buying any paint. |
Choose breathable paint | Silicone-enhanced or breathable masonry paint prevents moisture becoming trapped behind the finish. |
Match method to job size | Spray suits full façades, while brush and long-pile roller work well for smaller DIY areas. |
Budget extra paint | Plan for more paint than a smooth wall would need, plus drying buffer days for UK weather. |
Call in help when needed | Abrushwithgus handles repairs, stabilising, and spray application for larger or damaged pebbledash walls across the South West. |
Table of Contents
Is painting pebbledash a good idea? Pros, cons and red flags
Preparing pebbledash: inspection, cleaning and repairs for UK weather
Brush, roller or spray: which application method suits your job?
What does painting pebbledash cost and how long does it take?
How long does painted pebbledash last and how do you maintain it?
What A Brush With Gus has learned painting pebbledash across Cornwall
Is painting pebbledash a good idea? Pros, cons and red flags
Pebbledash paint transforms a dated 1930s or 1970s semi into something that looks properly cared for, and it does it for a fraction of the cost of rendering over the top. A good breathable masonry paint also adds a genuine layer of weather protection, which matters when your wall is facing the prevailing wind and rain off the Atlantic. Done well, it’s one of the better value-for-money jobs a homeowner can commission or attempt.
The catch is that paint doesn’t fix problems, it just makes them harder to spot. If the dash is already failing, painting over it can trap moisture behind the surface and accelerate the damage rather than stopping it, so a degraded wall genuinely needs repair before repainting rather than a fresh coat.
Watch for these before you commit to a colour:
Loose or hollow-sounding stones when you tap the wall.
Persistent damp patches that don’t dry out between showers.
Cracks wider than a hairline, especially near window and door frames.
Render that crumbles or comes away when you brush it.
Pro Tip: Tap the wall in a grid pattern with the handle of a screwdriver. A dull, hollow sound means the render has detached from the substrate underneath, and no amount of paint will fix that.
Preparing pebbledash: inspection, cleaning and repairs for UK weather
Getting this stage right decides whether your paint job lasts five years or fifteen. Rushing straight to the roller is the single biggest mistake DIY painters make on pebbledash.
Inspect thoroughly. Walk the full perimeter, check for the red flags above, and press gently on any suspect areas. Note damp patches, especially near gutters and downpipes, since leaking rainwater goods are a common hidden cause of pebbledash failure.
Clean the surface. A stiff brush and hose or a low-pressure wash removes loose dirt and dust; if algae or moss is present, consider professional driveway cleaning and moss treatment to prepare the surface thoroughly. If you spot algae or green staining, treat it with a fungicidal wash before doing anything else, since painting over algae just seals it in. Avoid high-pressure washers unless you really know what you’re doing. Too much force strips render and dislodges stones rather than cleaning them.
Repair defects. Fill hairline cracks with a flexible masonry filler and re-bed any loose stones with a suitable render mix. If you’re looking at cracked sections wider than a few millimetres or large areas of detachment, call a render specialist rather than patching it yourself.
Stabilise or mist coat. Bare, chalky, or highly absorbent render benefits from a proper stabilising solution, applied strictly per the manufacturer’s instructions. Avoid anything marketed as a “sealant” for the pebbles themselves; sealing the stones rather than stabilising the surface underneath is a common cause of poor adhesion later on.
Pro Tip: A thinned mist coat on bare, absorbent render is a small extra step that dramatically cuts the risk of your top coats flaking within the first winter.
For a deeper look at repair techniques before you paint, our guide to wall preparation essentials covers the process in more detail.
What tools and paint do you need for pebbledash?
Pebbledash eats paint and equipment differently to a smooth wall, so it pays to plan the shopping list properly rather than guessing.
Long-pile rollers (18mm to 32mm pile), such as the Axus Captain Chunk or Purdy Colossus ranges, push paint into the recesses between stones that a standard roller skates over.
A decent masonry brush for cutting in around windows, doors, and edges where a roller can’t reach cleanly.
Masking materials: heavy-duty tape, dust sheets, and polythene sheeting for anything spray-related.
PPE: safety goggles, a dust mask, and gloves, plus a proper platform or tower if you’re working above single-storey height rather than balancing on a ladder.
On paint, choose a breathable masonry paint or a trade-grade silicone-enhanced masonry paint. Breathability matters more in the UK than almost anywhere else in Europe, because a non-breathable film traps moisture inside the wall through our long damp winters, leading to blistering and eventual failure. Silicone-enhanced masonry paints combine that breathability with genuine hydrophobic performance, shedding rainwater rather than absorbing it.
Because pebbledash is so porous, expect to use more paint than the equivalent smooth-render wall, factoring in waste from splatter and back-brushing. Budget accordingly before you buy.
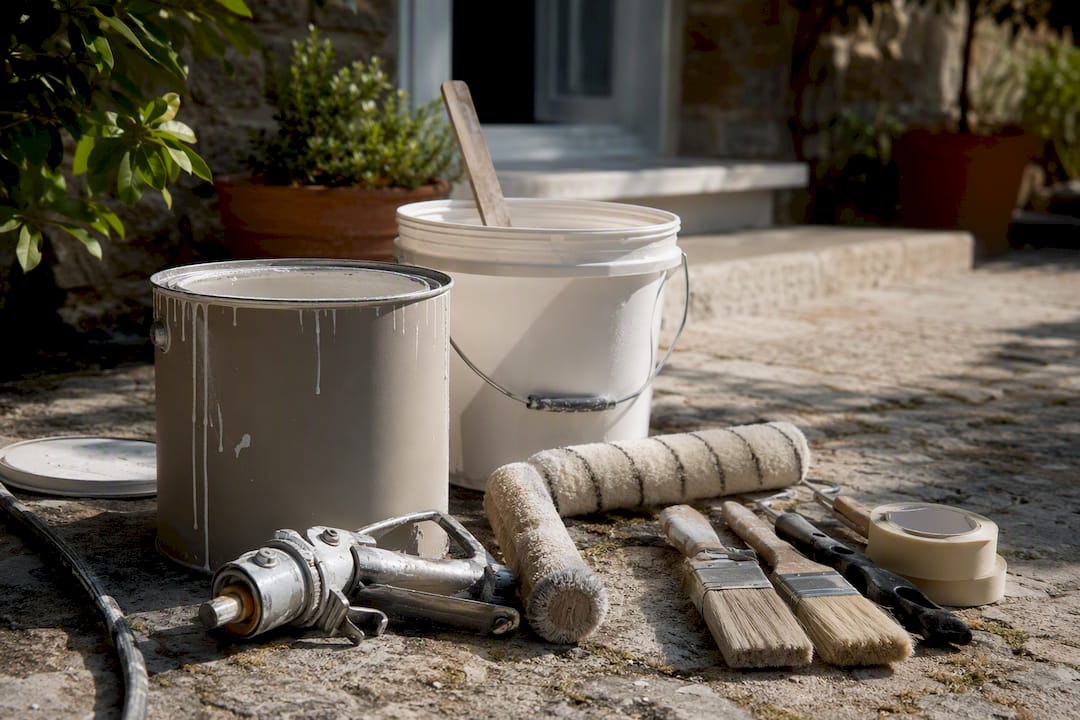
If you’re hiring an airless sprayer, ask the hire company about tip size (a 515 tip suits textured masonry well), hose length for your property, and whether they’ll show you how to clean it properly, since a clogged sprayer is the most common reason DIY spray jobs go wrong.
Brush, roller or spray: which application method suits your job?
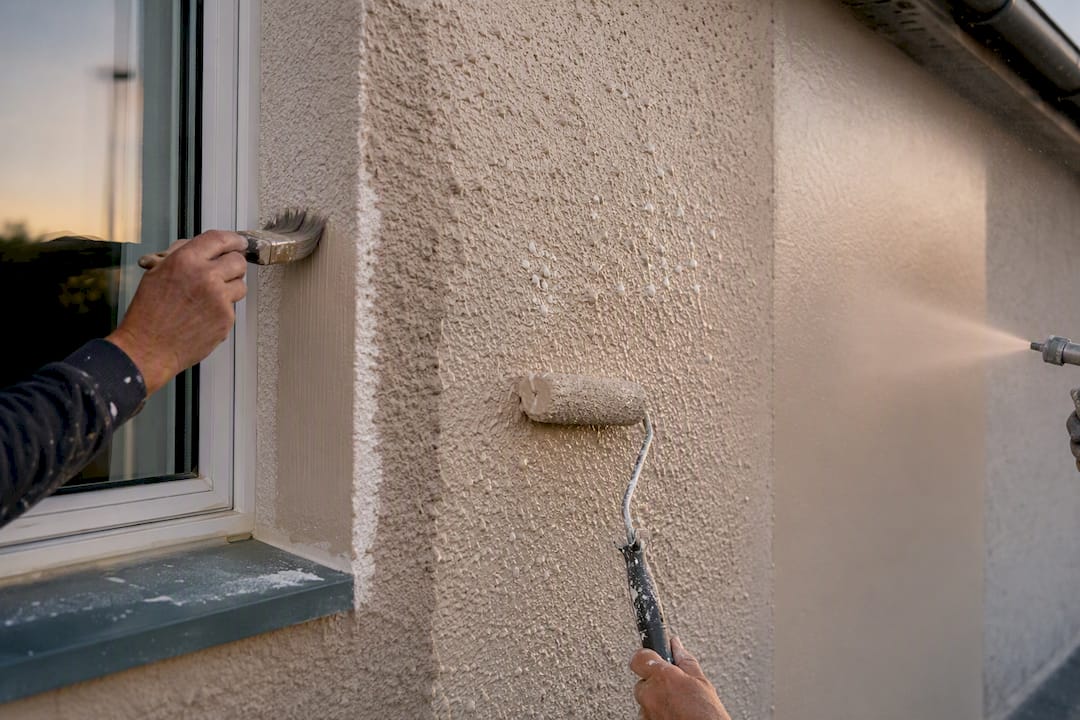
The method you choose depends far more on the size of your job and your patience than on which one produces the “best” finish, because all three can look excellent when done properly.
Brush gives you total control. It’s the right tool for cutting in around frames, working into corners, and small repair patches, but painting a whole gable end by brush alone is a multi-day slog most people regret by the second wall.
Long-pile roller is the realistic DIY sweet spot. It covers ground faster than a brush and, when you back-brush into the recesses afterwards, gets paint properly into the texture rather than just skimming the high points.
Airless spray is the fastest and most even option for a full façade, and it’s what most professionals reach for on anything bigger than a porch. The trade-off is masking: overspray travels further than people expect, so windows, cars, plants, and neighbouring walls all need protecting properly before you start.
Method | Best for | Labour intensity | Equipment cost | Coats needed | Finish quality |
Brush | Small repairs, edges, cutting in | High | Low (brushes only, cost varies) | 2 or more | Good, but visible brush texture |
Long-pile roller | Small to medium DIY façades | Medium | Low to moderate (£30 to £60) | 2, plus back-brushing | Very good with technique |
Airless spray | Whole-house jobs, large areas | Low (with hire) but high skill | Moderate (equipment hire for spraying, cost varies) | 2, sometimes with a mist coat first | Excellent, most even |
As a decision rule: spray for whole-house jobs or a tight time window, roller and brush for smaller façades where you’re happy to spend a weekend on it rather than a single day.
How to paint pebbledash step by step
Once the wall is prepped and dry, the actual painting follows a fairly predictable sequence, whichever method you’re using.
Check the weather window first. UK conditions mean you need at least two to three consecutive dry days, avoiding early morning dew and forecast rain during the curing period, since rushed drying is the most common cause of premature failure.
Protect everything you’re not painting. Mask window frames, doors, and any UPVC trim, cover plants and paths with dust sheets, and move cars away from the working area, particularly if you’re spraying.
Apply a mist coat if the render is bare or highly absorbent. Thin the first coat per the manufacturer’s instructions and allow it to dry fully before moving on. This single step does more for longevity than almost anything else in the process.
Apply the first full coat. If spraying, work in overlapping vertical passes and follow immediately with a dry roller back-rolled over the wet paint to force it into the recesses. If rolling by hand, load the long-pile roller generously and work it into the texture with a scrubbing motion rather than a light pass.
Allow proper drying time before the second coat. In damp UK weather, this often means waiting a full day rather than the two to four hours quoted on a warm, dry can label.
Apply the second coat, checking against strong daylight for thin or missed patches, particularly in recessed areas.
Do a final check and tidy up. Remove masking once fully dry, check gutters and downpipes for paint splatter, and note the date so you know when to plan a recoat.
Pro Tip: Don’t trust the tin’s stated drying time on a grey British afternoon. Touch-test an inconspicuous patch before committing to the next coat; painting over damp render is how blistering starts.
What does painting pebbledash cost and how long does it take?
For a typical three-bedroom semi, professional pebbledash painting tends to sit well above the cost of painting the same area of smooth render, largely because of the extra paint volume, the labour-intensive back-brushing, and any scaffolding needed for upper storeys. Specialist silicone-enhanced paints and structural repairs push the price higher still, particularly where a render specialist needs to re-bed stones before anyone picks up a brush.
Going the DIY route changes the maths considerably. Rough cost drivers to budget for:
Breathable or silicone masonry paint, remembering the 25 to 50% higher volume pebbledash demands.
Long-pile rollers, brushes, and masking materials.
Airless sprayer hire, if you’re covering a full façade.
Access equipment: tower scaffold hire or a decent ladder setup for anything above ground floor.
On timeline, allow a full weekend for prep and repairs alone on an averagely weathered wall, then a further two to three days for mist coat, two full coats, and drying time between each, and add a buffer day or two for unpredictable UK weather. If your wall has significant repairs, damp issues, or you simply don’t have three or four dry days free in a row, hiring a professional usually works out better value than a DIY job stretched over several damp weekends.
How long does painted pebbledash last and how do you maintain it?
Well-prepared, properly painted pebbledash with a quality breathable finish typically lasts well over a decade before it needs recoating, though exposed coastal walls facing driving rain and salt air will weather faster than a sheltered garden-side elevation. Skimping on prep, using a non-breathable paint, or painting over damp render are the three things most likely to cut that lifespan short.
Maintenance is mostly about staying ahead of small problems:
Rinse down annually to remove general grime and prevent algae taking hold.
Treat any green or black staining with a fungicidal wash as soon as you spot it, rather than waiting for it to spread.
Patch small chips or scuffs promptly with matching paint before moisture gets behind the film.
If you do see problems, they usually point to a specific cause. Flaking generally means the paint went on over damp or dirty render, or a non-breathable product was used. Patchy coverage almost always means the roller or spray pass didn’t reach into the recesses properly, which is why back-brushing matters so much. Both are fixable with a proper strip-back and reapplication rather than simply adding another coat on top.
What A Brush With Gus has learned painting pebbledash across Cornwall
Angus and his brother Rhys have built A Brush With Gus around jobs exactly like this: tired exterior walls across Cornwall and the wider South West that need more than a quick coat of paint to look right again. Working on properties facing the Atlantic weather has taught the team where corners genuinely cannot be cut.
On site, that means:
Never skipping the tap test on suspect walls, even when a homeowner is keen to get started.
Defaulting to spray with a back-roll on full façades, reserving brush and roller for smaller jobs and detail work.
Insisting on a stabiliser or mist coat on any bare or chalky render, whatever the schedule pressure.
The walls that come back to us within two years almost always have one thing in common: someone painted over a problem instead of fixing it first.
What matters more than the paint you choose
Most guides to pebbledash painting spend their energy comparing paint brands, when the real variable that decides whether a job lasts is what happens before the tin gets opened. Conventional DIY advice tends to treat prep as a box-ticking exercise: clean it, prime it, get painting. In practice, the wall itself dictates the schedule far more than any product choice does.
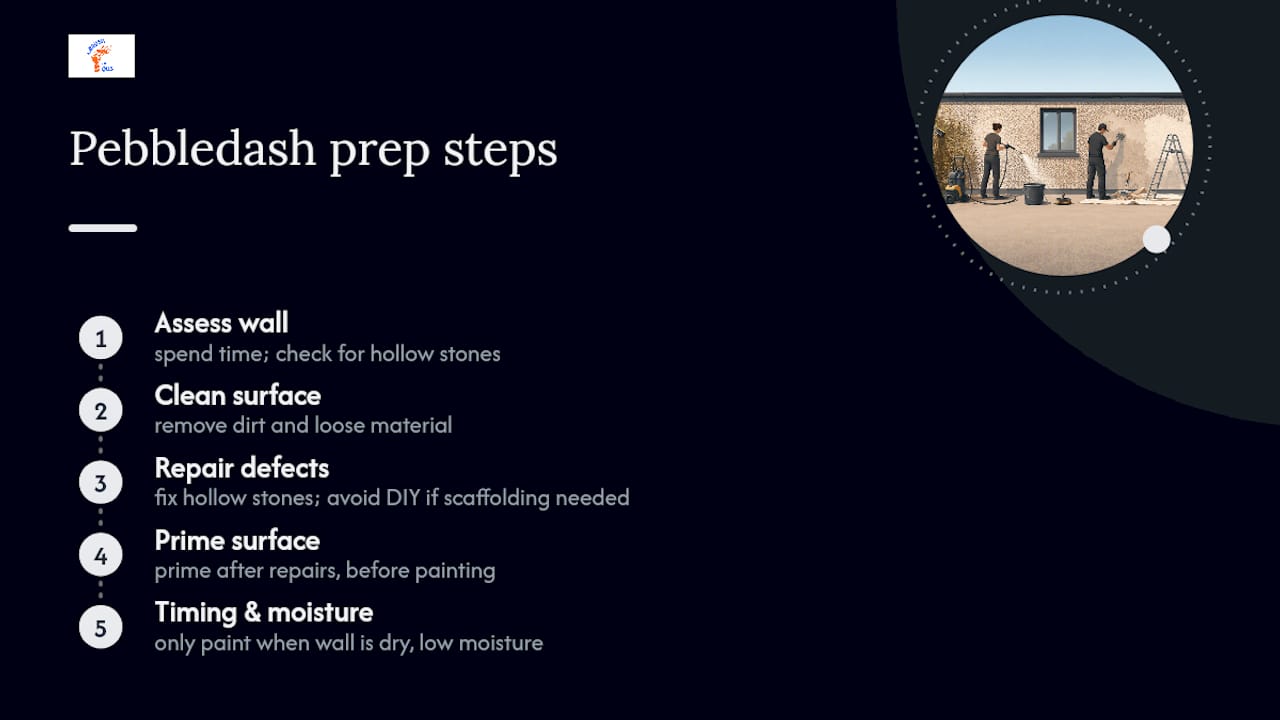
The judgement worth taking from this guide is straightforward: spend disproportionate time on the assessment stage, even if it feels like you’re delaying the satisfying part of the job. A wall that looks fine from the pavement can still be hollow behind several stones, and painting over that doesn’t buy you time, it just moves the repair bill a year or two down the road and makes it bigger.
Where DIY genuinely makes sense is smaller, well-maintained walls with no red flags. Where it doesn’t is anything involving scaffolding, significant repairs, or a wall you’re not confident assessing yourself. That’s not a sales pitch, it’s just where the risk-to-reward ratio tips against a weekend project.
— Angus
Get a professional finish without the DIY risk
If your assessment turned up loose stones, damp patches, or a wall bigger than you fancy tackling with a roller over a weekend, that’s exactly the kind of job Abrushwithgus handles across Cornwall and the South West. The advantage of bringing in a specialist isn’t just saved weekends, it’s the repair work done properly first, the right breathable or silicone masonry paint applied at trade-standard coverage, and airless spraying handled by people who do it daily rather than for the first time.

A proper quote should cover surface repairs, paint specification, number of coats, and how overspray and surrounding areas will be protected. Worth asking any contractor how they handle stabilising bare render and what warranty backs the finish. If cleaning is needed first, our exterior cleaning service tackles algae and grime before a single coat goes on, and for the painting itself, our exterior home services cover everything from repair to final coat. Get in touch for a local quote and a straight answer on what your wall actually needs.
Sources
Recommended
Comments