
Step by step exterior cleaning for UK homeowners
- WM Creative Designs Limited
- Jun 17
- 9 min read
TL;DR:
Step-by-step exterior cleaning restores home surfaces safely by following a sequence of inspection, preparation, application, dwell, rinsing, and drying. Using appropriate tools, surface-specific techniques, and addressing environmental factors prevents damage and ensures long-lasting results. Professional help is recommended for complex or fragile surfaces to avoid costly mistakes and surface damage.
Step by step exterior cleaning is a systematic method for restoring your home’s outside surfaces safely, without causing damage or wasting effort. The industry term for this approach is exterior surface washing, which covers everything from soft washing fragile vinyl siding to pressure washing brick and concrete. Done correctly, it follows a clear sequence: inspect, prepare, apply, dwell, rinse, and dry. This guide covers the full process, including the right tools, surface-specific techniques, and how to handle stubborn algae and moss. Follow it and you will get professional-level results without professional-level mistakes.
What tools and preparations do you need before starting?
The right preparation separates a clean finish from a damaged one. Before you touch a surface, gather every tool you need and complete all safety checks. Rushing this stage is the single most common reason DIY exterior washes go wrong.
Essential tools and materials:
Pressure washer (electric or petrol, rated 1,500–2,500 PSI for most home exteriors)
Wide fan nozzle (25° or 40°) and a low-pressure soap nozzle
Garden hose with adjustable spray head
Soft-bristle brush or long-handled scrubbing brush
Exterior cleaning detergent appropriate to your surface type
Sodium hypochlorite solution (diluted) for mould and organic growth
Safety goggles, waterproof gloves, and non-slip footwear
Plastic sheeting or tarpaulins to cover plants, outdoor furniture, and electrical fittings
Preparatory steps before you begin:
Start by inspecting for damage such as cracked render, loose pointing, or flaking paint. Cleaning over damaged surfaces forces water into gaps and worsens the problem. Remove loose debris by hand or with a dry brush. Close all windows and doors, and seal any external electrical sockets with tape.
Pre-wet surrounding plants and cover valuables before washing to prevent damage from splash or chemical runoff. Pre-wetting dilutes any cleaning solution that reaches your garden, protecting lawns and borders. Cover outdoor lights and power points with plastic bags secured with tape.

Pro Tip: Always test your chosen detergent on a small, hidden patch of the surface first. Leave it for five minutes and check for discolouration or surface reaction before committing to the full area.
Surface Type | Recommended PSI | Nozzle Type |
Vinyl siding | 1,200–1,500 | 40° fan |
Painted render | 1,200–1,500 | 40° fan |
Brick and stone | 1,500–2,000 | 25° fan |
Concrete paths | 2,000–2,500 | 25° fan |
Timber decking | 1,200–1,500 | 40° fan |
How do you clean exterior surfaces step by step?
The correct cleaning steps for exteriors follow a fixed order: inspect, remove debris, pre-rinse, apply cleaner, dwell, scrub if needed, rinse thoroughly, and allow to dry. Skipping steps or reversing the order causes streaking, residue, and surface damage.
The core cleaning sequence
Inspect the surface. Walk the full perimeter and note any cracks, loose material, or areas of concern. Mark them with chalk so you can avoid high pressure on those spots.
Remove loose debris. Brush away leaves, cobwebs, and dry dirt with a soft brush. This prevents debris from scratching surfaces during the wet wash.
Pre-rinse with low pressure. Use your garden hose or pressure washer on the lowest setting to wet the surface. This prevents detergent from absorbing too quickly into dry material.
Apply detergent bottom to top. Apply detergent upward to prevent streaking from runoff on dry surfaces. Keep the nozzle roughly 30 centimetres from the surface and work in manageable sections of around two square metres.
Allow a dwell time of 5–10 minutes. The chemistry needs time to break down dirt, mould, and organic matter. Do not let the solution dry. If the sun is strong or the surface dries quickly, mist it again with plain water.
Scrub stubborn areas. Use a soft-bristle brush on joints, corners, and textured surfaces where the washer cannot reach effectively.
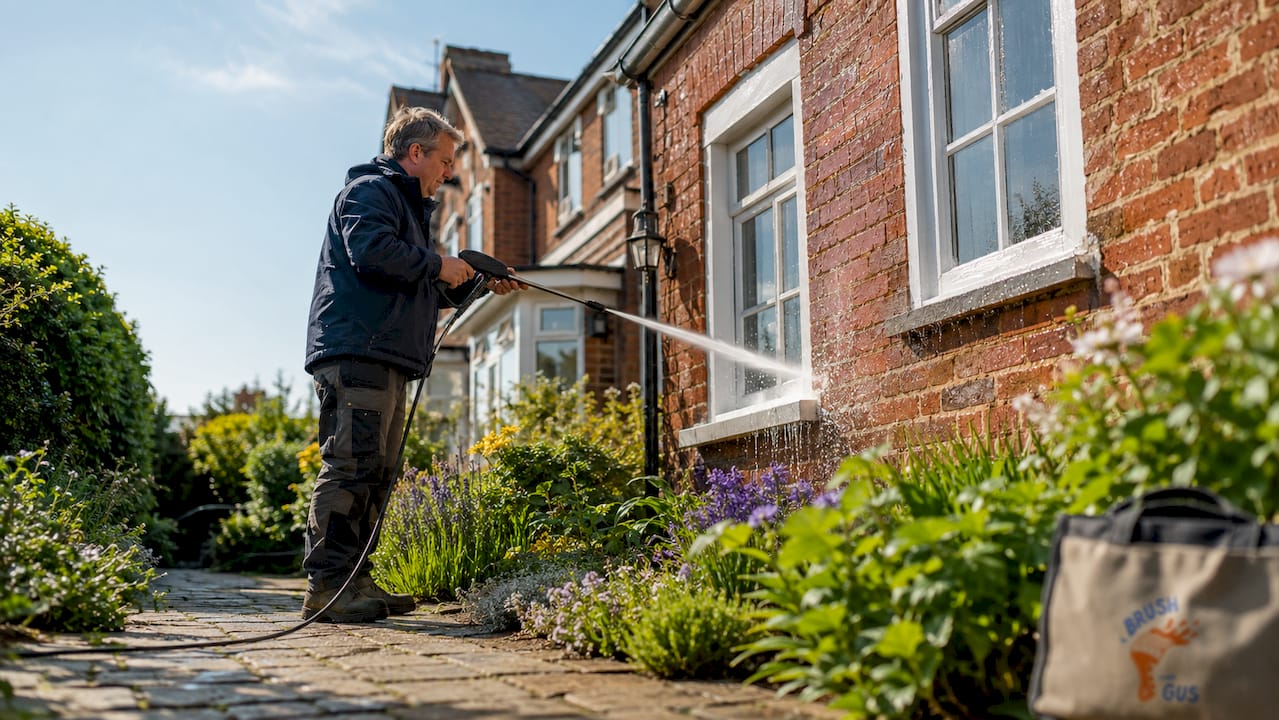
Rinse top to bottom. Rinse from the top down using a 25° or 40° fan nozzle. This carries dirty water away from already-cleaned sections. Maintain a distance of 30–45 centimetres and keep the nozzle at a slight downward angle.
Allow to dry fully. Do not apply any paint, sealant, or coating until the surface is completely dry. In the UK climate, allow at least 24–48 hours after washing before any follow-on work.
Soft washing vs pressure washing: which to use?
Soft washing is preferred over high-pressure washing for fragile exterior surfaces. It uses low water pressure combined with a diluted chemical solution to lift dirt and kill organic growth without mechanical force. Use soft washing on vinyl siding, painted render, timber cladding, and UPVC. Use pressure washing on brick, concrete, and stone paths where the surface can withstand higher force.
Each exterior surface demands appropriate cleaning chemistry and pressure levels. The wrong approach causes more harm than good, particularly on painted or rendered walls where high pressure strips coatings and forces water behind the surface layer.
Pro Tip: Work on one wall at a time rather than moving around the house. Completing each section fully before moving on prevents detergent from drying and reduces the risk of patchy results.
How do you remove algae, moss, and mildew from exterior surfaces?
Algae, moss, and mildew are the most common organic problems on UK home exteriors. They thrive in damp, shaded conditions and return quickly if you only remove the visible growth without addressing the cause.
Brushing and scraping first
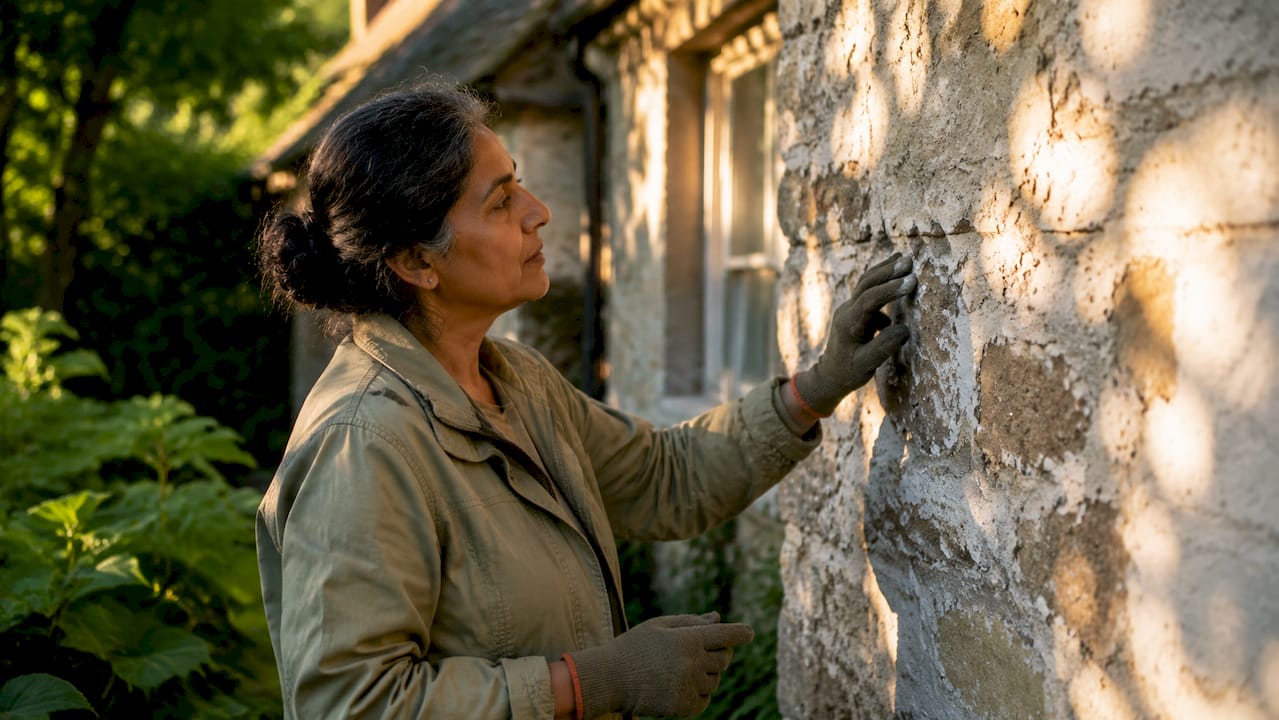
The RHS recommends brushing as the primary method for removing algae and moss from hard surfaces. Use a stiff-bristle brush to dislodge the bulk of the growth before applying any chemical treatment. Scraping with a plastic scraper works well on flat surfaces like paving and render. Avoid metal scrapers on painted surfaces as they cause scratching.
Soft washing with sodium hypochlorite
Soft washing with diluted sodium hypochlorite and low pressure removes mould without damaging fragile surfaces. Apply the solution using a downstream injector on your pressure washer or a garden sprayer. Allow a dwell time of ten minutes, keeping the surface wet throughout. Rinse thoroughly with clean water from top to bottom.
Key points for organic growth removal:
Never use a 0° nozzle on surfaces with algae or moss. High-pressure direct spray spreads spores rather than removing them.
Work in dry, overcast conditions when possible. Bright sun dries the solution too quickly and reduces its effectiveness.
Wear goggles and gloves when handling sodium hypochlorite solutions. Even diluted bleach causes skin and eye irritation.
Rinse surrounding plants again after treatment to wash off any chemical splash.
Removing algae and moss alone is incomplete unless environmental factors like moisture and shade are addressed to prevent regrowth. The RHS confirms that growth returns if damp conditions and shade persist after cleaning.
Improving drainage around the base of walls and pruning overhanging branches reduces the moisture and shade that feed regrowth. These changes cost little but extend the results of a clean by months or even years.
Pro Tip: After treating moss or algae, apply a proprietary biocide wash and leave it on the surface without rinsing. Products like Wet and Forget work over several weeks, killing remaining spores and reducing regrowth significantly.
What are the most common DIY exterior cleaning mistakes?
Most DIY exterior cleaning errors come down to impatience and incorrect equipment settings. The damage they cause is often irreversible without repainting or rerendering.
Mistakes to avoid:
Using a 0° nozzle. This concentrates pressure into a pinpoint stream that strips paint, gouges timber, and etches soft render. Use a 25° or 40° fan nozzle for all general cleaning.
Spraying at a 90° angle. Spraying at a direct right angle forces water behind siding, under seams, and into wall cavities. Always angle the spray slightly downward and away from joints.
Skipping the test patch. Applying detergent to an untested surface risks discolouration, bleaching, or chemical reaction. Always test on a hidden area first.
Letting chemicals dry on the surface. Chemical solutions must not dry on surfaces. Dried detergent leaves hard-to-remove residue and streaking. Mist the surface with water if it begins to dry before you rinse.
Cleaning in direct sunlight. Hot surfaces cause solutions to evaporate before they work. Choose an overcast day or work in the shade of the building.
Using the same pressure for every surface. Concrete handles 2,500 PSI without issue. Painted timber at the same pressure will strip the coating in seconds. Match your PSI to the surface every time.
Pro Tip: If a stain does not lift after two passes, do not increase the pressure. Instead, apply a stronger dwell solution, wait longer, and try again. More pressure rarely solves the problem and usually creates a new one.
For a broader look at exterior home maintenance and how regular cleaning fits into a long-term property care plan, the Abrushwithgus blog covers this in detail.
Key takeaways
Effective exterior cleaning depends on matching your method and pressure to the surface, following the correct sequence, and addressing the environmental causes of organic growth.
Point | Details |
Sequence matters | Always follow: inspect, pre-rinse, apply, dwell, scrub, rinse top to bottom, dry. |
Match pressure to surface | Use 1,200–1,500 PSI for painted or fragile surfaces; 2,000–2,500 PSI for concrete and brick. |
Soft washing beats high pressure | Low pressure with diluted sodium hypochlorite removes mould safely on fragile surfaces. |
Prevent organic regrowth | Improve drainage and prune overhanging plants to stop algae and moss returning. |
Never let chemicals dry | Mist the surface if it dries before rinsing to avoid streaking and residue. |
What i have learned after years of exterior cleaning work
I have seen homeowners spend a full Saturday pressure washing a house, only to find the render cracked and the paint lifting by the following week. The pressure washer was not the problem. The angle was. They sprayed straight at the wall at 90°, drove water behind the render, and created a damp problem that cost far more to fix than a professional clean would have.
The part most guides skip is the seasonal timing. In the South West, late spring and early autumn are the best windows. You avoid the summer sun drying your solutions too fast, and you get ahead of the winter damp that feeds moss and algae. Cleaning in november does little good if the surface is wet again within days.
The other thing I would stress is patience with dwell time. Most people rinse too early. The chemistry needs those ten minutes to do its job. If you rinse at five minutes because it looks clean, you leave the root structure of the algae in place and it regrows within weeks.
Know when to call in a professional. Two-storey walls, fragile heritage render, and severe mould infestations are not jobs for a domestic pressure washer and a Saturday afternoon. The risk of damage or injury outweighs the saving. For everything else, the process in this guide gives you a solid, repeatable method that protects your home and keeps it looking sharp.
— Angus
When to call in the professionals
Abrushwithgus provides specialist exterior home cleaning across the South West, handling the jobs that go beyond standard DIY reach. Whether it is two-storey render, delicate UPVC, or a severe moss infestation, the team brings the right equipment and chemistry to get results without risking damage.

For homeowners who want a thorough, safe clean without the risk of costly mistakes, Abrushwithgus offers domestic cleaning services tailored to residential properties. The brothers Gus and Rhys bring years of hands-on experience to every job, with a reputation built on quality finishes and straightforward pricing. Get in touch for a no-obligation quote.
FAQ
What is the correct order for exterior cleaning steps?
The correct order is: inspect for damage, remove loose debris, pre-rinse, apply detergent bottom to top, allow a 5–10 minute dwell, scrub if needed, then rinse top to bottom. Following this sequence prevents streaking and surface damage.
What PSI should i use to clean house exterior walls?
Use 1,500–2,500 PSI for most home exteriors, with lower settings of 1,200–1,500 PSI for painted render, vinyl siding, and timber. Concrete paths and brick can handle up to 2,500 PSI safely.
How do i stop algae and moss coming back after cleaning?
Removing the growth is only the first step. The RHS confirms that algae and moss return if damp and shaded conditions remain. Improve drainage around the base of walls and prune overhanging branches to reduce moisture and shade.
Is soft washing better than pressure washing for house exteriors?
Soft washing is the safer choice for fragile surfaces including vinyl siding, painted render, and UPVC. It uses low pressure combined with a diluted chemical solution, which removes mould and organic growth without the mechanical damage that high pressure can cause.
Can i clean exterior walls myself or do i need a professional?
Single-storey walls in reasonable condition are manageable as a DIY project if you follow the correct process and use appropriate equipment. Two-storey walls, heritage render, or severe organic growth are better handled by a professional to avoid injury and surface damage.
Recommended
Comments