
Workflow for exterior home cleaning: your full guide
- WM Creative Designs Limited
- Jun 8
- 9 min read
TL;DR:
A systematic exterior home cleaning workflow involves surface assessment, pre-treatment, section-based washing, rinsing top-down, and final inspection to prevent damage and ensure lasting results. Proper preparation, surface-specific methods, correct tool use, and timing are crucial for effective cleaning and maintaining property integrity. Regular cleaning every 12–18 months, with attention to detail and correct technique, preserves your home’s exterior and prevents costly repairs.
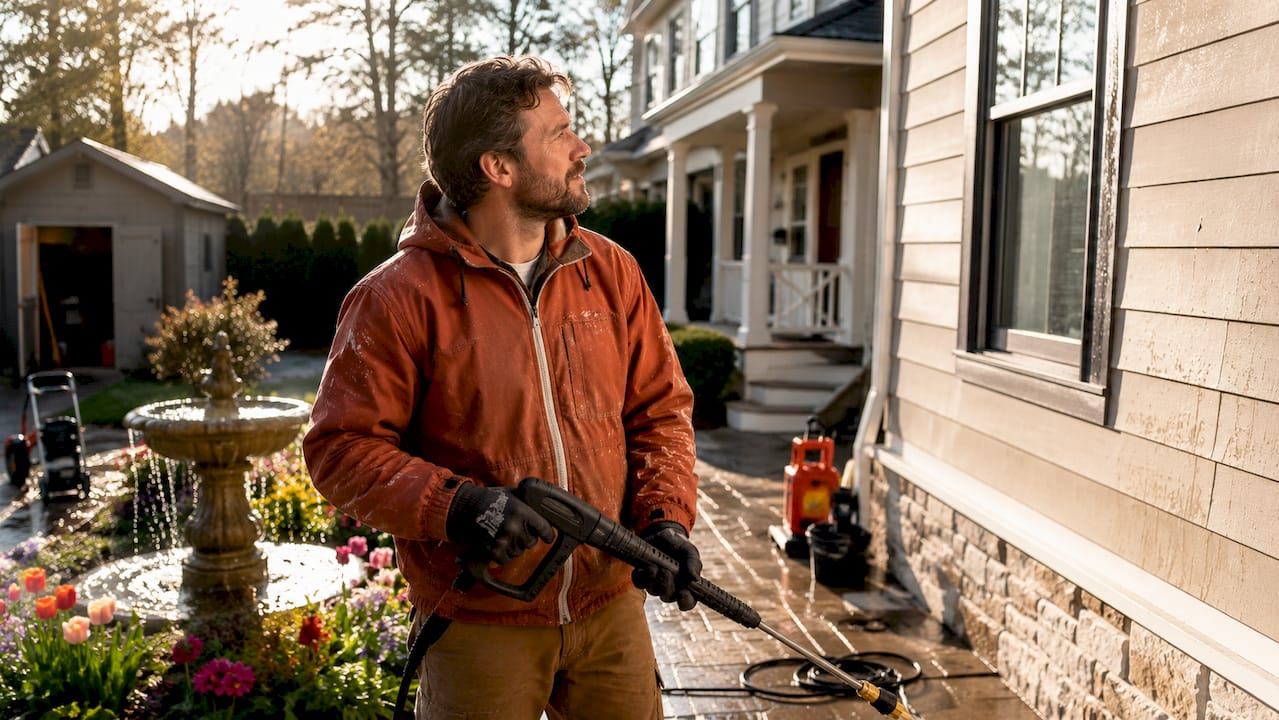
A workflow for exterior home cleaning is the step-by-step process of systematically assessing, preparing, treating, and cleaning outdoor surfaces to restore and maintain a residential property safely and effectively. Done correctly, it preserves your siding, roof, driveway, and gutters while dramatically improving kerb appeal. Done incorrectly, it can force water behind panels, strip paint, and cause mould to return within weeks. This guide gives you the exact sequence used by professionals, including the right tools, surface-specific methods, and the timing details that separate a lasting result from a rushed job.
What is the workflow for exterior home cleaning?
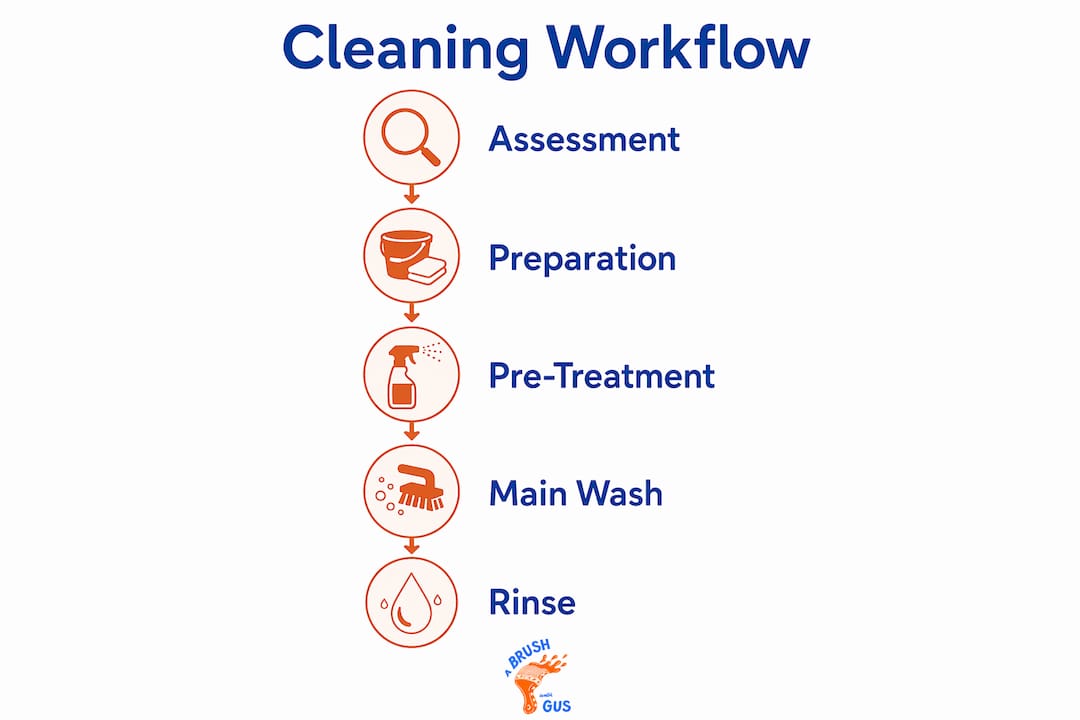
A complete exterior wash follows five core stages: surface assessment, pre-treatment, main wash, thorough rinse, and final inspection. Each stage builds on the last, and skipping any one of them increases the risk of damage or an uneven finish. This is the exterior house cleaning process that professional operators follow on every job, regardless of property size.
The reason sequencing matters so much is chemistry and physics working together. Pre-treatment loosens organic buildup, which means the main wash requires far less mechanical pressure to shift grime. Less pressure means less risk to your surfaces. The final inspection then catches any missed areas before chemicals or residues have time to dry and stain. Think of the workflow as a production line: each station does a specific job so the next station can do its job properly.
What preparations and tools do you need before starting?
Getting the right equipment together before you begin saves time and prevents mid-job improvisation that leads to mistakes. For most residential exteriors, you will need the following:
A pressure washer rated between 1,500 and 3,000 PSI, with adjustable nozzles (0°, 15°, 25°, and 40° tips as a minimum)
A soft wash system or a downstream injector for applying cleaning chemicals at low pressure
Personal protective equipment: safety goggles, chemical-resistant gloves, non-slip footwear, and waterproof clothing
Pre-treatment cleaning solution appropriate to your surface type (alkaline degreasers for general siding, sodium hypochlorite blends for mould and algae)
A garden hose for pre-saturating plants and rinsing landscaping after the job
Property preparation is equally important. Move garden furniture, plant pots, and any decorative items away from the work area. Cover electrical outlets, light fittings, and any exposed wiring with plastic sheeting secured with tape. Pre-saturate all plants, shrubs, and lawn areas adjacent to the house with clean water before applying any cleaning chemicals. Landscaping pre-saturation protects roots and foliage from chemical burns and is a non-negotiable step in any responsible exterior cleaning checklist.
Pro Tip: Check the weather forecast before you start. Avoid cleaning on windy days, which can carry chemicals onto glass, cars, or neighbouring gardens. Overcast days with mild temperatures are ideal because they slow chemical dry-down and give dwell times a chance to work properly.
Ladder safety deserves specific attention. Always use a ladder rated for your weight plus the weight of your equipment, and never lean out beyond the stiles. Where possible, use a telescopic wand extension to clean from ground level rather than working at height.
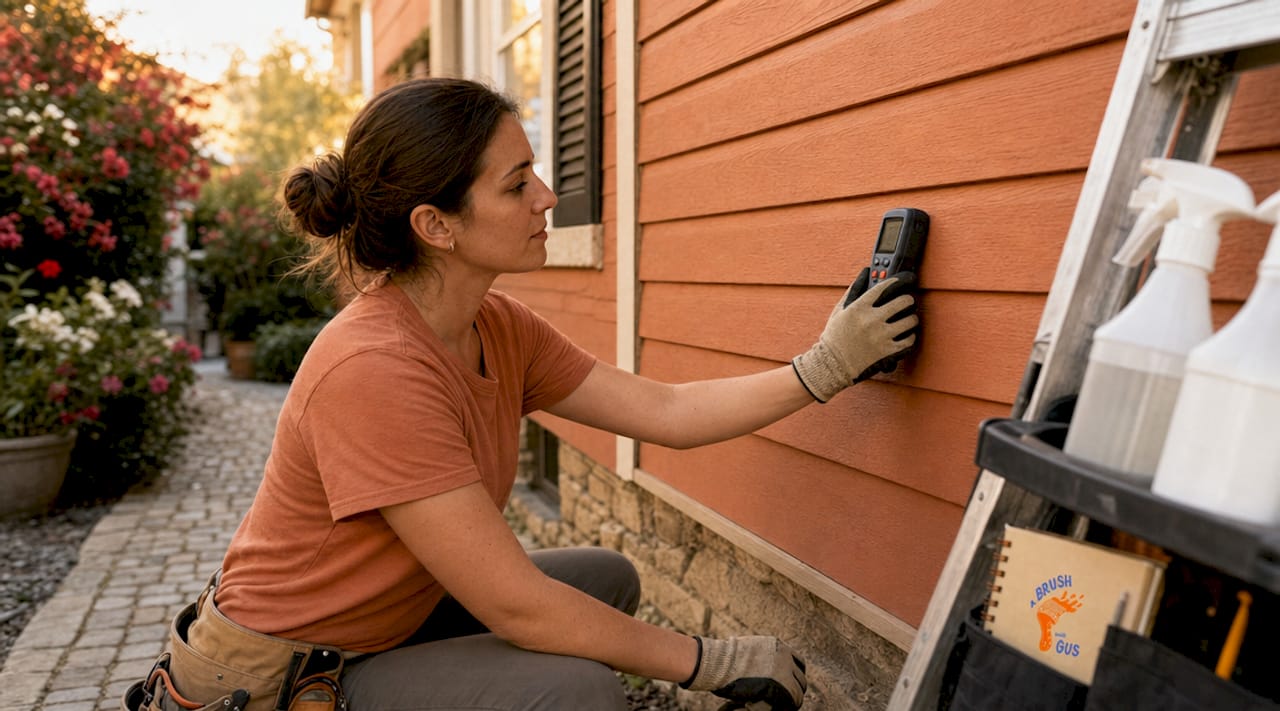
How do you assess surfaces and choose the right cleaning method?
Matching cleaning methods precisely to surface materials is the single most important decision in the entire home exterior cleaning guide. Get it wrong and you risk damage that costs far more to repair than the cleaning job itself.
The two primary methods are soft washing and pressure washing. The table below shows how they differ across common residential surfaces:
Surface | Recommended method | PSI range | Notes |
Vinyl siding | Soft wash | 100–200 PSI application | Dwell 10–15 minutes; rinse at 200–500 PSI |
Brick | Pressure wash | 500–1,000 PSI | Avoid mortar joints at close range |
Timber/wood | Soft wash | 300–500 PSI max | High pressure raises wood grain and splinters |
Roof shingles | Soft wash only | No mechanical pressure | Dwell 15–25 minutes; avoid pressure on shingles |
Concrete driveway | Pressure wash | 2,000–3,000 PSI | Use a surface cleaner attachment for even results |
UPVC windows/frames | Soft wash | 100–200 PSI | Chemical-led clean; rinse thoroughly |
Soft washing uses low pressure combined with a cleaning solution to do the heavy lifting. The chemistry breaks down mould, algae, and organic staining at a molecular level, so you do not need to blast the surface to shift it. Soft washing balances chemical effectiveness with low-pressure application to safely clean mould and mildew without surface damage. Pressure washing, by contrast, relies on mechanical force and is best reserved for hard, non-porous surfaces like concrete and brick.
Pro Tip: Always test your pressure washer on a hidden area first, such as behind a downpipe or in a corner near the back of the property. A 30-second test spray tells you immediately whether the pressure setting is safe for that surface before you commit to the full wall.
Step-by-step exterior cleaning workflow
This is the core of any effective home exterior cleaning guide. Follow these stages in order and you will achieve a professional-quality result with minimal risk of damage.
Pre-saturate landscaping. Soak all plants, grass, and shrubs adjacent to the property with clean water. This dilutes any chemical overspray that lands on foliage during application.
Apply pre-treatment solution. Using your soft wash system or downstream injector, apply the appropriate cleaning chemical to the surface working from the bottom upwards. Bottom-up application prevents streaking caused by solution running down over dry, untreated areas. Pre-treatment is a vital step that loosens organic buildup and reduces reliance on high-pressure washing.
Allow dwell time. Let the solution sit for the recommended period. For vinyl siding, this is 10–15 minutes with dwell monitoring. For roof shingles, allow 15–25 minutes. Do not let the chemical dry on the surface. If it begins to dry in warm or sunny conditions, re-mist the area with clean water or a diluted solution.
Perform the main wash section by section. Work across the property in manageable sections of roughly 2–3 metres wide. This keeps dwell times consistent and prevents any area from being left too long.
Rinse top-down. Once a section is washed, rinse from the highest point downward. A top-down cleaning sequence prevents re-soiling of cleaned areas by letting loosened grime and chemical residue flow down over surfaces yet to be rinsed.
Rinse landscaping again. After completing each wall section, rinse adjacent plants and soil with clean water to remove any chemical residue that has settled.
Conduct a final inspection. Walk the full perimeter of the property and check for missed spots, streaks, or areas where the chemical has dried unevenly. Address any issues immediately while the surface is still damp.
Stage | Key action | Common error to avoid |
Pre-treatment | Apply bottom-up | Starting top-down causes streaks |
Dwell time | Monitor and re-mist | Letting chemicals dry on surface |
Main wash | Work in sections | Cleaning the whole wall at once |
Rinse | Work top-down | Rinsing bottom-up re-soils clean areas |
Inspection | Check while damp | Leaving it until surfaces dry |
Pro Tip: Divide the property into four sides and complete each side fully before moving to the next. This keeps your workflow organised, prevents chemical cross-contamination between sections, and makes it easy to track progress.
What mistakes cause damage during exterior cleaning?
The most common and costly errors in the steps for cleaning outside all come down to pressure, angle, and timing.
Using too much pressure on delicate surfaces. High pressure on delicate surfaces risks forcing water behind siding panels, which causes moisture damage, rot, and mould growth inside the wall cavity. Vinyl siding and timber cladding are particularly vulnerable.
Wrong nozzle angle. Pointing the nozzle upward at siding panels drives water directly behind the overlapping edges. Correct nozzle angle and standoff distance prevent water intrusion and are as important as the PSI setting itself.
Letting chemicals dry on the surface. This is the leading cause of streaking and patchy discolouration. If you are working in direct sunlight or warm weather, reduce your section size so you can rinse before the dwell time expires naturally.
Skipping plant pre-saturation. Sodium hypochlorite solutions, even at low concentrations, will scorch foliage if applied to dry plants. Pre-wetting and post-rinsing of all landscaping is not optional.
Ignoring gutters and downpipes. Blocked gutters overflow during cleaning and deposit concentrated chemical runoff onto lower surfaces and plants. Clear gutters before you begin the main wash.
The most expensive cleaning mistake is not using too much pressure. It is using the right pressure on the wrong surface. A 2,500 PSI setting that is perfectly safe on a concrete driveway will strip paint from timber cladding in seconds. Assess first, clean second.
How often should you clean your home’s exterior?
Cleaning siding every 12–18 months is the standard recommendation for most UK climates, though properties in wetter or more sheltered areas may need attention annually. The South West of England, with its high rainfall and mild temperatures, creates ideal conditions for algae and mould growth, which means regular maintenance pays dividends.
Between major cleans, watch for these signs that your exterior needs attention sooner:
Visible green or black streaking on siding, which indicates algae or mould growth
Dark staining around gutters and downpipes suggesting overflow or blockage
A general greying or dulling of paintwork that does not improve after rain
Moss or lichen appearing on roof tiles or north-facing walls
Routine upkeep between full cleans extends the life of your surfaces considerably. Clear gutters twice a year, trim back overhanging trees and shrubs that trap moisture against the walls, and rinse patios and paths with a garden hose after periods of heavy leaf fall. For more detail on long-term exterior maintenance, the benefits compound significantly when cleaning is treated as a scheduled task rather than a reactive one.
Key takeaways
A systematic workflow for exterior home cleaning, built around surface assessment, correct method selection, and top-down rinsing, is the most reliable way to protect and restore your property’s exterior.
Point | Details |
Assess before you clean | Identify surface materials first to select the correct PSI and cleaning method. |
Pre-treatment is not optional | Applying solution bottom-up and allowing full dwell time reduces pressure requirements and prevents damage. |
Sequence matters | Rinse top-down after every section to prevent re-soiling and chemical streaking. |
Clean every 12–18 months | Regular scheduling prevents organic buildup from becoming structural damage. |
Protect landscaping throughout | Pre-saturate and post-rinse all plants to prevent chemical burns from cleaning solutions. |
What I have learned from years of exterior cleaning work
Angus’s perspective on getting exterior cleaning right the first time
The single biggest mistake I see homeowners make is treating exterior cleaning as a power-washing job rather than a chemistry job. They hire or borrow the most powerful machine they can find, point it at the wall, and wonder why the paint is lifting or the mould is back within three months. Pressure alone does not kill algae. It displaces it. The spores remain in the surface and regrow quickly. A correctly dosed soft wash solution, given adequate dwell time, actually kills the organism at the root. That is why the result lasts.
The second thing I would stress is patience with dwell times. Most people rinse too early because they are worried about the chemical sitting on the surface. In reality, the chemical is doing its job during that window. Rinsing at eight minutes when the label says fifteen means you have done half a clean. You will see the difference within a few weeks when the staining returns unevenly.
If you are unsure about your surface type, or if your property has a mix of materials including timber, render, and UPVC, I would always recommend getting a professional assessment before you start. The cost of a consultation is nothing compared to the cost of re-rendering a wall or replacing damaged cladding. For anything involving exterior wall preparation, take the time to get it right.
— Angus
Let Abrushwithgus handle your exterior cleaning
If the workflow above feels like a lot to manage on your own, that is because it genuinely is. Getting the chemistry, pressure settings, and sequencing right across multiple surface types takes experience and the right equipment.

Abrushwithgus provides professional exterior home cleaning services across the South West, including soft washing, pressure washing, and specialist UPVC surface cleaning for windows, doors, and fascias. Brothers Gus and Rhys bring years of hands-on experience to every job, using surface-appropriate methods that protect your property while delivering a finish that lasts. Whether you need a one-off clean or a scheduled maintenance programme, get in touch for a no-obligation quote and let the team take care of it properly.
FAQ
What is the correct order for cleaning a home’s exterior?
The correct sequence is: pre-saturate landscaping, apply pre-treatment bottom-up, allow full dwell time, wash section by section, rinse top-down, and conduct a final inspection. This order prevents re-soiling and gives cleaning chemicals time to work effectively.
What PSI should I use for vinyl siding?
Apply cleaning solution at 100–200 PSI and rinse at 200–500 PSI for vinyl siding. Higher pressure risks forcing water behind the panels, which causes moisture damage inside the wall cavity over time.
How often should I clean my home’s exterior?
Most homes benefit from a full exterior clean every 12–18 months. Properties in wetter climates or those with significant tree cover may need annual attention to prevent algae and mould from taking hold.
What is the difference between soft washing and pressure washing?
Soft washing uses low pressure combined with cleaning chemicals to break down organic matter, making it safe for delicate surfaces like timber, UPVC, and roof shingles. Pressure washing relies on mechanical force and is best suited to hard surfaces such as concrete driveways and brick paths.
Can I clean my roof with a pressure washer?
Roof shingles should never be cleaned with mechanical pressure, as it strips protective granules and shortens the roof’s lifespan. Soft washing with a dwell time of 15–25 minutes is the correct method for roof cleaning.
Recommended
Comments