
Essential kitchen spraying checklist for a flawless finish
- WM Creative Designs Limited
- May 3
- 9 min read
TL;DR:
Proper preparation, including cleaning and masking, is essential for a durable professional-looking finish.
Using the right tools, materials, and patience during spraying ensures a smooth, even coat.
Professional services provide better results with less hassle, especially for busy households.
There comes a point in every homeowner’s life when the kitchen starts to look tired and dated, yet the thought of ripping everything out and starting again feels financially overwhelming. Kitchen spraying offers a genuinely impressive middle ground, transforming faded, chipped, or simply unfashionable cabinets into something that looks brand new without the disruption of a full renovation. But achieving that smooth, professional result depends almost entirely on preparation and process. This checklist-driven guide walks you through every stage, from initial cleaning right through to final inspection, so nothing gets missed and the finished result does your kitchen justice.
Table of Contents
Key Takeaways
Point | Details |
Preparation is crucial | Thorough cleaning and masking boost the quality and lifespan of your sprayed kitchen. |
Right tools matter | High-quality sprayers, primer, and protective gear make a professional difference. |
Follow a process | Step-by-step spraying delivers smoother, more durable finishes than improvisation. |
Choose wisely | Weigh professional versus DIY kitchen spraying based on your time, skill, and budget. |
Key preparation steps before spraying
Preparation is where kitchen spraying projects are won or lost. Many homeowners focus on the spraying itself, but the hours spent getting surfaces ready are what separate a finish that lasts years from one that starts peeling within months.
A solid preparation sequence looks like this:
Degrease every surface thoroughly. Kitchen cabinets accumulate cooking grease, steam residue, and grime over years of daily use. Even surfaces that look clean will hold invisible grease films that prevent paint from bonding properly. Use a dedicated degreaser and work methodically across every door, drawer front, and frame.
Fill holes and repair damage. Any chips, dents, or screw holes need filling with an appropriate filler before you go near a spray gun. Sand these areas smooth once dry, otherwise every imperfection shows clearly under a sprayed finish.
Fix loose hardware. Hinges that are slightly loose or drawer runners that wobble need tightening before doors and drawers come off. Spraying cabinets while hardware is misaligned causes fitting problems when everything goes back together.
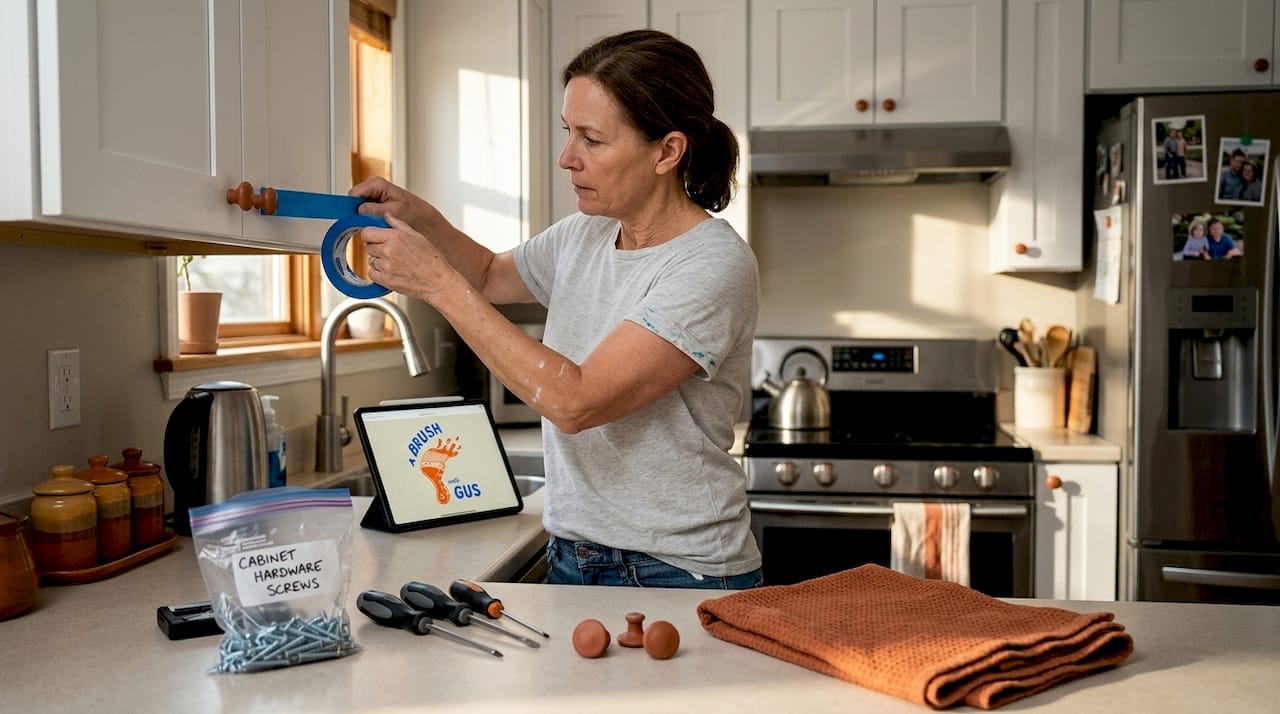
Mask walls, floors, and appliances. Spray mist travels further than you expect and settles on every exposed surface. Use quality painter’s tape and protective sheeting to cover worktops, walls, flooring, and any appliances that stay in the room. As paint spraying technique guides confirm, thorough cleaning and masking of all surfaces is a core part of professional prep.
Create adequate ventilation. A well-ventilated space keeps fumes safe and helps paint dry evenly. Open windows and use fans if needed, but avoid creating draughts that carry dust onto freshly sprayed surfaces.
Control dust. Vacuum the entire area and wipe down surfaces with a tack cloth just before spraying. Dust particles landing on wet paint create rough, uneven patches that require sanding back and respraying.
Pro Tip: Use labelled zip-lock bags for every set of screws, hinges, and handles you remove. Write the cabinet location on each bag with a marker. Reassembly becomes straightforward and nothing gets lost during what can be a multi-day project.
Applying professional painting techniques during the preparation stage separates adequate results from genuinely impressive ones. Don’t rush this phase.
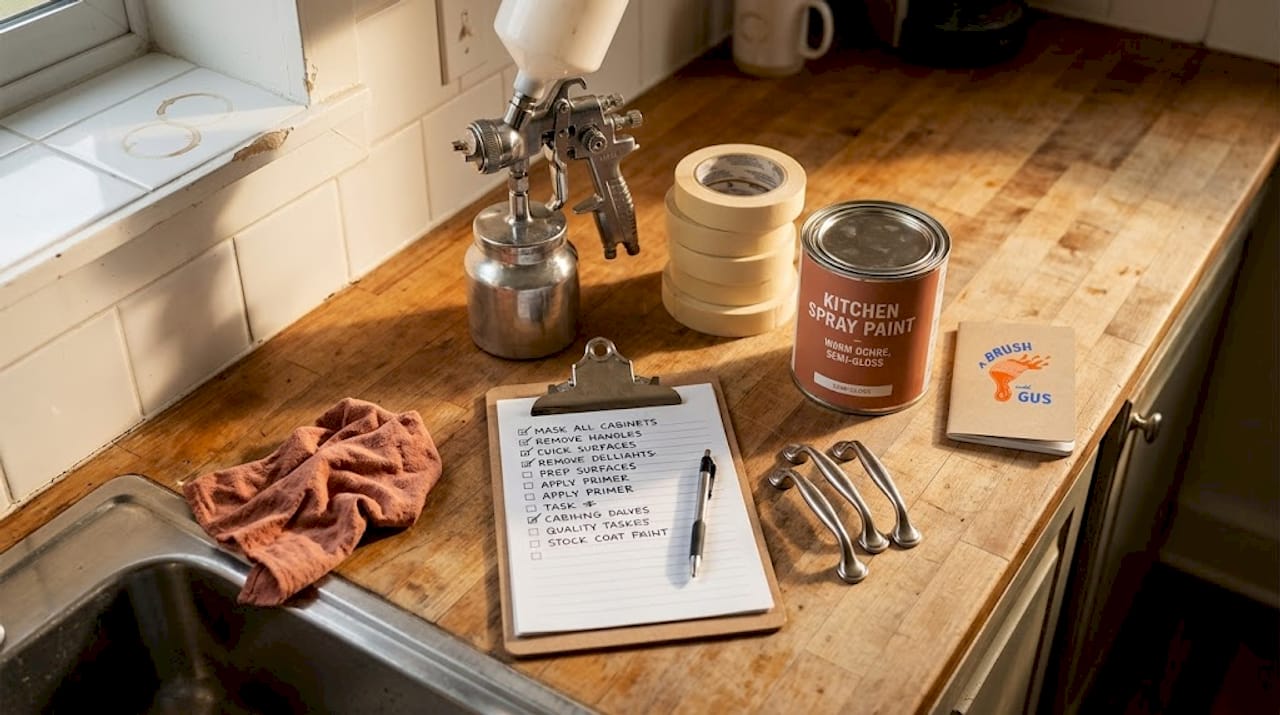
Tools and materials checklist
Once preparation is planned, you need the right tools and materials assembled before work begins. Stopping mid-project to source missing items disrupts drying times and creates inconsistency in the finish.
Here’s what you’ll need:
A paint sprayer designed specifically for domestic cabinet work
Adhesion primer suited to the surface material (wood, MDF, or laminate)
Durable topcoat paint formulated for kitchen environments
Protective sheeting in sufficient quantity to cover all exposed areas
High-quality painter’s tape that removes cleanly without lifting existing finishes
Fine-grit sandpaper (typically 180 to 240 grit for between coats)
Tack cloths for dust removal
Safety gloves, an FFP2 or FFP3 rated mask, and protective goggles
Mixing sticks and a clean container if thinning paint is needed
Good lighting, preferably portable LED work lights to spot uneven coverage
As kitchen spraying basics outline, typical tools include specialist spray guns, masking tape, and paint suited for kitchen environments. Cutting corners on any of these items adds time later through touch-ups and corrections.
Item | Why it matters | Budget or invest? |
Paint sprayer | Even coverage, no brush marks | Invest |
Adhesion primer | Ensures topcoat bonds properly | Invest |
Kitchen-grade topcoat | Durability and easy cleaning | Invest |
Painter’s tape | Protects edges and surfaces | Mid-range minimum |
Safety equipment | Health protection | Never compromise |
Tack cloths | Removes dust before spraying | Budget |
Pro Tip: Quality paint costs more upfront but pays for itself over time. A kitchen-grade, semi-gloss or satin topcoat resists moisture, grease, and daily cleaning far better than standard emulsion. Explore expert kitchen painting tips for specific product recommendations to guide your choices. You can also review kitchen painting tips focused on surface-specific approaches if your cabinets include mixed materials.
Step-by-step kitchen spraying process
With tools assembled and the workspace prepared, the spraying process itself follows a clear sequence. Skipping or rushing any stage undermines everything that came before it.
Final clean. Wipe all cabinet surfaces with a tack cloth immediately before priming. This removes any last traces of dust that have settled since the initial clean.
Light sanding. Use fine-grit sandpaper to scuff the surface lightly. This creates a key for the primer to grip onto, which is especially important on smooth or glossy surfaces. Wipe off sanding dust thoroughly.
Apply adhesion primer. Spray a thin, even coat of primer across all surfaces. Allow it to cure fully according to the manufacturer’s guidance, which is typically between one and four hours depending on the product and ambient temperature.
Sand between coats. Once the primer has cured, lightly sand again with fine-grit paper to remove any nibs or dust particles. This step is often skipped by DIYers and is one of the main reasons amateur finishes look slightly rough compared to professional ones.
Spray topcoats in thin, steady layers. Apply the topcoat in multiple thin passes rather than one heavy coat. Keep the sprayer moving at a consistent speed and distance from the surface, typically 20 to 30 centimetres. Overlap each pass by about 50 per cent to avoid streaks.
Check for consistency. After each coat, inspect the surface under good lighting from multiple angles. Look for runs, thin patches, or uneven sheen. Address any issues before the paint fully hardens.
Allow full drying time. Between coats and after the final coat, allow the paint to dry and cure properly. Rehanging doors too soon causes scratching and marks that are difficult to repair.
As respraying process details confirm, the kitchen respraying process typically involves cleaning, sanding, priming, spraying, and drying phases in sequence, each building on the last.
“The customers who are happiest with their sprayed kitchens are always the ones who allowed proper drying time between every single stage. Patience isn’t a nice-to-have in kitchen spraying. It’s the actual technique.” — Professional painter with over 15 years of experience in domestic cabinet finishing.
Professional vs DIY: kitchen spraying checklist comparison
Understanding the differences between a professional and a DIY approach helps you decide which route suits your situation, your budget, and your confidence level.
Professional services offer a more comprehensive process including specialist preparation, equipment, and aftercare, which is difficult to replicate without experience and the right tools. Meanwhile, respraying is a cost-effective alternative to replacement, offering comparable visual transformation whether you go professional or tackle it yourself.
Checklist task | Professional | DIY |
Surface degreasing | Industrial-grade products | Domestic degreasers |
Equipment | Specialist HVLP spray systems | Consumer-grade or hired sprayer |
Primer application | Timed to conditions, multiple coats | Variable |
Finish quality | Factory-level smoothness | Skill-dependent |
Aftercare advice | Written guidance provided | Self-researched |
Warranty | Often included | None |
Timescale | Efficient and scheduled | Flexible but slower |
Here is what each approach typically covers:
Professional checklist:
Full site assessment and surface testing
Industrial degreasing and preparation
Specialist primer and topcoat systems
Controlled spraying environment where possible
Post-job inspection and touch-ups
Written aftercare guidance and warranty
DIY checklist:
Self-assessed preparation
Consumer-grade primers and paints
Hired or owned domestic spray equipment
Self-managed drying times
Personal quality checks
No formal aftercare or warranty
The benefits of respraying apply to both routes, but the level of finish and the ease of the process differs considerably. If your kitchen has older, more complex cabinetry or intricate detailing, the residential spraying guide is a useful reference for understanding when professional input makes the biggest difference.
Customising your checklist for your kitchen
No two kitchens are identical. Layout, cabinet material, household routine, and your timeline all influence how the checklist needs to be adapted to work for your specific situation.
Material-specific considerations:
Wood cabinets often need more thorough sanding and may require grain filler for a truly smooth finish. They absorb primer differently to manufactured boards.
MDF surfaces are highly absorbent and benefit from a dedicated MDF sealer before primer to prevent raised grain and swelling.
Laminate fronts need careful scuffing to create adhesion. Without this step, paint simply peels away from the smooth, sealed surface.
As noted in respraying guidance, each kitchen’s needs will differ depending on cabinetry materials and layout, making a one-size-fits-all checklist impractical.
Adjusting for busy households:
Plan the project room by room if your kitchen cannot be taken offline completely.
Schedule spraying during periods when the kitchen is least in use, such as weekday mornings when children are at school.
Allow a buffer day between stages rather than trying to complete the entire project over a single weekend.
Tight spaces and tricky corners:
In galley kitchens or those with lots of integrated appliances, access to cabinet sides and interiors becomes more difficult. Use a narrow spray pattern for tight corners and consider a small brush for very confined areas where the sprayer cannot reach consistently.
Pro Tip: Before removing any cabinet doors or drawers, photograph the entire kitchen from multiple angles. These reference photos make reassembly far quicker and remove any guesswork about which door belongs where, especially in kitchens where doors look similar but are slightly different sizes.
What most kitchen spraying checklists miss
Most kitchen spraying guides cover the technical steps adequately. What they rarely address is the human element, specifically the way that time pressure and impatience quietly undermine even the most careful preparation.
We’ve seen this pattern repeatedly in our work across the South West. A homeowner does everything right through the preparation stage and the priming stage, then loses patience during the topcoat application and applies coats too thickly or too quickly because they want to see the finished result. The paint runs or blooms, and suddenly what should have been a straightforward project needs reworking.
The most underrated steps in any spraying project are the transitions between surfaces and the drying intervals. Moving from a cabinet door to a drawer front sounds simple, but mismatched spray distances and inconsistent pressure in those moments create visible tonal differences in the finished colour. Slowing down at every transition point makes a measurable difference to how uniform the final result looks.
Drying time is genuinely the most skipped step in DIY spraying projects. Paint can feel dry to the touch in as little as an hour, but the coating hasn’t hardened fully and will pick up marks, scratches, and fingerprints easily at that stage. Allowing 24 hours before rehanging doors and 48 to 72 hours before returning the kitchen to normal use protects weeks of careful work.
“Every shortcut taken during a spraying project shows up in the finished result. The kitchen doesn’t lie. But every hour spent doing it properly stays on those cabinets for years.” — Hard-earned lesson from professional spraying experience.
For guidance on advanced finishing approaches, the expert painting techniques resource covers the finer details that experienced painters rely on to produce consistently excellent results.
Pro Tip: Plan for a touch-up session roughly one week after the main project is complete. Reassembled kitchens always reveal a small number of spots where doors knock against frames or handles catch the finish. Addressing these early, while you still have paint mixed and equipment out, keeps the result looking sharp.
Take the next step with professional kitchen spraying
Working through a detailed checklist gives you real confidence and clarity about what a kitchen spraying project involves. But knowing what to do and executing it to a professional standard are two different things. A mistake-free finish, lasting colour, and smooth coverage that holds up to daily kitchen life consistently come from experience, specialist equipment, and the kind of preparation that professionals carry out as second nature.

At A Brush With Gus, Gus and Rhys bring years of hands-on spraying experience to kitchens across the South West. Whether you want a complete kitchen transformation or a refresh of specific cabinet doors, our professional spraying services cover every stage from first assessment to final inspection. If you’d like to explore the full range of what we offer for your home, our domestic spraying solutions page gives you a clear picture of how we can help. Get in touch for a no-obligation quote and let’s talk about what your kitchen could look like.
Frequently asked questions
How long does kitchen spraying take from preparation to finish?
Kitchen spraying projects usually take two to five days in total, depending on kitchen size, the number of coats required, and drying and reassembly time, which can add a day or more to the overall timeline.
What surfaces in the kitchen can be safely sprayed?
Kitchen respraying suits wood, laminate, and MDF surfaces well, provided they are properly prepared with the correct primer and surface treatment before any topcoat is applied.
How do I clean sprayed kitchen cabinets?
Use mild soapy water and a soft cloth for day-to-day cleaning, as a lasting sprayed finish depends on avoiding harsh chemicals, abrasive pads, or anything that degrades the topcoat over time.
Is professional spraying better than DIY for busy homes?
Professional services offer faster turnaround, more durable finishes, and dedicated aftercare, making them a strong choice for households that cannot afford extended kitchen downtime or the learning curve that DIY spraying requires.
Recommended
Comments