
48–72 hours, then primer: UK decorators' fix for flaky ceiling paint
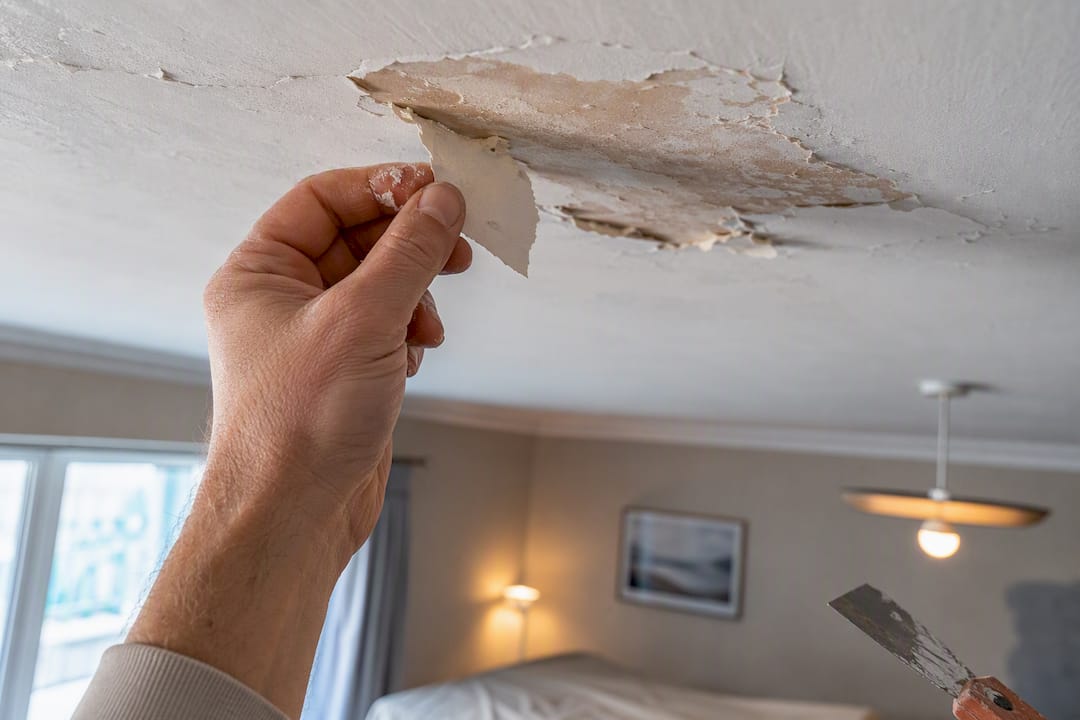
Never paint over flaky ceiling paint before finding out why it failed. Stop any moisture first, scrape back to sound edges, then prime bare patches with a high-adhesion or stain-blocking primer before you patch and repaint. Small, dry patches are a weekend DIY job. Widespread, recurring or mould-related peeling needs a professional to diagnose what’s happening above the plaster.
TL;DR:
Moisture from leaks or condensation is the primary cause of ceiling paint flaking and must be fully resolved before any repainting begins.
Proper preparation includes scraping to sound paint, cleaning, feathering edges, patching, and applying a high-adhesion or stain-blocking primer.
Primer choice is crucial; using a stain blocker for water stains or a penetrating primer for chalky surfaces helps prevent recurring peeling.
Allow at least 48 to 72 hours for the substrate to dry and ensure no dampness remains before priming and topcoating.
Extensive or recurring damage, especially with moisture problems or hidden mold, warrants professional diagnosis and repair to avoid repeated failure.
Table of Contents
Why is my ceiling paint flaking?
Flaking almost always comes down to one of six things: moisture from a leak, condensation, an incompatible paint layered over an older coating, old calcimine-based distemper, too many built-up paint layers losing their grip, or grease and dust stopping the primer from bonding in the first place. Moisture is the biggest repeat offender, whether it’s a slow roof leak, a failed bathroom seal, or condensation from poor airflow, and poor preparation or incompatible coatings run a close second.
Look for the visual clues before you touch a scraper. Brown or yellow staining points to water. Soft, bulging blisters usually mean trapped moisture pushing the paint film away from the surface. A powdery, chalky residue on your fingers after wiping the ceiling is often calcimine, an old-fashioned whitewash that modern paint simply won’t stick to.
Run three quick tests before deciding on a fix:
Wet-finger test: rub a damp cloth on the ceiling. If it turns milky or chalky, you’re likely dealing with calcimine, which needs a specialist bonding primer, not a standard one.
Scrape test: press a flat scraper against a flaking edge. If large sheets lift easily with no resistance, adhesion has failed across a wide area, not just at the edge.
Damp test: press the back of your hand against the ceiling near the stain. Any coolness or dampness signals an active leak that needs fixing before any repaint.
Prepare the room, stop the leak and let it dry properly
Fix the source of the water before you touch the paintwork. Repainting over an active leak just buys you a repeat job in a few months, whatever primer you use afterwards.
Locate and repair the leak, whether that’s a roof issue, a failed shower seal, or a pipe joint, and confirm it’s genuinely stopped before moving on.
Ventilate and dry the area for at least 48 to 72 hours, using an extractor fan, dehumidifier or open windows depending on the season.
Check the substrate is dry to the touch and no longer cool or damp before sanding or priming.
Lay dust sheets over floors and furniture, and wear a mask and eye protection when scraping or sanding overhead.
If you spot mould, wipe it back with a mild detergent solution first; extensive coverage or persistent mould after cleaning is worth getting looked at by a remediation specialist.
Pro Tip: Don’t rush the drying stage. Priming over a ceiling that feels dry to the touch but is still damp underneath is the single most common reason a “fixed” ceiling flakes again within a year.
How to fix flaking paint on a ceiling step by step
Once the substrate is genuinely dry, the actual repair is straightforward if you follow the sequence in order and don’t skip the primer stage.
Scrape back to sound paint. Hold a stiff scraper at roughly a 30 degree angle and work outward from the centre of the flaking patch until you hit paint that won’t budge under firm pressure.
Clean the area. Wipe away dust and grease with a mild degreaser, since grease and dirt stop primer adhering properly even on a well-scraped surface.
Feather the edges. Sand from 120 grit up to 220 grit, blending the raised edge of old paint into the bare patch so there’s no visible ridge under the topcoat. A pole sander speeds this up on larger ceilings.
Check the drywall paper. If scraping has torn through the paper facing, cut out the damaged section and patch with new drywall rather than trying to sand it flat.
Fill low spots. Apply joint compound or filler in thin layers rather than one thick pass, letting each layer cure fully. Feathering with 120 to 220 grit and thin, multiple layers avoids the visible craters that a single thick fill leaves behind.
Sand smooth. Once cured, sand the patch flush with the surrounding ceiling.
Prime. Apply a penetrating, high-adhesion or stain-blocking primer over the whole repaired area, not just the bare patch, and let it cure fully before topcoating.
Topcoat. Apply two thin coats of ceiling paint, allowing proper drying time between each.
Tools worth having to hand for this job:
A stiff-bladed scraper and a flexible filling knife
120 and 220 grit sandpaper, plus a pole sander for larger ceilings
Joint compound or a ready-mixed filler
A high-adhesion or stain-blocking primer
A roller with an extension pole for ceiling-rated paint
This full sequence, remove, feather, patch, prime, repaint, is the same one trade decorators follow, whether the ceiling is two square feet or the whole room.
Which primer actually stops paint flaking coming back?
Primer choice is where most DIY repairs quietly fail. A standard primer bonds paint to paint reasonably well, but it won’t grip bare plaster, chalky calcimine residue, or a water stain the way a proper high-adhesion or stain-blocking product will.
High-adhesion bonding primers create a mechanical key between old paint, bare patch, and new topcoat. Penetrating primers give the repair the grip it needs exactly where old and new surfaces meet, which is usually where flaking restarts first.
Stain-blocking primers, often shellac or oil-based, seal in watermarks and stop tannins bleeding through your new paint. Zinsser’s own case work shows that thorough scraping followed by the right sealer product stops recurring peeling on damp bathroom ceilings even where mould has previously been an issue.
For chalky calcimine, a clear penetrating sealer used before filler and primer stabilises the surface so nothing above it can lift again.
Skipping primer at the transition between old paint and bare patch is the single most common reason a repair edge-lifts within months. For the topcoat, choose a ceiling-rated flat paint, or a mildew-resistant formula in bathrooms and kitchens where humidity is a constant factor.
Stopping bathroom ceilings flaking for good
Steam is the real enemy here, not the paint itself. If your extractor fan barely moves air or vents into the loft rather than outside, no primer will hold for long.
Fit or upgrade to an extractor fan that vents directly outside, suitably rated for effective ventilation in a standard bathroom.
Run the fan for a full 20 minutes after every shower or bath, on a timer if you tend to forget.
Wipe down visible mould with a detergent solution before repainting, then move straight to a mould-resistant primer once dry.
Finish with a mildew-proof, moisture-tolerant paint rather than standard matt emulsion.
Pro Tip: A humidity meter costing a few pounds tells you more than guesswork ever will. Anything consistently above 65% in a bathroom is a sign your extraction isn’t doing its job, whatever primer you’ve used.
When should you call a professional instead?
Some jobs are genuinely quick DIY wins. Others aren’t, and pushing on regardless just means redoing the work in six months.
More than roughly half the ceiling is affected, not just one isolated patch
The same spot has failed and been repainted more than once already
There’s extensive mould, or you suspect hidden damage behind the plaster
You’re not confident diagnosing whether the moisture source has actually stopped
Ask any professional you’re considering about their drying plan, primer choice, expected timescale, and whether the work carries any guarantee. A decent tradesperson diagnoses the cause first, controls drying properly, and picks a specialist primer for the specific failure, three steps DIY repairs most often skip.
Trade tips from a working decorating team
We favour a penetrating sealer over chalky or calcimine surfaces every time, and we won’t rush joint compound before its full cure window. The two most common failures we see are primer applied too soon after filling, and repairs made before the substrate has genuinely dried out.
The ceilings that come back to bite people aren’t the ones with bad paint. They’re the ones where someone primed a patch that still had damp behind it, because the surface looked dry and felt dry to a quick touch test.
Related reading: our guide to fixing ceiling water stains within 24 to 48 hours and our checklist for painting over mould on walls cover the moisture side of this in more depth.
What most guides get wrong about flaky ceilings
Most advice treats flaky ceiling paint as a sanding-and-repainting problem. It isn’t. It’s a diagnosis problem first, and a painting problem second. The step people skip almost every time isn’t the scraping or the sanding, it’s confirming the moisture source has actually stopped before they reach for a primer.
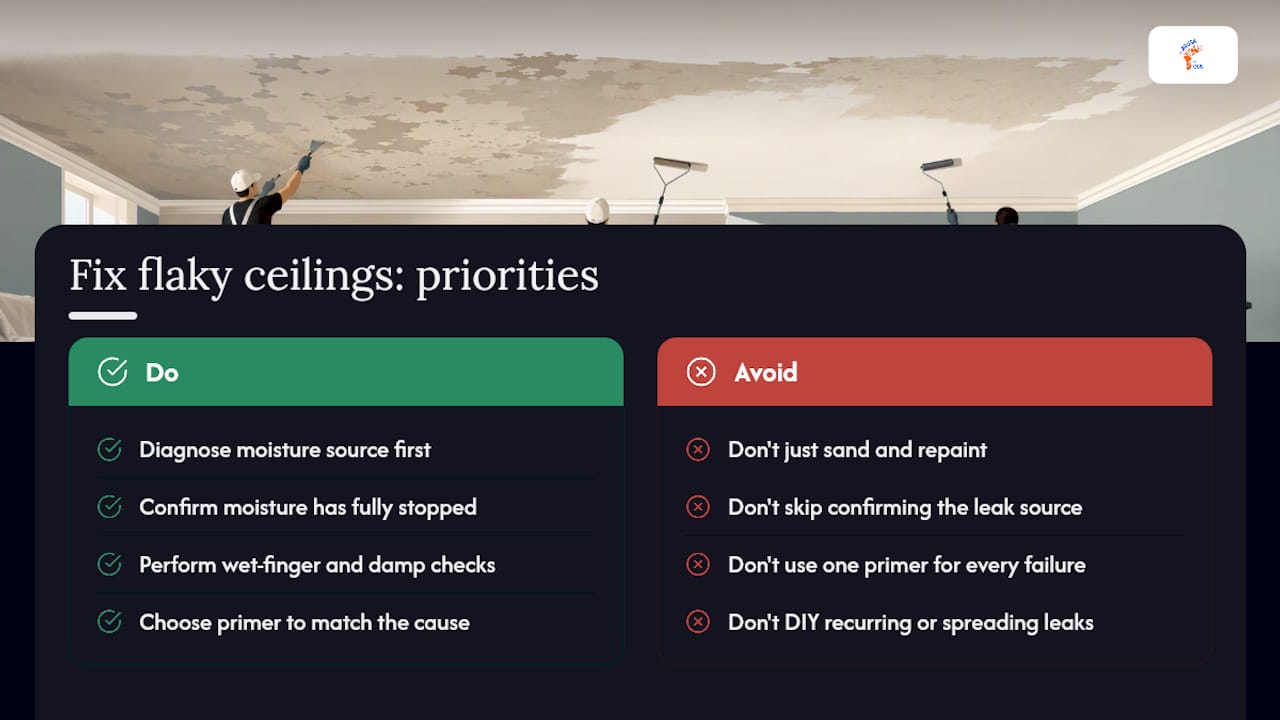
The conventional advice to “just prime and repaint” ignores that primer choice matters enormously depending on what caused the failure in the first place. A high-adhesion bonding primer and a shellac-based stain blocker solve different problems, and using the wrong one is why so many DIY repairs fail again within a year. If you prioritise one thing from this whole process, prioritise the diagnosis: the wet-finger test, the damp check, and an honest look at whether the affected area is growing or has come back before.
Where the research is genuinely consistent is this: small, isolated, dry patches respond well to DIY. Anything recurring, spreading, or tied to a leak you can’t fully trace usually points to a substrate or moisture issue that needs proper diagnosis, not another coat of paint.
— Angus
How A Brush With Gus can help if you’d rather not tackle it yourself
Professional painting and decorating services offer an alternative to a weekend of scraping and guesswork for homeowners who’d rather have it diagnosed and fixed properly the first time. If your ceiling has flaked more than once, or steam and damp are involved, that’s exactly the kind of repeat failure a site visit sorts out fast.

We start with a proper look at what’s actually caused the failure, not just what’s visible on the surface, then quote for the right primer and finish for that specific room. Bathroom ceilings, kitchen extensions, and larger textured or Artex ceilings often suit airless spraying for a smoother, more even finish than a roller gives on tricky surfaces. Our domestic painting service covers everything from a single flaking patch to a full ceiling repaint, and we’re happy to walk you through exactly what we’ll do differently to stop it coming back. If bathroom steam is behind the problem, our bathroom-specific paintwork uses mould-resistant primers and finishes built for that environment. Get in touch for a quote or to see examples of similar jobs we’ve completed nearby.
Sources
FAQ
How do you fix flaking paint on a ceiling?
Scrape back to sound edges, clean off dust and grease, feather with 120 to 220 grit sandpaper, patch with thin layers of filler, then prime with a high-adhesion or stain-blocking primer before applying two thin topcoats of ceiling paint.
What causes flaky paint on a ceiling?
The main causes are moisture from leaks or condensation, poor surface preparation, incompatible paint layers, old calcimine distemper, and grease or dust that stops primer bonding properly.
Can you paint over peeling paint on a ceiling?
No. Painting straight over loose or peeling paint traps the problem underneath and it will flake through again within months; you need to scrape, dry, prime and patch first.
How do you repair a flaking textured ceiling?
Follow the same scrape, feather and prime sequence, but work carefully to avoid flattening the texture, and consider airless spraying for a smoother, more even finish once the repair is primed and ready for topcoat.
Is flaking ceiling paint always a sign of a leak?
Not always. It’s often moisture-related, but it can also come from old calcimine paint, too many built-up layers, or a primer that never bonded properly in the first place, so testing before you assume is worth the extra ten minutes.
Recommended
Comments