
How to paint kitchen cupboards professionally
- WM Creative Designs Limited
- May 17
- 10 min read
TL;DR:
Proper preparation, including degreasing, sanding, and hardware removal, is essential for a durable professional finish. Selecting the correct primer and high-quality paint tailored to your cupboard material ensures long-lasting results. Professional techniques, such as spraying and thin coats, produce a smooth, resilient surface that DIY methods often struggle to achieve.
Repainting kitchen cupboards sounds straightforward until you are standing in a half-finished kitchen with brush marks everywhere, paint peeling off the doors, and a finish that looks nothing like the glossy images you saved for inspiration. Knowing how to paint kitchen cupboards professionally is the difference between a transformation that lasts a decade and one that starts failing within months. Most DIY attempts fall short not because of effort but because of skipped preparation, the wrong products, and an underestimation of how long the whole process genuinely takes. This guide walks you through every stage, step by step, so you get it right the first time.
Table of Contents
Priming and selecting the right paint for a professional finish
Applying paint: techniques for a smooth, long-lasting finish
Expecting professional results: durability and maintenance of painted cupboards
Why professional painting often outperforms DIY for kitchen cupboards
Let a professional transform your kitchen cupboards with expert painting services
Key Takeaways
Point | Details |
Thorough prep is essential | Effective degreasing, sanding, and hardware removal form the foundation of professional kitchen cupboard painting. |
Use the right primer and paint | Shellac primers and professional-grade paints improve adhesion and durability on cabinets. |
Apply thin coats patiently | Multiple thin coats with drying and sanding between create a smooth, lasting finish. |
Curing takes weeks | Paint needs around four weeks to fully cure for maximum chip resistance and durability. |
Professional painting offers superior results | Experts use industrial-grade materials and techniques difficult to replicate in DIY projects. |
Preparing your kitchen cupboards for painting
Preparation is where professional results are won or lost. You can buy the finest paint on the market, but if your cupboard surface is greasy, dusty, or unkeyed, the paint simply will not bond. Proper cabinet preparation involves degreasing with a multipurpose cleaner or sugar soap, sanding with 120-grit paper, and removing all hardware before a single drop of primer touches the surface.
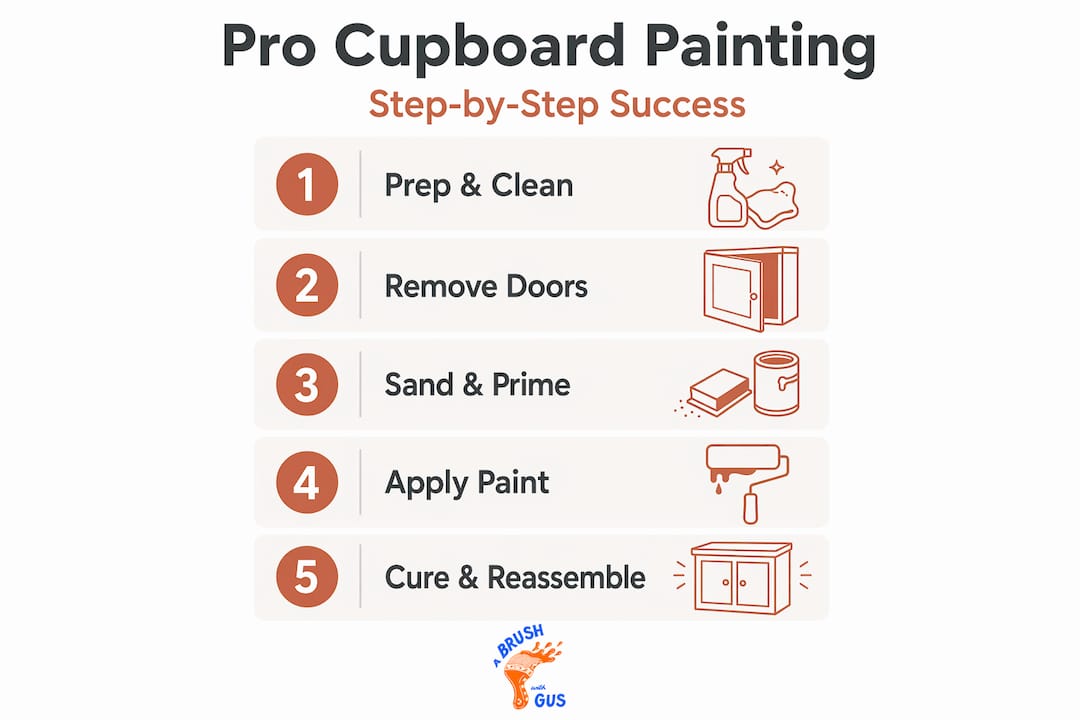
Start by taking every door off its hinges. Label each door and its corresponding hinge with masking tape and a marker so reassembly is not a guessing game. Remove handles, knobs, and any soft-close mechanisms and store them in a labelled bag. Working on doors flat and detached from the carcass prevents drips running down vertical surfaces and means you can reach every edge properly.
Cleaning kitchen cupboards before painting is the step most homeowners rush or skip entirely. Kitchen surfaces accumulate years of cooking grease and airborne oils that are invisible to the naked eye but will cause paint to separate and peel within weeks. Wash every surface with a dedicated multipurpose degreaser or sugar soap, rinse clean, and allow to dry fully before sanding.
Step-by-step preparation checklist
Remove all cupboard doors and label them clearly.
Unscrew handles, hinges, and any other hardware.
Wash all surfaces with sugar soap or a multipurpose degreaser.
Rinse thoroughly and allow surfaces to dry completely.
Sand all surfaces with 120-grit sandpaper using circular motions.
Fill any dents, holes, or scratches with wood filler.
Sand filled areas smooth once dry using fine-grit paper.
Wipe down all surfaces with a damp cloth to remove sanding dust.
Protect floors, worktops, and appliances with dust sheets.
What to prepare and why
Step | Why it matters |
Degreasing | Grease prevents primer and paint from bonding |
Sanding with 120-grit | Creates a key for primer adhesion without stripping the surface |
Wood filler | Smooth surface means no imperfections telegraphing through paint |
Dust sheets | Avoids contamination and protects surrounding surfaces |
Hardware removal | Prevents overspray and allows full coverage of all edges |
Pro Tip: When sanding previously painted cupboards, you are not trying to strip them bare. You are simply roughening the surface. A light, even scuff is all that is needed. Over-sanding can damage the substrate and create more work.
These professional painting techniques used in the trade are not complicated, but they do demand patience. Every minute spent on preparation directly translates to hours saved on fixing a poor finish later.
Priming and selecting the right paint for a professional finish
With clean, sanded cupboards ready, the next decision is primer and paint selection. This is where many homeowners make a costly mistake, reaching for whatever is available at the local DIY shop without considering what their specific cupboard material actually needs.
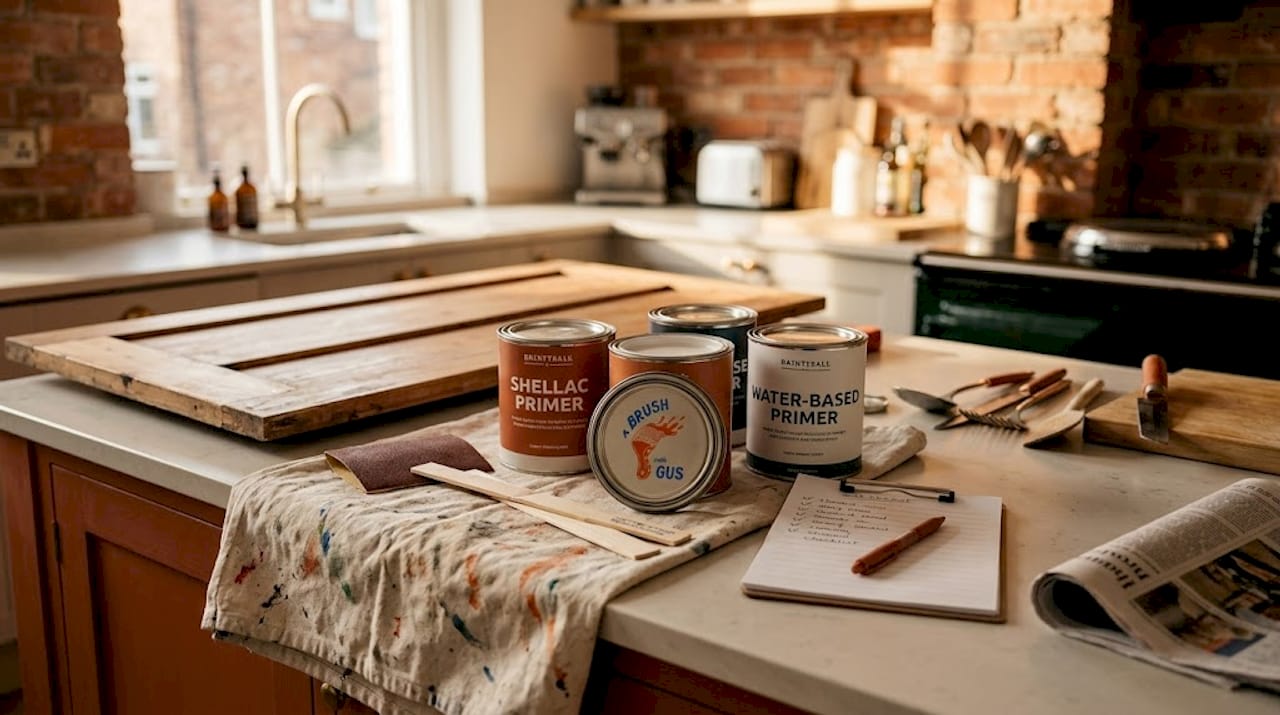
What paint to use for kitchen cabinets depends heavily on what the cupboard is made from. Shellac-based primers are the professional choice for laminate and hardwood cupboards because they bond aggressively to slick, non-porous surfaces where water-based primers simply slide off. Water-based primers work well on softwood or cupboards that were previously painted with a water-based product.
Primer selection by cupboard type
Cupboard material | Recommended primer |
Laminate | Shellac-based primer |
Hardwood (oak, ash) | Shellac-based primer |
Softwood (pine, MDF) | Water-based primer |
Previously painted (water-based) | Water-based primer |
Previously painted (oil-based) | Oil-based primer |
Once primed, your top coat choice matters just as much. Professional-grade cabinet paints cost significantly more than standard emulsions, but the investment is genuinely worth it. They require fewer coats, contain harder-wearing resins, and provide longer-lasting results than their budget counterparts. A tin of professional cabinet paint that covers two coats is better value than three tins of standard paint that chips after six months.
Paint finish recommendations
Satin finish (40-50% sheen): The most popular choice for kitchen cupboards. Wipeable, grease-resistant, and forgiving on minor surface imperfections.
Eggshell finish (20-30% sheen): Slightly less durable than satin but gives a more subtle, contemporary look. Works well on cottage or Shaker-style kitchens.
Gloss finish: Hard-wearing but unforgiving. Every brush mark and dust particle shows. Best achieved via spray gun rather than roller.
Pro Tip: Always buy your primer and top coat from the same manufacturer when possible. Formulas are designed to work together, which improves adhesion and reduces the risk of incompatibility between layers. Check the kitchen painting tips recommended by professionals before committing to a brand.
Applying paint: techniques for a smooth, long-lasting finish
Application is the stage that most visibly separates a professional finish from a DIY one. The secret is not a single trick. It is a combination of the right tools, thin coats, and disciplined patience between layers.
Application steps for a factory-like finish
Apply a full, even coat of primer to all prepared surfaces.
Allow primer to dry fully, typically four to six hours.
Lightly sand the primed surface with 320-grit sandpaper.
Wipe away all dust with a tack cloth before painting.
Apply the first thin coat of top coat paint.
Allow to dry overnight before applying the second coat.
Sand lightly again with 320-grit paper between coats.
Apply a second thin coat and repeat drying process.
Apply a third coat if needed, particularly on darker colours.
Applying 2-3 thin coats with overnight drying between each and a light sand in between is the method professional painters rely on for a smooth, even result.
Tool selection
Fine-finish foam roller: Best for flat door panels. Leaves minimal texture.
2-inch angled brush: Essential for edges, mouldings, and recessed areas.
Airless spray gun: The professional’s choice for a factory-smooth finish with zero brush marks. Requires more setup and masking but delivers outstanding results.
Thin coats prevent drips and allow for proper adhesion between layers. Heavy coats feel faster in the moment but invariably cause problems: runs, slow curing, and a finish that bubbles or wrinkles.
Pro Tip: If you are using a roller, do a final light pass in one direction only while the paint is still wet. This eliminates roller stipple and gives a smoother result without switching to a brush.
“Full curing of kitchen cabinet paint takes up to four weeks. The surface may feel dry to touch within hours, but the paint continues to harden for weeks. Treat newly painted cupboards gently throughout this period.”
These kitchen painting techniques are what separate a result that looks good on day one from one that still looks good in year five.
Avoiding common mistakes and troubleshooting
Even with the best intentions, certain errors come up again and again in DIY kitchen cupboard projects. Understanding them before you start means you will not be searching for solutions halfway through.
Not removing doors or hardware leads to drips on vertical surfaces, incomplete coverage around hinges, and paint bridging the gap between door and frame. Skipping degreasing causes peeling. Using the wrong primer on laminate or vinyl-wrapped doors causes the paint to lift within weeks.
Common mistakes and how to fix them
Mistake | Consequence | Solution |
Skipping degreasing | Paint peels within weeks | Use sugar soap or dedicated degreaser before sanding |
Wrong primer on laminate | Adhesion failure, chipping | Switch to shellac-based primer |
Applying thick coats | Drips, slow curing, wrinkling | Apply multiple thin coats only |
Not sanding between coats | Rough, uneven finish | Use 320-grit between every coat |
Rushing drying times | Lumpy or peeling surface | Allow overnight drying minimum |
Painting doors in situ | Missed edges, drips | Remove and paint doors flat |
Gloss or vinyl-wrapped cabinets present a particular challenge. The slick surface makes adhesion genuinely difficult, and even with the correct primer, results can be inconsistent without professional equipment. In some cases, replacing the doors entirely is a better financial decision than repeatedly attempting to repaint a surface that resists paint.
Pro Tip: After applying each coat, check the surface under a bright side-light held at a low angle. This reveals any brush marks, roller stipple, or runs before they dry and become a problem to fix.
The benefits of bringing in professional painters become clearest when dealing with problematic surfaces or complex kitchens. The full professional painting guide explains what separates a trade-standard result from a typical DIY attempt.
Expecting professional results: durability and maintenance of painted cupboards
Once your cupboards are painted, understanding the curing process and how to care for them properly is what keeps them looking fresh for years rather than months.
Professional-grade paints last longer, resist grease and heat more effectively, and clean up better than standard emulsions. Satin finishes specifically are favoured in UK kitchens because they can be wiped clean without scrubbing the paint off. That balance of durability and practicality is hard to replicate with a standard wall paint.
Maintenance guidelines for painted kitchen cupboards
Wipe surfaces with a soft, damp cloth for routine cleaning.
Avoid abrasive cloths, scouring pads, or harsh chemical cleaners.
Do not leave steam from boiling pans directed at cupboard surfaces.
Keep doors and drawers from slamming during the curing period.
Avoid frying directly beneath cupboards without adequate ventilation.
Touch up any chips promptly to prevent moisture penetrating the substrate.
Painted cupboards need around four weeks to reach full hardness. During this window they are vulnerable to chips, dents, and marking. Planning your project to coincide with a period of lighter kitchen use makes a real difference.
Pro Tip: Keep a small amount of your top coat paint in a sealed jar labelled with the room and date. You will thank yourself in 18 months when you need to touch up a chip and cannot remember which shade you used.
The benefits of working with professional painters are particularly visible at this stage. Professionals control the environment, the temperature, and the drying conditions in ways that simply are not possible for most homeowners working around family life.
“A satin finish strikes the ideal balance for UK kitchens: it is washable enough for daily grime, hard-wearing enough for cabinet door use, and forgiving enough to look good over time.”
Why professional painting often outperforms DIY for kitchen cupboards
Here is something worth saying plainly: not all kitchen cupboard painting projects are suitable DIY jobs. That is not a criticism of homeowners who want to take on the work. It is an honest assessment of what the job actually demands.
Professional painters use industrial-grade materials and equipment that are not widely available to the public. Spray booths, airless sprayers calibrated to specific paint viscosities, and professional primers applied at controlled temperatures produce a finish that hand-painted results rarely match in terms of factory-level durability. The gap between a brushed DIY finish and a professionally sprayed one is significant, and it becomes more obvious over time.
The most common DIY failures we see are not caused by carelessness. They come from dust contamination during painting, brush marks that cured into the finish, insufficient drying time between coats, and the use of standard emulsion instead of a dedicated cabinet paint. These are easy mistakes to make when you are working in a live kitchen under time pressure with children and meals to manage.
Industrial-grade paints and techniques ensure chip resistance and long-lasting beauty, and when you factor in the cost of repeated DIY attempts, the overall spend often sits lower than expected. A kitchen that was repainted three times in five years costs more in materials and time than a single professional job that holds for a decade.
This is especially true for gloss or vinyl-wrapped doors. The adhesion challenges on these surfaces mean even experienced DIYers frequently get poor results. Replacing those doors, or having them professionally sprayed in a controlled environment, is often the smarter investment. The benefits of professional painters extend well beyond the immediate finish; they include the lasting value added to your home. A professionally painted kitchen genuinely boosts your home’s value and appeal in a way that a patchy DIY effort simply does not.
Pro Tip: Before committing to a full DIY repaint, test one door completely through the process. If the result does not meet your expectations after proper prep, primer, and two coats, that is your signal to bring in a professional before spending time and money on the whole kitchen.
Let a professional transform your kitchen cupboards with expert painting services
If reading through this guide has made you realise just how much work goes into a truly professional result, you are not alone. Many South West homeowners start the process and quickly discover that the prep alone takes a full weekend before a drop of paint has been applied.

At A Brush With Gus, Gus and Rhys handle every stage for you: full degreasing and preparation, shellac or water-based priming matched to your cupboard material, professional application using airless spraying for a flawless finish, and careful reassembly once fully cured. Our domestic painting services cover kitchen cupboards across the South West, and our professional spraying services deliver the factory-smooth finish that rollers and brushes simply cannot replicate. We also offer professional cleaning services to get your kitchen surfaces ready before painting begins. Get in touch for a free consultation and find out what your kitchen could look like.
Frequently asked questions
What type of primer should I use for laminate kitchen cupboards?
Use a shellac-based primer for laminate kitchen cupboards, as it bonds aggressively to smooth, slick surfaces where water-based products fail to grip, giving you a durable foundation for your top coat.
How long does it take for painted kitchen cupboards to fully cure?
Painted kitchen cupboards take around four weeks to fully cure and reach maximum hardness, even though the surface will feel dry to the touch much sooner.
Can I paint gloss kitchen cabinets myself?
It is possible, but adhesion on gloss surfaces is genuinely difficult, and results are inconsistent without professional sanding, specialist primers, and controlled drying conditions. In many cases, replacing the doors delivers better long-term value.
What paint finish is best for kitchen cupboards in the UK?
Satin finish is recommended for UK kitchen cupboards because it is wipeable, resists grease and steam, and sits at a sheen level that hides minor surface imperfections while still looking clean and contemporary.
Recommended
Comments