
How to protect kitchen fixtures during painting
TL;DR:
Proper fixture protection during kitchen painting involves thorough masking and using the right materials to prevent damage. Preparation typically takes 40 to 60 percent of the project time and is crucial for a lasting, professional finish. Specific techniques for fixtures like switches, taps, and recessed lights ensure clean results and save time in the long run.
Protecting kitchen fixtures during painting is the difference between a professional finish and a costly repair job. Fixtures including taps, sinks, light fittings, switches, handles, and built-in appliances are all vulnerable to paint splatter, overspray, and accidental brush contact. Preparation covers 40–60% of project time, and skipping it causes early paint failures within one to three years. The industry term for this process is “masking,” and when done correctly, it protects every surface you are not meant to paint while giving you clean, sharp edges on the surfaces you are.
How to protect kitchen fixtures during painting: what you need first
The right materials make fixture protection straightforward. Without them, even careful painters end up with paint on taps or smeared across a light switch.
Essential materials for masking kitchen fixtures:
Painter’s tape: Use 1.5–2 inch wide tape for clean edges on fixtures. Narrow tape tears and lifts; wide tape seals properly.
Plastic sheeting: Lightweight polythene sheeting covers large surfaces like worktops and appliances quickly.
Canvas drop cloths: Heavier than plastic, these stay in place on floors and absorb drips rather than letting them slide.
Masking film: Pre-taped masking film combines tape and plastic in one roll, ideal for covering cabinet fronts and large flat areas.
Rubber bungs: Rubber bungs insert into recessed downlights to block paint during spraying. They are removable once the job is done.
Plastic bags: Small food bags or nappy sacks cover light switches and sockets when secured with tape.
Ziplock bags: Used to store removed hardware safely during the project.
Cleaning materials: Sugar soap or a TSP substitute removes grease before masking begins.
The table below shows which materials suit which fixture type:
Fixture type | Recommended protection |
Taps and sinks | Plastic sheeting secured with painter’s tape |
Light switches and sockets | Plastic bags wrapped and taped in place |
Recessed spotlights | Rubber bungs inserted before spraying |
Cabinet handles | Painter’s tape wrapped around each handle |
Worktops and appliances | Canvas drop cloths or heavy polythene sheeting |
Cabinet fronts | Pre-taped masking film |
Buying quality tape is not optional. Cheap tape bleeds paint underneath and tears when you remove it, leaving adhesive residue on your fixtures.
How do you prepare your kitchen before painting?
Preparation is where most kitchen painting projects succeed or fail. Most kitchen painting failures happen because preparation is rushed, not because of the paint colour or brand chosen.
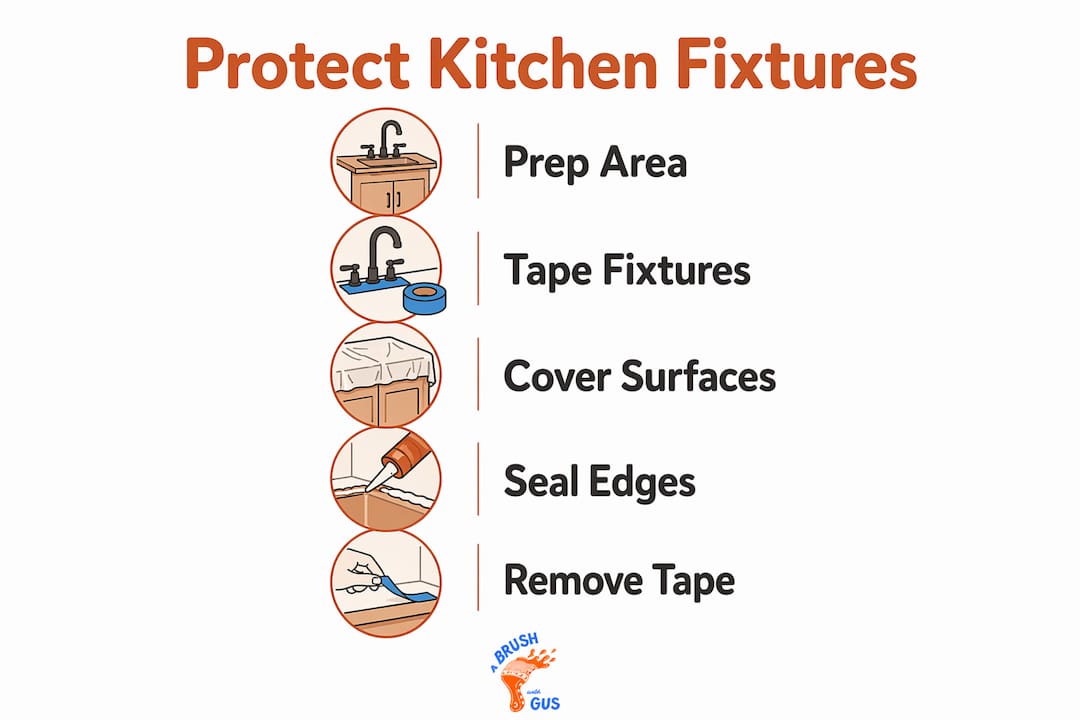
Follow these steps before you pick up a brush or roller:
Clear the room. Moving fragile items out of the room reduces accident risk significantly. Remove anything from worktops, shelves, and the floor that does not need to be there.
Remove detachable fixtures. Take off cabinet handles, knobs, and any light fittings you can safely disconnect. Label hardware and store it in ziplock bags taped to the corresponding door or drawer. This prevents loss and speeds up reassembly.
Clean every surface. Degrease with sugar soap or a TSP substitute. Kitchens accumulate cooking grease on walls, cabinets, and around fixtures. Paint will not adhere properly to a greasy surface, and tape will not seal against it either.
Sand cabinet surfaces if needed. Sand at 180–220 grit and allow 2–4 hours drying time before applying tape or paint. Sanding creates a key for paint to grip.
Mask fixed fixtures. Apply painter’s tape carefully around taps, sinks, switches, and any fixture you cannot remove. Press the tape edge down firmly with a putty knife or your thumbnail to prevent paint bleeding underneath.
Cover large surfaces. Lay canvas drop cloths on the floor and drape polythene sheeting over worktops and appliances. Secure sheeting with tape so it does not shift during painting.
Seal the work zone for spraying. If you are using a spray application, use a taped plastic zipper door to isolate the kitchen area. Spray paint travels as fine mist and will coat every unprotected surface in the room.
Pro Tip: Run your finger along every tape edge after applying it. Any gap, however small, will let paint bleed through. A firm press takes ten seconds and saves you twenty minutes of cleanup.
Protecting specific kitchen fixtures: a practical breakdown
Different fixtures need different approaches. A one-size-fits-all method leaves gaps in your protection.

Light fittings and recessed spotlights
Recessed spotlights are the most overlooked fixture in a kitchen paint job. Paint mist from a roller or sprayer enters the fitting through the gap around the bulb. Rubber bungs are the professional solution. Insert one into each downlight before you start, and remove them once the paint is dry. For pendant fittings, wrap the fitting in a plastic bag and secure it with tape at the ceiling rose.
Switches, sockets, and outlets
Remove the faceplates where possible. Unscrew the cover plate, fold the tape behind it, and replace it loosely so the plate sits slightly proud of the wall. This gives you a clean line to paint up to. Where removal is not practical, wrap a plastic bag over the fitting and tape it tightly at the edges.
Taps, sinks, and kitchen hardware
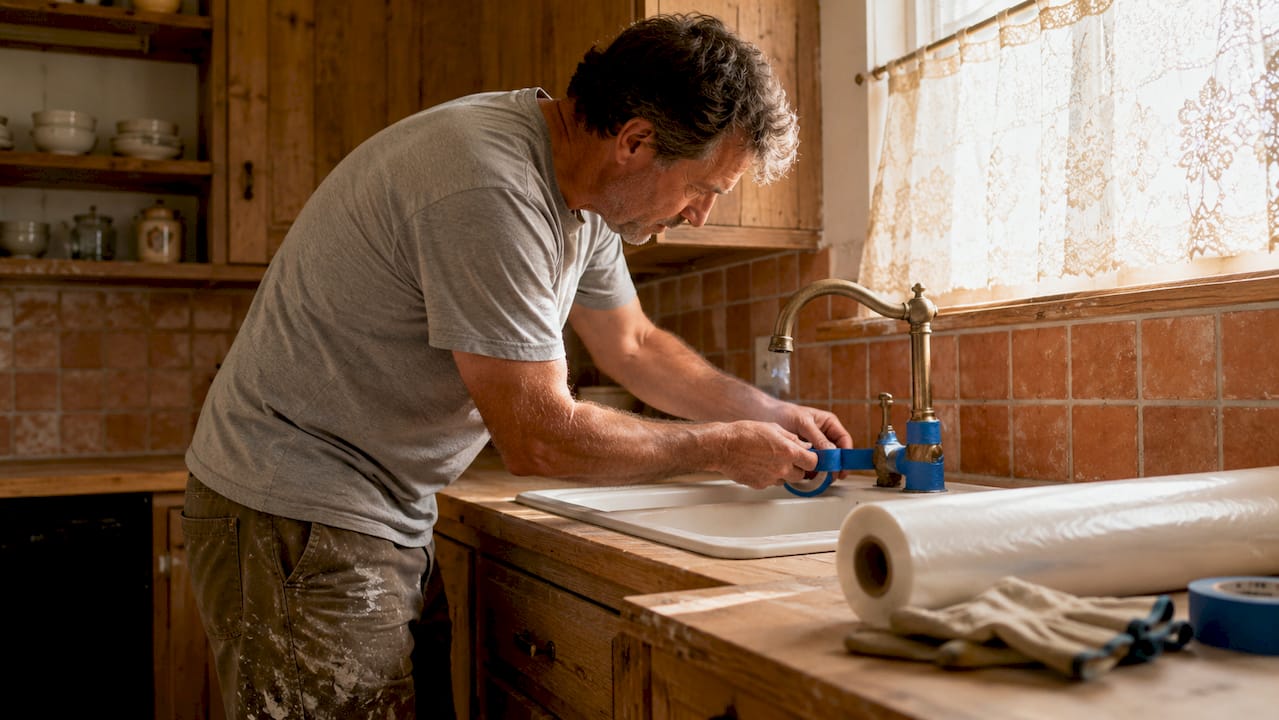
Taps and sink basins need full coverage. Wrap each tap individually with painter’s tape, then drape polythene sheeting over the entire sink area and tape it to the surrounding wall or worktop. For cabinet handles you have not removed, wrap tape around each handle and press it flat. This takes longer than draping a cloth, but it gives a cleaner result.
Worktops, appliances, and built-in fixtures
Worktops need a heavy canvas drop cloth rather than thin polythene. Polythene slides and bunches, and a dropped roller will push it aside. Canvas stays put. For built-in appliances like ovens and dishwashers, cover the entire front panel with masking film, pressing the tape edge firmly against the surrounding cabinetry. For protecting kitchen appliances and fixtures during spray applications, double-layer your coverage on anything within two metres of the spray path.
Pro Tip: For spray painting jobs, treat every surface as if it will be hit by overspray. Spray mist travels further than you expect, especially in enclosed kitchens with limited airflow.
What mistakes do homeowners make when masking fixtures?
The most common errors in fixture protection are predictable and avoidable. Knowing them before you start saves time and money.
Using low-quality tape. Budget painter’s tape lifts at the edges within hours, especially in warm kitchens. It also tears when you remove it, leaving sticky residue on fixtures. Spend more on tape and less on cleanup.
Skipping the cleaning step. Tape applied over a greasy or dusty surface will not seal. Paint bleeds underneath and leaves ragged edges on your fixtures. Always degrease before masking.
Rushing the masking process. Pressing tape down quickly without checking the seal is the single biggest cause of paint bleed. Take your time on every edge.
Removing tape too early or too late. Remove painter’s tape while the paint is still slightly wet, not after it has fully dried. Dried paint bonds the tape to the surface and tears the edge when you pull it off.
Reattaching hardware too soon. Paint takes up to 30 days to fully cure. Screwing handles back on before the paint has hardened leaves indentations and scuffs. Wait at least two weeks before reattaching hardware to painted surfaces.
Ignoring overspray zones. If you are using a sprayer, any surface not covered will receive a fine coat of paint mist. Cover the ceiling, adjacent walls, and all appliances before you begin.
If paint does land on a fixture, act quickly. Wet latex paint wipes off most surfaces with a damp cloth. Dried paint on chrome or glass responds well to a plastic scraper used at a shallow angle. Avoid metal scrapers on polished fixtures as they scratch.
Key takeaways
Protecting kitchen fixtures during painting requires thorough preparation, quality masking materials, and fixture-specific techniques applied before a single drop of paint is mixed.
Point | Details |
Preparation is non-negotiable | Prep covers 40–60% of project time and determines whether your paint job lasts years or months. |
Use the right tape | High-quality painter’s tape at 1.5–2 inches wide prevents paint bleed and lifts cleanly without damage. |
Remove what you can | Detach handles and hardware, label them, and store in ziplock bags taped to the correct door or drawer. |
Match protection to the fixture | Rubber bungs for spotlights, plastic bags for switches, canvas cloths for worktops. One method does not cover all. |
Wait before reattaching hardware | Paint takes up to 30 days to fully cure. Reattaching hardware too soon causes permanent surface damage. |
Preparation is everything: what I have learned from kitchen painting jobs
After years of painting kitchens across the South West, I can tell you with confidence that the paint colour is rarely what makes or breaks a job. The masking is.
Homeowners often spend hours choosing between shades and then spend twenty minutes on prep. That ratio is backwards. A beautiful colour applied over poorly masked fixtures looks amateur the moment you notice paint on the tap or a blurred edge around the light switch. The fixture damage is what the eye goes to first.
The lesson I keep coming back to is this: treat your fixtures as if they are irreplaceable, because replacing a chrome tap or a recessed fitting costs far more than a roll of quality tape. I have seen homeowners try to save time by draping a single cloth over everything and hoping for the best. It never works. Spray mist gets under cloths. Rollers flick paint sideways. Brushes catch edges.
The kitchen spraying checklist we use at Abrushwithgus covers every fixture category before we load the sprayer. That discipline is what separates a finish that looks professional from one that looks like a weekend project. If you are doing this yourself, build your own checklist and tick off every fixture before you open the paint tin. Patience at the start means pride at the end.
— Angus
Abrushwithgus kitchen painting services
Kitchen painting is one of the most detail-intensive jobs in any home. Fixtures are close together, surfaces are varied, and the room gets heavy daily use the moment the job is done.

Abrushwithgus provides domestic painting services across the South West, with full fixture masking and preparation included as standard. For kitchens requiring a factory-quality finish, the team also offers professional spraying services using airless spray equipment with complete fixture and surface protection built into every job. Get in touch with Gus and Rhys for a free quote and find out what a properly prepared kitchen paint job looks like.
FAQ
What is the best way to cover taps and sinks during painting?
Wrap each tap individually with painter’s tape, then drape polythene sheeting over the entire sink basin and secure it to the surrounding surface with tape. This prevents both direct brush contact and paint drips.
How do I stop paint getting into recessed spotlights?
Insert rubber bungs into each recessed downlight before you begin painting or spraying. They block paint mist from entering the fitting and are removed once the paint is dry.
When should I remove painter’s tape after painting?
Remove painter’s tape while the paint is still slightly wet. Waiting until the paint is fully dry causes it to bond with the tape edge, which tears the finish when you pull the tape off.
How long should I wait before reattaching cabinet handles?
Wait at least two weeks before reattaching hardware to freshly painted surfaces. Paint takes up to 30 days to fully cure, and screwing handles on too soon leaves permanent marks in the finish.
Do I need to protect fixtures differently when using a paint sprayer?
Yes. Spray applications produce fine mist that travels much further than brush or roller splatter. Use a taped plastic zipper door to seal the work zone, and cover every surface within the room, including the ceiling and adjacent walls, before you begin.
Recommended
Comments